

Building raised planter boxes is very easy, and usually more cost effective than purchasing them. Follow this easy DIY raised garden box tutorial for an easy design, step-by-step instructions and cost breakdown.
🪻My tutorial for building raised wooden planter boxes is easy and affordable. After you get the materials, you can make this DIY planter in about 15 minutes.
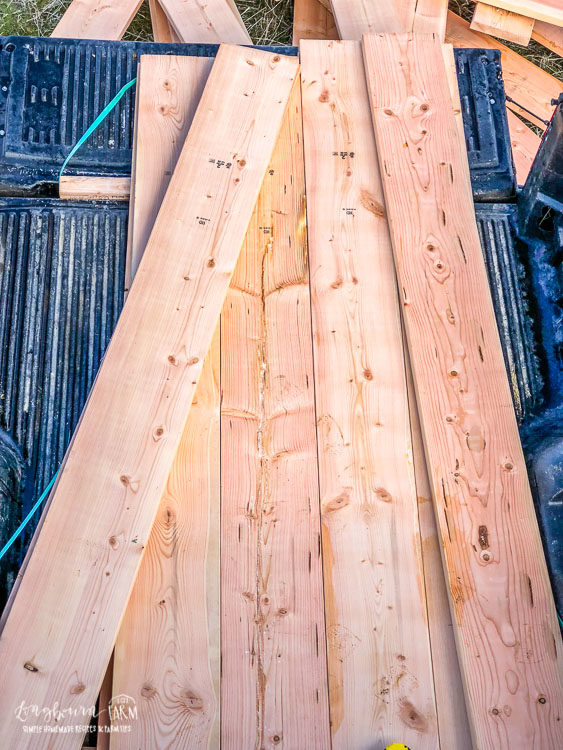
Wood selection
- Cedar - this is the most durable outdoors and also the most expensive.
- Douglas Fir - not as durable as cedar but more affordable. You can purchase food-safe weather-proof stain for garden boxes to help it last longer.
WANT TO SAVE THIS RECIPE?
Enter your email below and we'll send it straight to your inbox. Plus you’ll get great new recipes from us every week!
Size of Wood (6, 8, 10, or 12)
- 8 inches: this is the lowest I’d recommend going. This will give you good box depth for your soil and save you some money on lumber.
- 10 inches: This gives you a bit more height and can improve the look of the boxes in your space.
- 12 inches: This is similar to the 10 inch height in that it is great depth for growing and looks good. If you have remarkably poor soil, this is a good depth.
Length of Boards
- I prefer boxes that are 8 ft by 4 ft. This size is easy to work in. You can reach across the box easily and work the entire thing without having to get inside of it.
- I’ve also made 4 ft by 4 ft boxes and I like those as well. Any smaller and it’s not enough bang for your buck.
These DIY Raised Garden boxes do not have a bottom. I don’t usually recommend putting a bottom on garden boxes. You want your plants to be able to grow down into the ground below the box and establish deep root systems. This minimizes how much you have to water and maximizes your plants size and productivity.
What to Fill Boxes With:
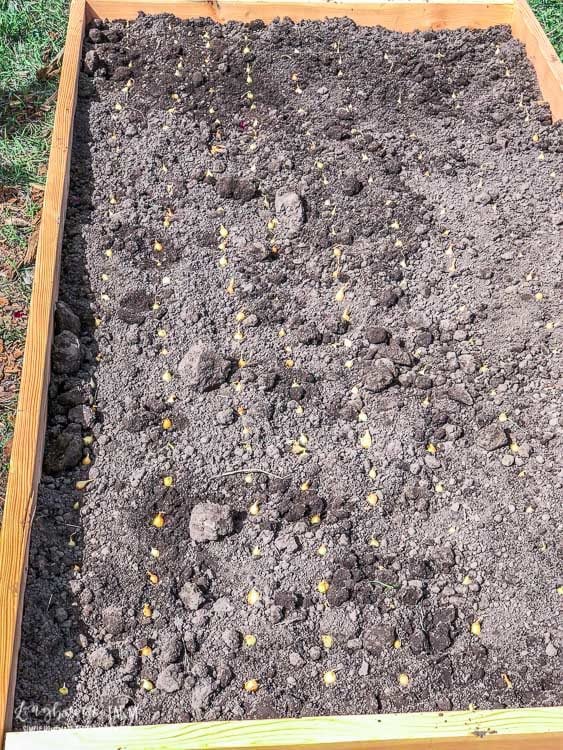
- You will want to fill your planter boxes with high-quality soil. This is usually called a sandy loam and can be purchased from a local gravel and soil company.
- After I’ve filled the boxes 2 inches from the top of the box with the soil, I mix in 2 inches of peat moss into the top 2 inches of the soil. This adds organic matter to the soil texture and ensures a good planting and growing bed.
- I also add about 1 gallon of pearlite to each 4ft by 8 ft. box. Pearlite is an inert substance found naturally that will help you soil stay light and avoid compaction. If you’ve ever purchased potting soil, it’s the white pieces you see in the mix.

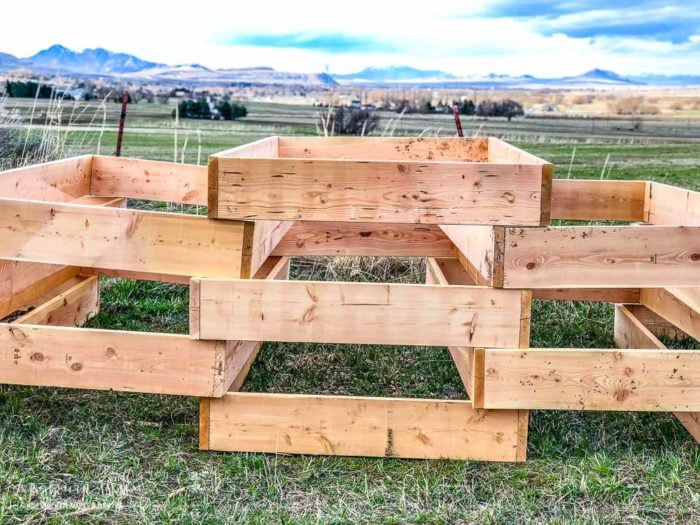
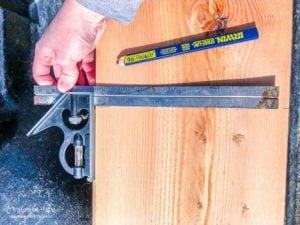
Since we build 20 boxes in all, I sorted out 40 pieces of wood for the straight edges and then cut 20 pieces of wood in half. It's much easier to assemble the boxes if you make a straight cut. Here is how to get a good, straight measurement.
Measure 4 feet from one end of the board and make a mark close to one edge.
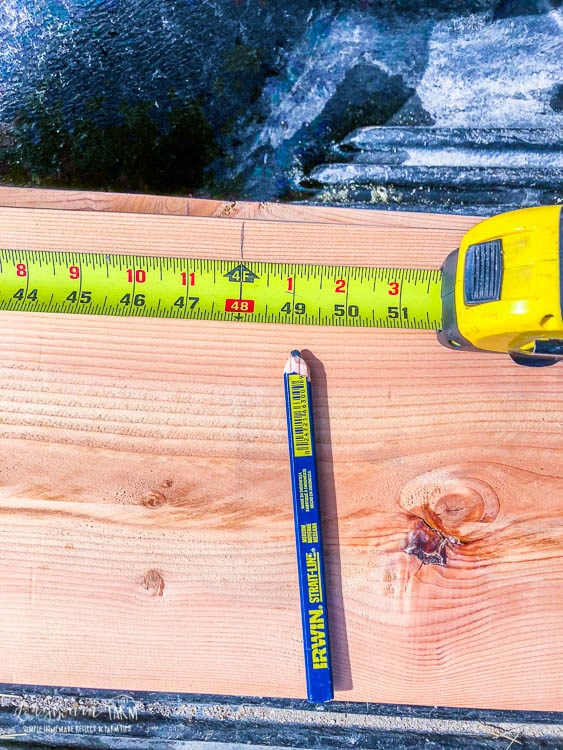
Do the same thing on the opposite edge of the wood so that you have two tick marks both at 4 feet.
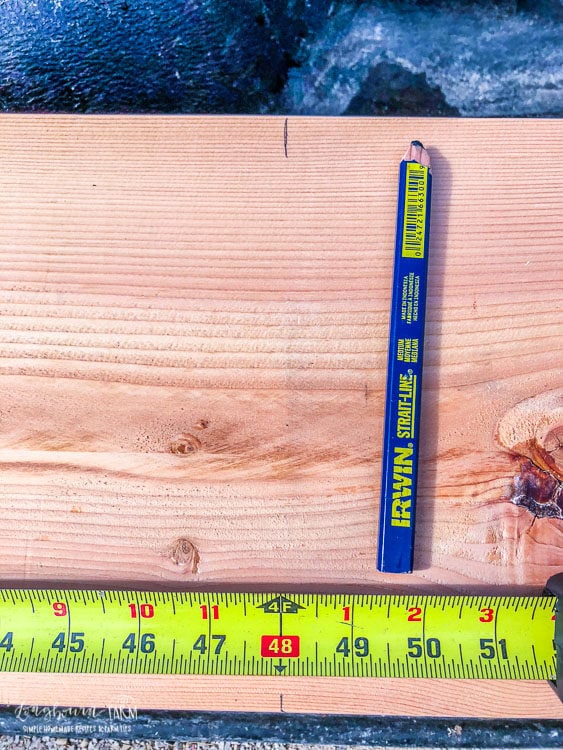
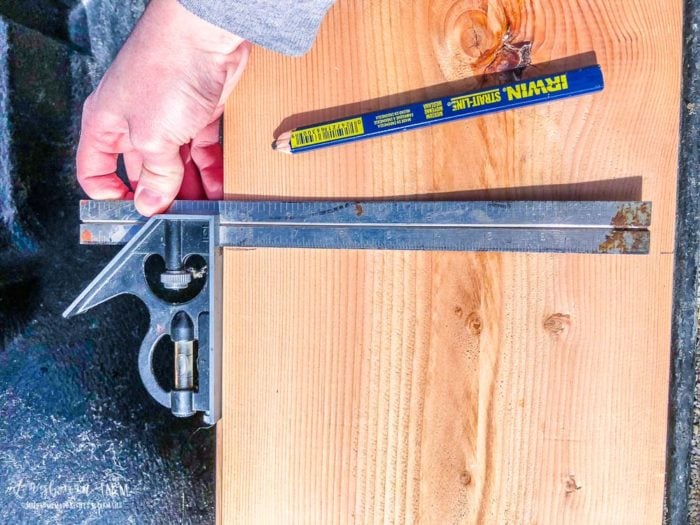
Use a straight edge to connect both the tick marks. This makes sure your line across is nice and straight. But just because you have a straight line doesn't mean your cut will be straight....ask me how I know. Ha! I'm not the best with the saw, but the great thing about this design is it's very forgiving and even with my bad cutting skills the boxes went together easily.
How To Build Raised Planter Boxes
- Measure a level line halfway across one of the boards so that you are dividing it into two 4 foot pieces.
- Using a skill saw, carefully cut along your level line.
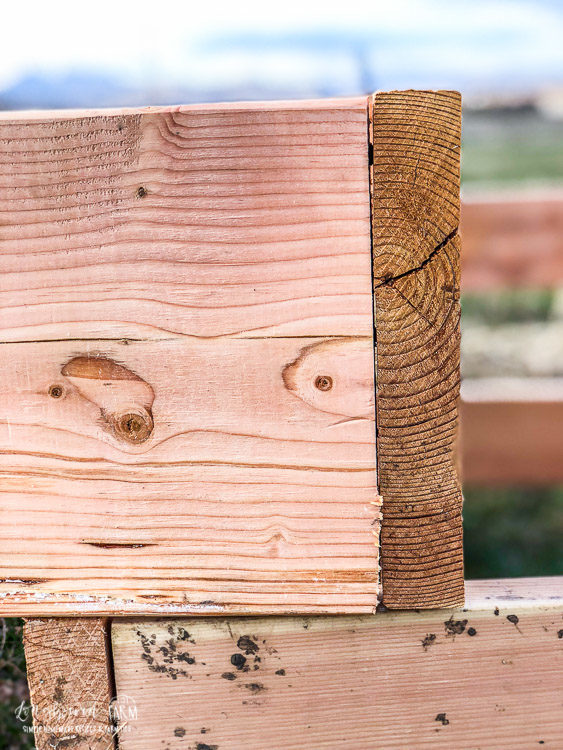
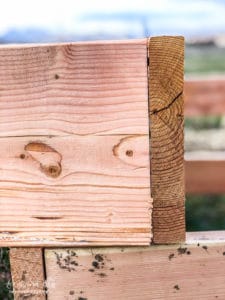
- Place the edge of a 4-foot piece of the board even on the edge of an 8-foot board. It doesn't matter if the 4-foot board or the 8-foot board is on the outside. Just keep it the same on both ends so your box is evenly wide all the way down.
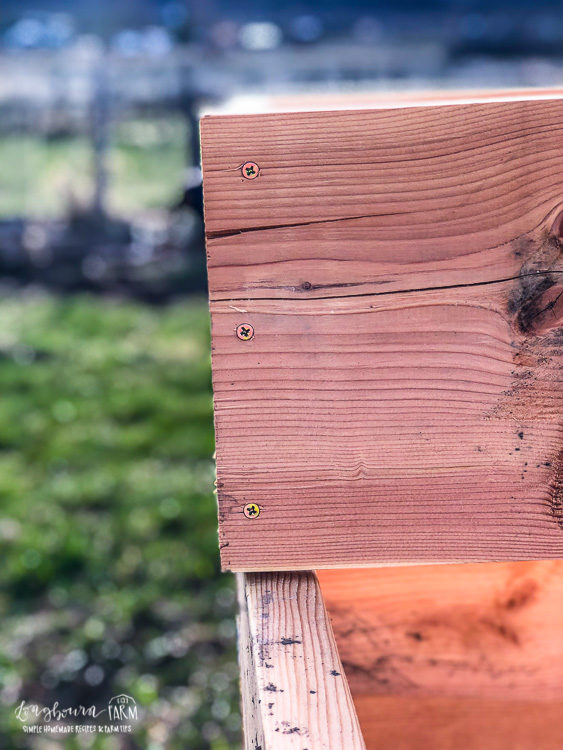
- Drill pilot holes slightly smaller than your screws into the boards while you are holding them together. It is easiest if someone helps you with this. There should be 3 pilot holes evenly spaced along the edge of the board.
- Once the pilot holes are drilled, screw the ends together using the pilot holes. We joined the edges of the boxes together very simply, with just three screws on each side. We used 3 ½ inch screws so that the joint was strong enough.
- Repeat this until all the edges are screwed together.
Since I am building this new garden area for my CSA, I wasn't sure how many garden boxes I would need total until I closed share sales. As I mentioned before, we ended building 20 raised planter boxes, using 2 apple bins for potatoes, and building a strawberry planter {tutorial on that coming soon!}. I'll definitely be updating this post at the end of the season with more pictures of things actually growing in the garden boxes. We stacked the raised planters until I decided where I wanted everything to go, it was quite the stack!
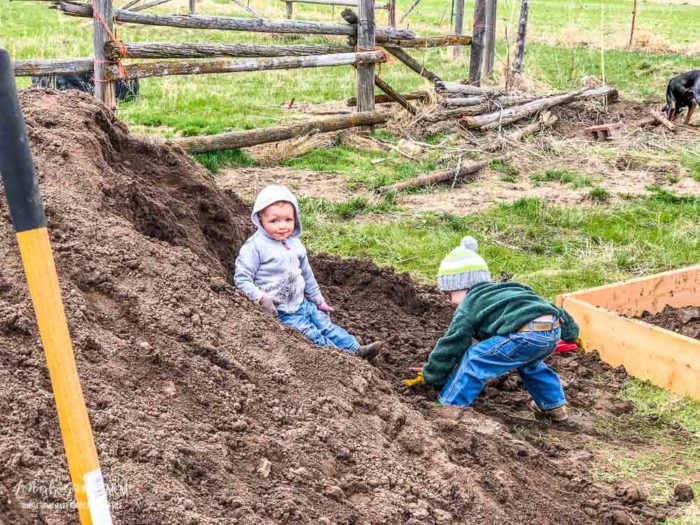
The other essential part of building raised planter boxes is filling them! You cannot just put any old dirt in your garden boxes and expect your plants to thrive. We actually have great soil here, but on our property, the rocks are so bad I can't grow and pull carrots or any root vegetable successfully. And, since our property was unmanaged for more than 10 years, the weed-seed load is outrageous. I'm hoping to be able to minimize the weed seeds and manage weeds better by using these raised planter boxes.
I purchased a very high-quality sandy loam topsoil for the boxes and then added peat moss and pearlite {helps with soil compaction} to the top inch or so of each box. Later I will add more composted material, but since I moved our entire garden area I didn't have a composting situation set up yet.
Here is a cost breakdown for making and filling 20 raised planter boxes {I'm in Utah, pricing will vary depending on your area}:
- Wood: Each plank was $12, I used 60 planks to build 20 boxes so the total cost for wood {after tax} was $780.
- Screws: I bought a contractor pack that was 5 pounds for $24.
- High-Quality Soil: I had 14 yards {1 giant dump truck load} delivered and it was enough for all 20 boxes and cost $380 after tax.
- We already had a skill saw, the drill, bits, and a truck to transport that much wood easily.
- Total cost to build 20 raised planter boxes: $1,184.
- If you wanted to calculate one box, it would be roughly $60 a box which is still much cheaper than purchasing a box, remember that total price included filling the boxes with dirt.
Now, is it in everyone's best interest to build 20 raised planter boxes? Nope, probably not. If you have workable soil that you can manage it will be less expensive to just garden in the ground. But as I said before, I wanted the extra control of gardening in boxes and I like the way it looks. It's also much easier for me to manage verticle growing, which makes the expanded space gardening in raised planters takes up worth it.
It's going to be a great gardening season! I can't wait to show you more updated pictures as the season progresses.
Looking for more gardening posts?
WANT TO SAVE THIS RECIPE?
Enter your email below and we will send it straight to your inbox. Plus you will get great new recipes from us every week!

DIY Raised Planter Boxes
Ingredients
- 3 8 ft boards (cedar or douglas fir)
- 12 3 in wood screws
Instructions
- Measure a level line halfway across one of the boards so that you are dividing it into two 4 foot pieces.
- Using a skill saw, carefully cut along your level line.

- Place the edge of a 4-foot piece of the board even on the edge of an 8-foot board. It doesn't matter if the 4-foot board or the 8-foot board is on the outside. Just keep it the same on both ends so your box is evenly wide all the way down.

- Drill pilot holes slightly smaller than your screws into the boards while you are holding them together. It is easiest if someone helps you with this. There should be 3 pilot holes evenly spaced along the edge of the board.
- Once the pilot holes are drilled, screw the ends together using the pilot holes.
- Repeat this until all the edges are screwed together.


Gregory W Slayton
Alli,
A tangent to your raised garden beds would be a discussion of a hugelkultur.
I have enough trimmed limbs and slab wood from cutting my own lumber that I will be building one or more this summer and adding a top to extend my growing season here in Northeast Arkansas.
Alli
Interesting! I've not heard of that before but just looked it up. I'd love to hear how your experiment goes.