
Planting large planters can feel intimidating. You want them to be big and beautiful and make an impact. Picking the right flowers is actually really easy!
WANT TO SAVE THIS RECIPE?
Enter your email below and we'll send it straight to your inbox. Plus you’ll get great new recipes from us every week!
One of my favorite things about my home growing up was all the beautiful planters my mom always had everywhere. I loved the beauty they instantly added to any outdoor space.
I've planted a lot of terrible planters over the years, but I think some of my mom's talent has rubbed off on me because now I have it down to a science!
When you're planting your planter, you want to think of it as a pie. You want there to be a central focal point in the pie, symmetry in the pie, two pieces of excitement, and then fillers if you need them.
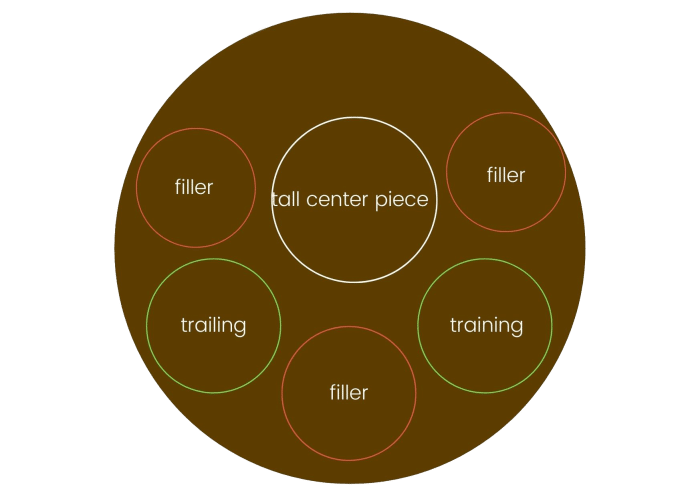
I like to plant a tall focal plant - usually some kind of spiky grass. If the planter will be seen from all sides, I put this in the middle and work my other plants in evenly around it.
If it will only be seen from the front and maybe a few angles, I center it towards the back and work my other plants in a half-moon shape around it.
In a large planter, you want a large grass. Not one with 2-3 spikes but one with 5-8 spikes at least or one that is bushier while also being tall.
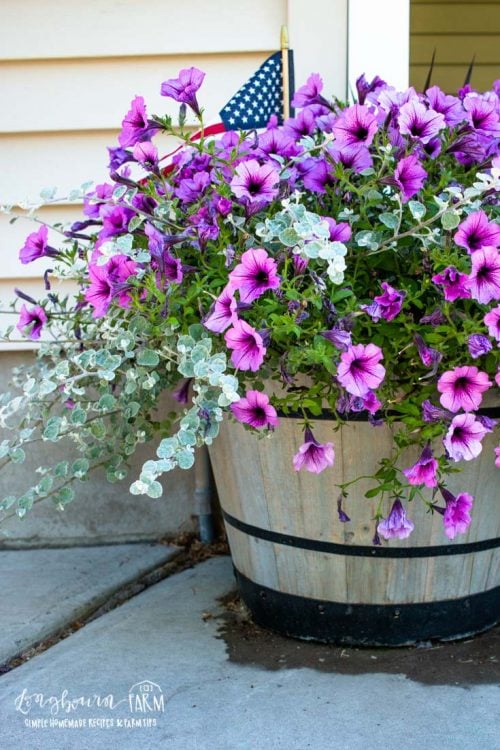
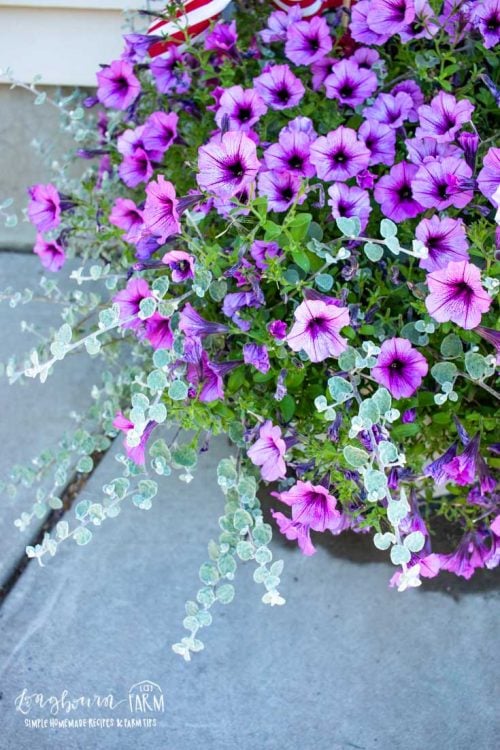
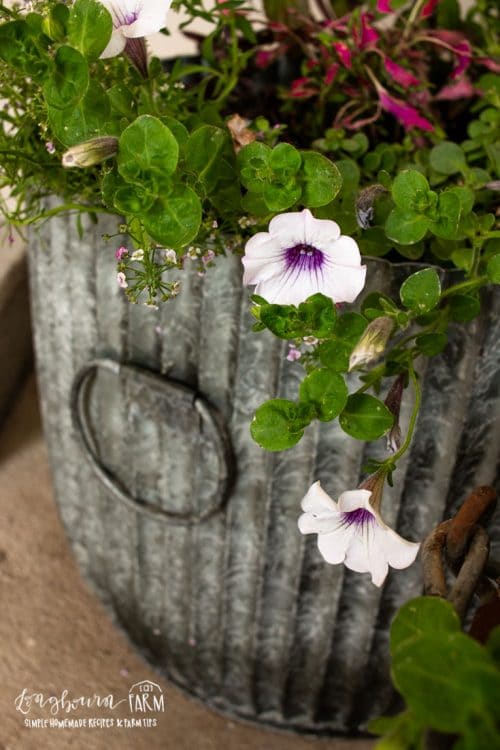
Once you have your center plant in, add in the symmetry plants. I love using supertunias as my symmetry plants because they always perform so well. In these large planters I only used 4, two on each side and they are filling in beautifully.
Looking for more in-depth chicken-keeping information? Take my course, Gardening 101!
My exclusive Gardening 101 course guides you through each step, from starting seeds to harvest. This course will teach you everything you’ll need to know about planning and growing your own garden.
The other two sections of your "planter pie" are the excitement pieces. I usually make these trailing plants of different varieties but you don't have too.
I do recommend using at least one trailing plant. This draws your eye down while the tall grass draws it up, really accenting the large planter they are in.
In these planters, the trailer I used was a sweet potato vine and the other trailing plant was a licorice vine. The licorice vine is a trailer but it grows more vertically than other trailers. The color and texture also add a pop that really offsets the other plants nicely.
Since my planter is extra large, I added some fillers. I like to use fillers that are going to be a medium height compared to everything else in the pot.
Since the grass is tall (or will be, everything is tiny at first) and the supertunia's are short, I chose geraniums as the fillers. They are a good middle height and grow in all directions which is what you want a filler to do.
When choosing colors for your planters, think in color families or even get out a color wheel for reference. I used purple as my main shade and then played off of the different purples in my centerpiece grass and my symmetry pieces, the supertunias.
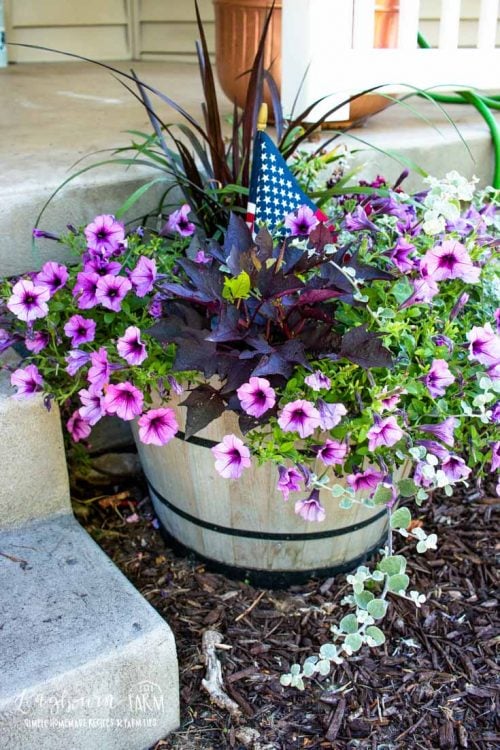
I used a red-pink geranium to complement the red-purple of the grass. I used the licorice vine to bring out the pale purple in the center of the supertunias.
I love the purple sweet potato vine because the new growth is lime green, which is across from purple in the color wheel and therefore a complimentary color.
I hope that all helps you pick what colors you want in your planter! At the end of the day, if you love it, that is all that matters.
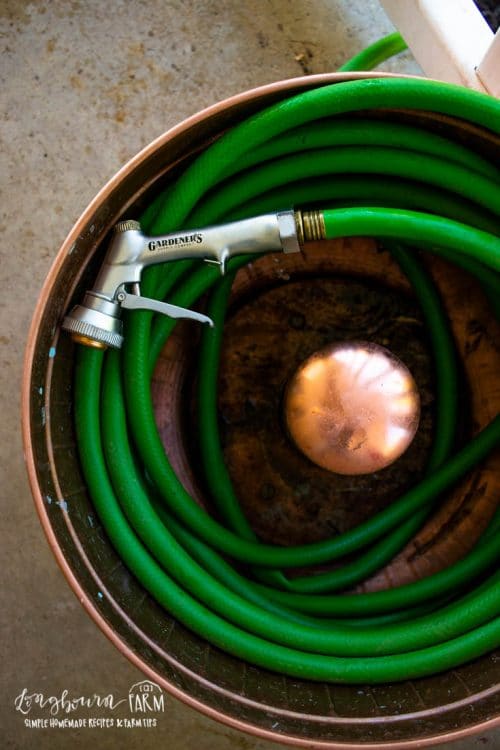
To make these planters completely hands-off, I also ran drip irrigation through them. This also allows your planters to grow amazingly well since they thrive on a regular watering schedule.
Supplies for Drip Tubing in Planters
- VegTrug™ Barrel Planter
- Galvanized Ribbed Barrel Planters
- ¼-inch Micro Tubing Drip Line
- Drip Emitters - I used .5 GPH which is recommended for annuals.
- ¼-inch Barbed Connection T's
- ¼-inch Barbed Connection Elbows
- ¼-inch Straight Barbed Connectors
- ¼-inch Coaxial Staples
- ¼-inch to ¾-inch Hose Adapter
- ¼-inch tubing stakes
- 25 PSI Pressure Reducer
- Brass ¾ inch hose adapter to connect the pressure reducer to the hose or spigot.
- Orbit Single Port Dial Timer so that you can make this a totally hands-free system!
How to Run Drip Irrigation to Planters
- Run the ¼ inch micro tubing drip line up through a drainage hole in the bottom of the planter.
- Once the drip line is up through the drainage hole, fill the planter with soil if it wasn't full already.
- Add drip emitters (I used .5 GPH) every 3-4 inches throughout the planter. I like the drip emitters better than the spray emitters for a few reasons. They keep the water near the soil which reduces evaporation. They also won't get hard water stains on the foliage of your plants.
- You will add the drip emitters by attaching more dripline with T's, elbows, and straight connectors.
- Once the emitters have been run along the top of the soil in the planter, connect the end of the drip line that is coming out of the bottom of the planter to your main line. Make sure the tubing isn't kinked anywhere.
- We ran ours along the edge of our house down to the spigot we were using. To keep it in place, we used these coaxial staples.
- Test the drip line to make sure it is working once it is all hooked up. You will need a pressure reducer, ¼-inch to ¾-inch hose adapter, and ¼-inch tubing stakes to keep the micro tubing in place anywhere it is in the soil.
Looking for more in-depth chicken-keeping information? Take my course, Gardening 101!
My exclusive Gardening 101 course guides you through each step, from starting seeds to harvest. This course will teach you everything you’ll need to know about planning and growing your own garden.


Leave a Reply