
Hummingbird Feeder Tips can make the difference between an empty feeder and a backyard full of amazing birds. Proper setup will turn your space into a hummingbird hotspot that brings daily entertainment.

WANT TO SAVE THIS RECIPE?
Enter your email below and we'll send it straight to your inbox. Plus you’ll get great new recipes from us every week!
Jump to:
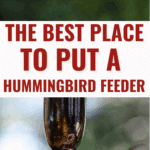
Best Place To Put A Hummingbird Feeder
Location is everything when it comes to hummingbird feeders. The ideal spot is somewhere visible but partially shaded, like hanging from a deck railing or under an awning, where afternoon sun won't spoil the nectar.
Place it near red flowers or bright colors to catch their attention, and make sure it's at least 10 feet from windows to prevent crashes.
Keep convenience and safety in mind for both you and the birds. Position the feeder where you can easily reach it for weekly cleaning, but high enough that cats can't jump up to it.
Give the birds plenty of flying space around the feeder since they like to hover while eating, and avoid windy areas where the feeder might swing around or spill.
Hanging a Hummingbird Feeder

Here is how to hang a hummingbird feeder:
Step 1: Select a sturdy hook, bracket, or branch that can support the feeder's weight when full. Popular spots include deck railings, shepherd's hooks, or tree branches about 5-6 feet high.
Step 2: Screw in a heavy-duty hook or clamp on a bracket if using railings. For trees, choose a branch that won't sway too much in the wind. Make sure whatever you use can handle at least 2-3 pounds.
Step 3: Fill your clean feeder with fresh nectar, then securely attach it to your hanging point. Double-check that all connections are tight and the feeder hangs level to prevent leaking.
Step 4: Gently shake the feeder to make sure it's stable and won't fall. Check that birds can fly around it from all sides and that you can easily reach it for refills and cleaning.
How To Clean a Hummingbird Feeder
Clean your hummingbird feeder at least once a week, or more often in hot weather when nectar spoils faster.
Empty all the old nectar and rinse the feeder with hot water.
Use a bottle brush or feeder brush to scrub away any sticky residue, paying special attention to the feeding ports where mold can grow. For stubborn buildup, soak the feeder in a solution of one part white vinegar to four parts water for an hour.
Rinse everything thoroughly with clean water before refilling to remove any soap or vinegar taste.
Make sure all parts are completely dry before adding fresh nectar, as leftover moisture can cause the new food to spoil quickly.
If you notice any black mold or the feeder smells sour, clean it immediately and consider replacing it if the mold won't come off completely.
Hummingbird Feeder Parts
These are the general parts for most hummingbird feeders. Knowing this information will help you better equip your feathered friends with exactly what they need!
- Reservoir/Nectar Container: The main body that holds the sugar water, usually made of glass or clear plastic so you can see the nectar level.
- Base/Feeding Station: The bottom piece with small holes or ports where hummingbirds insert their beaks to drink the nectar.
- Feeding Ports: Tiny openings in the base, often surrounded by red plastic flowers or decorative pieces to attract birds.
- Cap/Lid: The top piece that seals the reservoir and prevents nectar from spilling out when the feeder is flipped upside down.
- Hanging Hardware: Wire, chain, or built-in loop that allows you to suspend the feeder from hooks or branches.
- Gasket/Seal: Rubber or plastic ring that creates a tight seal between the reservoir and base to prevent leaks.
- Perches (Optional): Small rods or ledges near feeding ports, though hummingbirds prefer to hover and don't really need them.
- Ant Guard/Bee Guard (Optional): Built-in or attachable accessories that keep insects away from the nectar without harming the birds.
When To Put Out Hummingbird Feeders
Timing depends on your location, but generally put feeders out 1-2 weeks before hummingbirds typically arrive in your area.
In southern states, this might be as early as March, while northern regions should wait until late April or early May.
The key is having food ready when the first scouts arrive from migration, as they'll remember reliable food sources and return with others.
Keep feeders up until 2-3 weeks after you see your last hummingbird of the season. Late migrants and stragglers depend on these food sources for their long journey south.
In most areas, this means keeping feeders active until mid to late October, though southern regions may need to maintain them longer.
Don't worry about feeders preventing migration - hummingbirds leave based on instinct and daylight changes, not food availability.

Hummingbird Feeder Tips
Below are various tips I've found that have helped me in my quest to bring more of these enjoyable birds to my yard.
- Choose the Right Location - Place your feeder where it's visible to birds but convenient for you to maintain. Look for a spot that gets morning sun but afternoon shade to prevent nectar from spoiling too quickly. Avoid areas near windows (to prevent collisions) or too close to busy walkways where people might accidentally bump the feeder.
- Maintain Proper Height and Safety - Hang your feeder 5-6 feet high to keep it safe from cats and other predators while still being accessible for cleaning. Make sure there's enough open space around it so hummingbirds can hover and fly freely while feeding, as they need room to maneuver their rapid wing movements.
- Keep It Clean and Fresh - Clean your feeder thoroughly every 3-5 days in hot weather or weekly in cooler temperatures. Use hot water and a bottle brush to scrub away sticky residue, and rinse completely before refilling. Old or moldy nectar can make birds sick, so never let it sit too long.
- Use the Right Nectar Recipe - Make nectar with a simple 1:4 ratio of white sugar to water. Do not use honey, brown sugar, or artificial sweeteners. Boil the water first to dissolve the sugar completely, then let it cool before filling the feeder. Skip the red food coloring, as it's unnecessary and potentially harmful.
- Time It Right - Put feeders out 1-2 weeks before hummingbirds typically arrive in your area (varies by region), and keep them up until 2-3 weeks after the last sighting. This ensures early arrivals find food and late migrants have fuel for their journey south.
- Add Visual Attractors - Position feeders near red flowers, hang red ribbons nearby, or choose feeders with bright red parts to catch hummingbirds' attention. These birds are naturally drawn to red and orange colors, which help them locate food sources from a distance.
- Provide Multiple Feeders - Set up 2-3 feeders spaced around your yard since hummingbirds can be territorial and may chase others away from "their" feeder. This gives more birds a chance to feed and reduces aggressive behavior, ultimately attracting more hummingbirds to your space.
Hummingbird Feeder Tips FAQS
Yes, but if your tap water is heavily chlorinated or tastes bad, use filtered or bottled water instead. The most important thing is keeping the nectar fresh and clean.
In most areas, leave feeders up until 2-3 weeks after your last hummingbird sighting. Late migrants depend on these food sources, and feeders won't prevent natural migration.
Be patient - it can take 2-4 weeks for birds to discover new feeders. Make sure your nectar is fresh, the feeder is clean, and it's positioned where birds can see it. Try adding red ribbons or placing it near red flowers.
Final Thoughts
With these simple hummingbird feeder tips, you are well on your way to creating a backyard paradise that these amazing birds will love to visit.
Remember that success comes from consistency - keep your nectar fresh, your feeders clean, and be patient as word spreads through the hummingbird community about your reliable food source.
Once you establish yourself as a trusted stop on their daily route, you will be rewarded with endless entertainment as these tiny aerial acrobats zip, hover, and dance around your outdoor space, bringing magic and wonder to your everyday life while helping your garden flourish through their natural pollination services.
More Favorites From Longbourn Farm


Did you find this info helpful? If so, please share it on Instagram, Facebook, or Pinterest!


Leave a Reply