
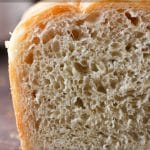
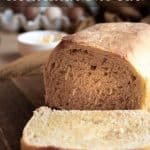
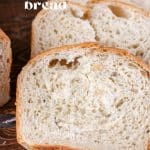
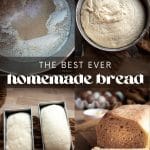

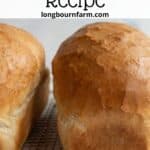
This is the best homemade bread recipe, seriously! The bread is soft and airy with a buttery crust. With only 5 ingredients and a few simple steps, you'll produce beautiful and tasty homemade bread every time you make it.

WANT TO SAVE THIS RECIPE?
Enter your email below and we'll send it straight to your inbox. Plus you’ll get great new recipes from us every week!
I've told you before that baking bread is my all-time favorite. I have tried and tested many, many bread recipes over the last couple of years trying to find one that I absolutely love. Finally, I just created this recipe because I could never find one I liked, ha! It's really the best homemade bread recipe. I promise!
I wanted the bread to have minimal ingredients, two proofing steps, yield 2 large loaves, and have a perfectly crispy crust. Tall order? Nah. Turns out that simple, as usual, is best. I should have started there in the first place!

Why You'll Love The Best Homemade Bread Recipe
- Basic Ingredients: Just a few ingredients that you can keep in the pantry, plus water, and you have everything you need for loaves of fresh bread anytime.
- Simple Steps: Don't be daunted by the idea of making homemade bread. I promise the steps are very simple and even beginning bread makers can succeed!
- Crazy Good: I bet you'll want to make this recipe every single week instead of buying store-bought bread — it's that good.
- Freezer Friendly: Homemade bread is an excellent make-ahead staple, and making a few loaves when you have time and storing them in the freezer is a great way to keep bread on hand.
🍞 When I have a few spare minutes on the weekend or after dinner, I will get a couple loaves of homemade bread baked up to have on hand for the week!
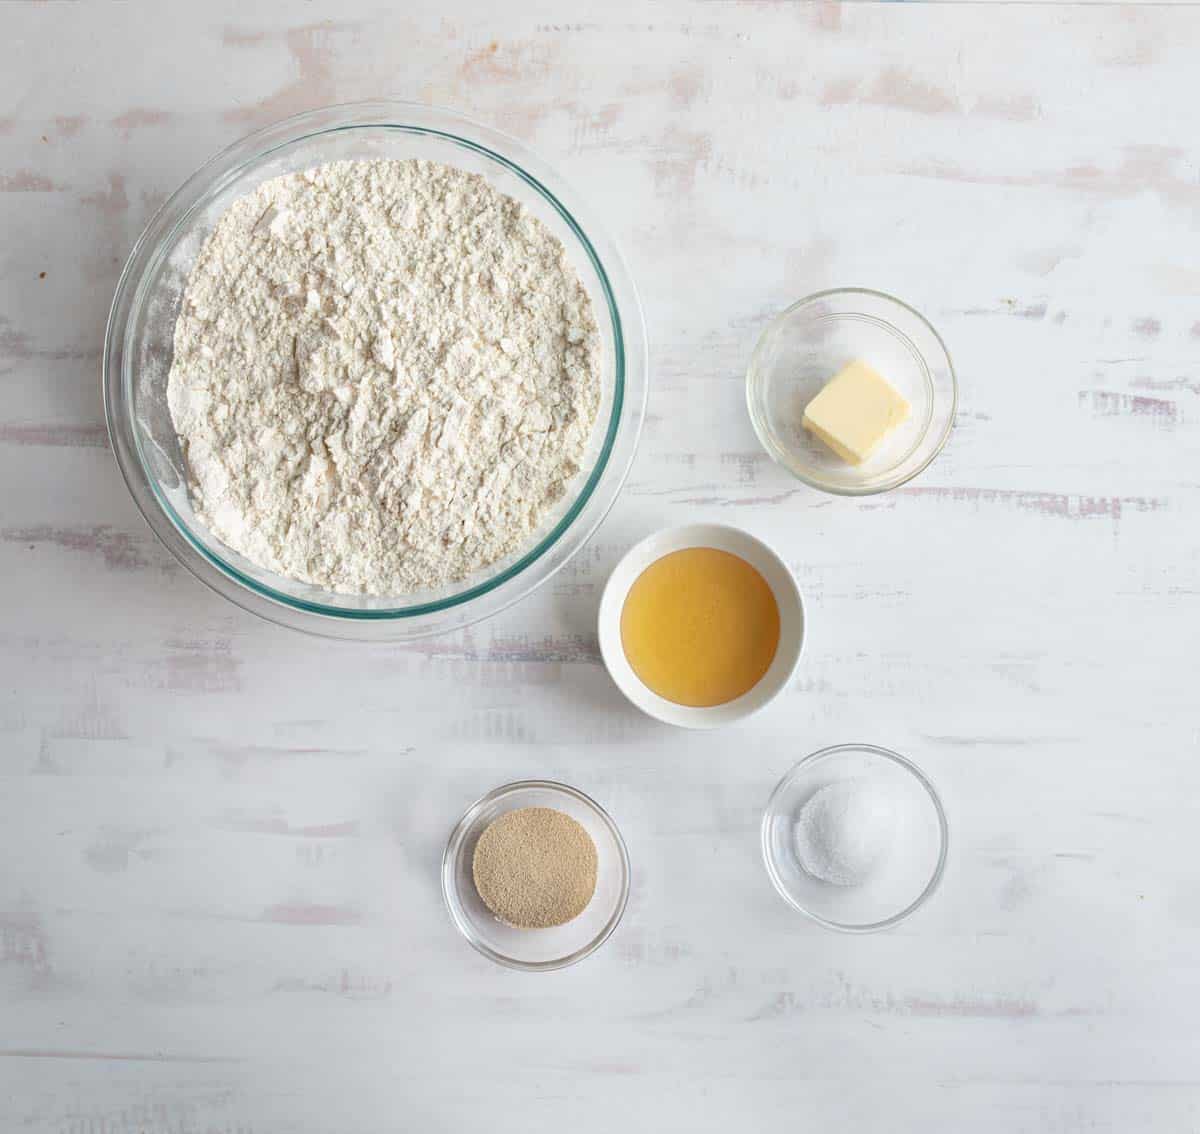
Recipe Ingredients
- All-purpose flour
- Salt
- Yeast
- Honey
- Water
- Butter
For the exact amounts needed, please see the recipe card below.

How to Make the Best Homemade Bread
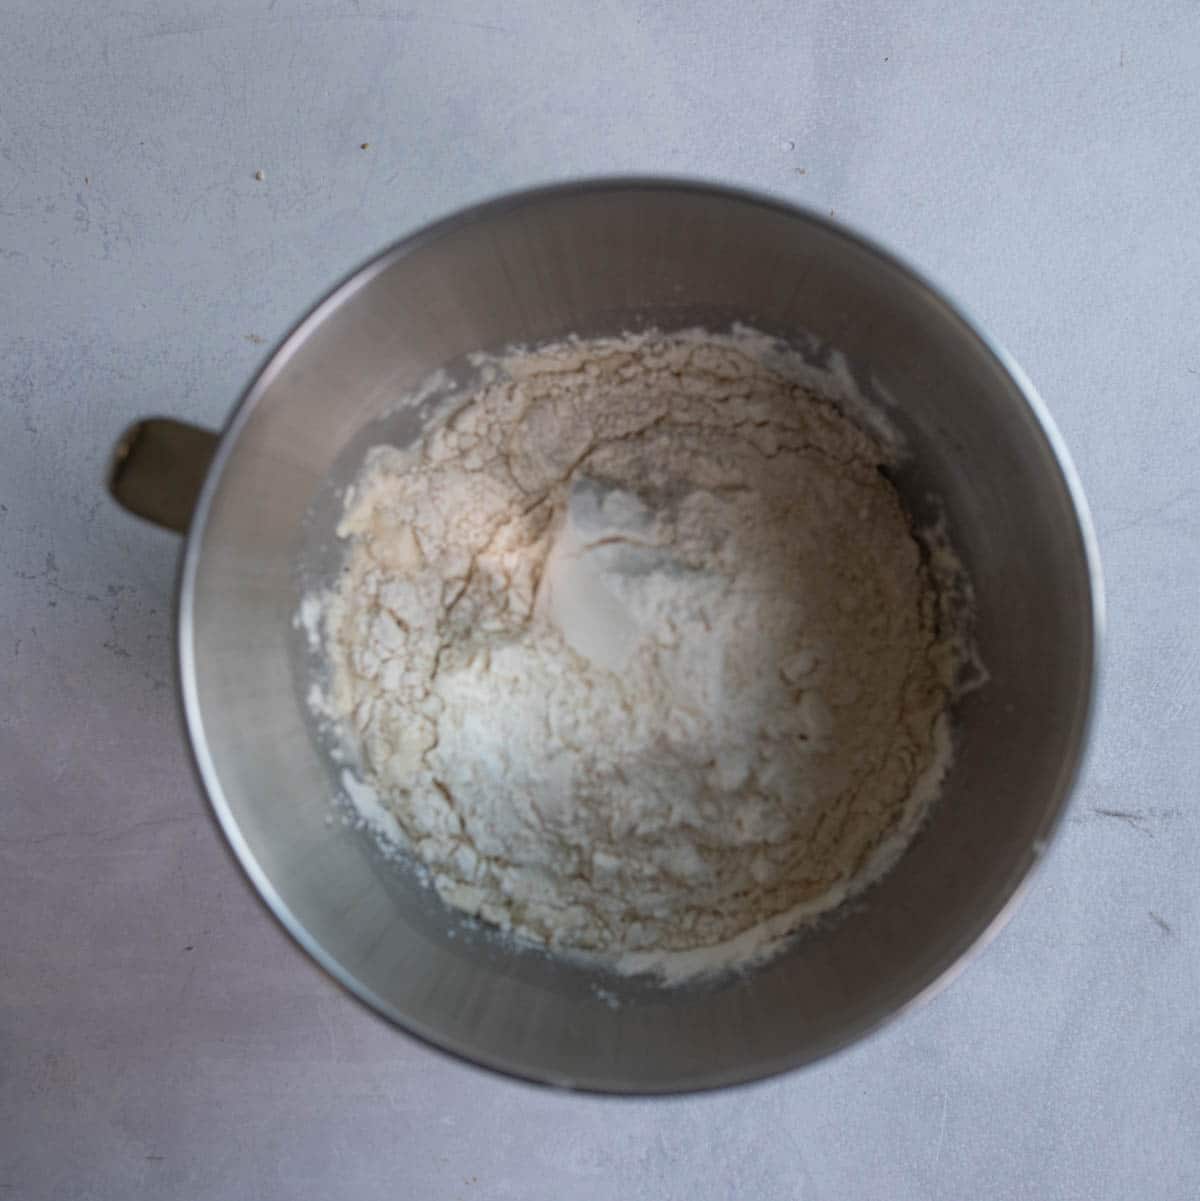
Step 1: Mix dry ingredients together in large bowl or the bowl of a standing mixer.
Add honey and 2 cups water with the mixer on. Let it mix together for a about 1 minute.
Step 2: Gradually add the final cup of water and add more if necessary. The dough should stick to the bottom of the bowl but clean the sides and be sticky to the touch. If you add too much water, don't worry! Just add a bit more flour to get it back to the right consistency.

Step 3: Knead 6-8 minutes in a mixer or 8-10 minutes by hand until the dough is smooth and elastic. Don't skimp on the kneading! This helps create the structure of the bread.

Step 4: Let the dough raise (covered, room temperature) in the same bowl you mixed it in for 1 hour or until doubled.
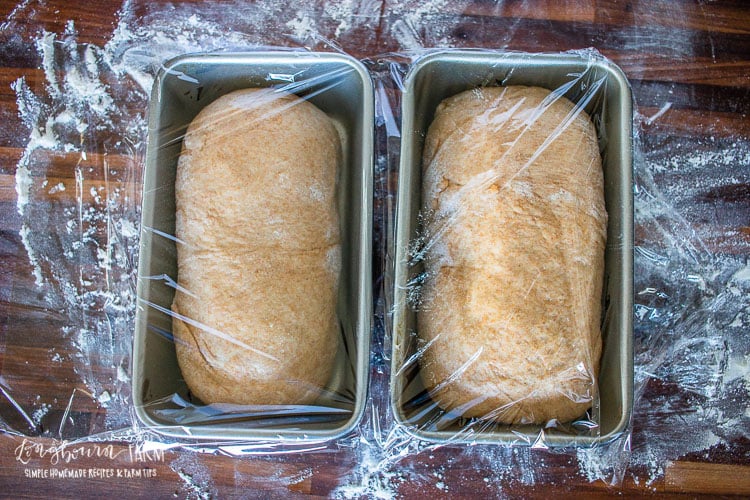
Step 5: Remove from bowl gently and form into 2 loaves. Place in greased bread loaf pans and raise (covered, room temperature) 1 hour or until doubled.
Step 6: Bake in a preheated 375°F oven for 25 minutes; remove from oven and brush each loaf with a tablespoon of butter. Return to oven and bake 5-10 more minutes, or until golden brown.

Recipe FAQs
Yes, definitely! I freeze bread for future meals as whole, baked loaves as well as the dough. I actually have a very detailed blog post about prepping and freezing bread. I talk about freezing bread dough, rolls, and roll dough in the breads section. Click here to read it!
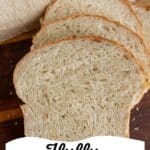
Homemade bread will stay very fresh for 3 days, after that it can get stale. If you won't use both loaves in that time, wrap and freeze one.
I have not tried using fresh yeast in this homemade bread recipe, but again some of my amazing readers have. They used a 2:1 ratio for the measurement conversion from dry yeast and reported fantastic results. They also recommend shopping for fresh yeast at a specialty baking store.
While I don't have a bread machine myself, I have some amazing readers who have tested this out for everyone! Most readers recommend halving the recipe if you want to make it in a bread machine or just letting the bread machine mix and raise the dough and then baking it in the oven.
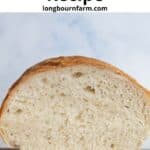
There are a couple of ways to make bread soft and fluffy. The first is to make sure you don't dry out your dough. This dough should be sticky! Letting the bread rise all the way will also help keep the bread fluffy. This recipe makes a loaf that is medium density, not light like a sandwich loaf but it shouldn't be too dense.
Yes! I make this in both my stand mixer as well as by hand. I have instructions for both methods in the recipe card below.
I have heard that the KitchenAid Artisan stand mixers can struggle a little kneading this much dough at once, so be sure to follow the recommendation for only using speed 1 or 2 for kneading bread, and maybe knead half the dough at a time in the stand mixer if yours seems to be struggling.

Expert Tips
- Measure Accurately: Always measure your flour by weight (using a kitchen scale) rather than volume for precision. Too much flour can result in a dense loaf, while too little can lead to a sticky, hard-to-handle dough.
- Dough Tests: You can test your dough by performing the "windowpane test" – take a small piece of dough and stretch it between your fingers. If it stretches into a thin, translucent sheet without tearing, it's ready. If you're new to kneading, consider using the "fold and stretch" method for a gentler approach.
- Rising: After shaping the dough, let it rise in a warm, draft-free area until it has doubled in size. For the best flavor, you can also allow for a slow, overnight rise in the fridge, which helps develop more complex flavors.

Other Homemade Breads We Love
I make some form of homemade bread more days than I don't, and my family still gets excited when I make these particular breads, no matter how many times they've eaten them!
- A fave for any kind of sandwiches, this Subway-style Italian Herb & Cheese Bread is phenomenal!
- Basic French bread is great with any pasta meal and then the leftovers can be turned into a breakfast casserole.
- A true go-to recipe is a rustic no-knead bread — keep this recipe within reach!
More Favorites From Longbourn Farm


Did you make this recipe? Leave a ⭐️ review and share it on Instagram, Facebook, or Pinterest!
WANT TO SAVE THIS RECIPE?
Enter your email below and we will send it straight to your inbox. Plus you will get great new recipes from us every week!

The Best Homemade Bread Recipe
Equipment
- ThermoPop
- Thermoworks MK4 Thermapen
Ingredients
- 8 cups all-purpose flour
- 2 teaspoons salt
- 1 ½ tablespoons yeast
- ¼ cup honey
- 3 ½ cups water (see note)
- 2 tablespoons butter (melted - use at the very end! NOT with the wet ingredients.)
Instructions
- Mix dry ingredients together in large bowl or the bowl of a standing mixer.
- Add honey and 2 cups water with the mixer on. Let it mix together for a about 1 minute.
- Gradually add the final cup of water and add more if necessary. The dough should stick to the bottom of the bowl but clean the sides and be sticky to the touch. If you add too much water, don't worry! Just add a bit more flour to get it back to the right consistency.
- Knead 6-8 minutes in a mixer or 8-10 minutes by hand until the dough is smooth and elastic. Don't skimp on the kneading! This helps create the structure of the bread.
- Let the dough raise (covered, room temperature) in the same bowl you mixed it in for 1 hour or until doubled.
- Remove from bowl gently and form into 2 loaves. (Just fold it and mold with your hands until it's the size and shape you want, then pinch together the dough wherever it joins.)
- Place in greased bread loaf pans and raise (covered, room temperature) 1 hour or until doubled.
- Preheat oven to 375ºF.
- Bake at 375 degrees F for 25 minutes, remove from oven and brush each loaf with a tablespoon of butter.
- Return to oven and bake 5-10 more minutes, or until golden brown. The internal temperature of the bread should read right around 200 degrees F.
Notes
- I use standard size loaf pans, either 9x4 inches or 10x5 inches.
- I use instant yeast which is more potent than active dry yeast and doesn't need to be bloomed in water like active dry yeast does. If you’re using active dry, don’t worry, just put it in with your water for a few minutes instead of straight into the flour. If you forget which kind of yeast you have, it really won’t make too big of a difference in this recipe.
- The exact amount of water you will need for this recipe (or any baking recipe) can vary quite a bit. This is due to altitude, humidity, and weather. I live in an arid high-desert mountain climate, so often my readers need to less water if they live at a lower elevation with more humidity. If too much water is added, simply add more flour gradually until the proper consistency is reached.
- For the best flavor, you can also allow for a slow, overnight rise in the fridge, which helps develop more complex flavors.


Sharon
I have used this recipe it’s great. But since I’ve been making more bread I bought a big loaf bread pan no lid can I put the entire recipe in the bigger pan
Kerri
Hello. I was wondering which rising method is better, because in the "How to make the best homemade bread" section, I'm instructed to split the dough into two loaves, place them into loaf pans, cover them, and let them rise for an hour. However, in the recipe card, I'm instructed to leave the dough whole in the bowl it was mixed in, cover it, and let it rise for an hour. Can you provide clarification here? Thank you.
Melissa G
Hi, Kerri! The recipe instructions have been updated for clarification, but the first rise is in the bowl (either the one it was mixed in or you can use a clean bowl). Then the dough is shaped into the 2 loaves, placed into the bread pans, and covered for the second rise prior to baking.
Alexis
Hi, my bread is currently on its first rise on the countertop. Step 6 is a little confusing. If im separating it into 2 loaves then why do I pinch the loaf together after I fold it over onto itself. The photo in the step by step instructions before the recipe didn't help me sum it up either. Could you explain what you mean in more detail?
Melissa G
Hi, Alexis, thanks for bringing that to my attention, it definitely was confusing. I've updated the recipe but just know the loaves just need to be formed and shaped so they fit your pan or desired shape, and then the dough needs pinched together wherever it meets.
Lauren
Hi,
I was wondering about add-ins for this bread. How would jalapeño cheddar be with this dough? Or maybe an everything bagel seasoning? Does the honey make it sweeter, which wouldn’t pare well with those flavors? Just curious. I’m going to try the bread but since it makes two loaves figured I try one with an add-in. Just didn’t want to waste ingredients if someone already knows it wouldn’t turn out well with more of a savory flavor. Thanks!!!
MJF
Hi, I have been using your original recipe to make this DELICIOUS and easy bread for years now. I have the recipe printed and saved but today went to the website and see that you modified it in January 2025. I see in your step by step instructions you skipped the first rise in the bowl and skipped to separating the dough into two loaf pans. Also no melted butter brushed on the finished loaves. Would you please explain to me what you modified? Thank you so much!!
Melissa Griffiths
We just added more information to the post but we didn't put every single step in the blog post, just the basics. The recipe in the recipe card is still the same and all of those things you mentioned are still included. We just added more information and new photos for clarity. The recipe has not been changed, it's a great recipe!
carol burdett
And just WHERE does it give baking directions, temp, time???
Janice
Steps 9 & 10 have that information
Claire
I make bread all the time, love trying new recipes but have never had a recipe that needed use very warm water. So this recipe doesn't require it? Thank you
Melissa Griffiths
You can use warm water if you'd like, room temp if fine too.
Donna
This bread has no fat in it. Is it not really dry??
Alli
It's not dry unless it is over-baked.
Carrie
This recipe is delicious and so simple. It was a home run! Thank you for sharing 🙂
Alli
So glad you liked it! Thank you!
Brittney
My first time making homemade bread. I was happy to come across this recipe. It is simple and easy to make. Delicious!
Alli
So happy you liked it!
claudette burwash
Does the bread hold together for making sandwiches ok.
Alli
Yes, it does.
Jen
I've made this bread several times and it has been a hit with my family. Can I put the dough in the fridge and let it rise overnight?
Thanks!
Alli
Hi Jen! I have let the dough rise overnight. I skip the first rise and put it directly in the greased loaf pans, then let those rise in the fridge. It does work best to divide it into 3 loaves when rising in the fridge.
Julianna
Hey, this looks like a doable recipe to follow, I’ve had trouble in the past. But I am definitely interested in the rise in my fridge. How would I do that? Would I need it to rise again? Or let it come to room temperature before baking it?
Alli
Hi Julianna, you can refrigerate after the first rise. When you're ready to bake, divide and shape it into loaves, and carry on with the recipe from there as written.
Pauline Lane
I haven't tried this yet but am planning to. Has this bread recipe been tried on a regular baking sheet like Italian? Would it work okay?
Thanks,
Pauline Lane
Alli
Hi Pauline, yes you can make it like french bread. I'd make three loaves with it.
Kiran
Made bread for the first time without the bread machine. Mine died several years ago. I do not have kitchen aid mixer. I used my cuisinart mixer and it did well. I am not sure if I kneaded it for 6-8 minutes. But the bread came out great. I am going to try making it with 50 all purpose flour and 50 wheat flour. My question is can I add cranberries & walnuts to this recipe and at what stage? Thanks again
Kiran
Alli
So glad it turned out, Kiran! It does work well with half and half AP or wheat flour, I think that's a great idea. I would add the cranberries and walnuts at the beginning so they get incorporated evenly.
Robyn
This was so, so good! I immediately made a turkey sandwich with mayo and a tomato. Delicious!!! How long will the bread stay good? Can we freeze it after it has been baked?
Alli
Hi Robyn! I'm so glad you liked it! Yes, you can freeze it after baking it. Mine usually lasts for 5 days but honestly, we usually eat it all before then.
MaryJo
Hi! I have made this bread countless times and it's delicious every time! Thank you for such an easy foolproof recipe.
But I do have a question...do you use a certain temperature for your water? Thanks again!
Alli
Hi MaryJo! I'm so glad you like the recipe, thank you so much for the review! I just use room temperature water.
Joni
That was my question as well. I am sooo looking forward to making this bread!!
Crystal
Tried this recipe and was very sticky to form into the loaf pans why
Alli
Hi Crystal, this is a sticky dough but you should be able to handle it easily if you flour your surface and your hands. The video should be a good reference if you have more questions!
Monica
This bread s amazing!! Thank you for sharing this simple yet awesome recipe!
Alli
Thank you, Monica!
Linda Rike
First time making your bread..trying to stay home not buy bread. It's the best easiest bread I've made ...Quick easy tasty. Thank you for sharing
Alli
So glad to hear that, Linda!
Debbie
This recipe was SO easy...I read every word of your directions and followed them to the letter. My first two beautiful loaves are cooling and I cannot wait to cut into them!
I do have one question...Can this be frozen after first rise? My grandfather loves fresh bread and keeps going to the store to buy fresh bread. I would love to freeze a couple of loaves after first rise and let him do the second proof and bake in his own home. Thank you for this lovely, simple recipe.
Alli
I'm so glad you like the recipe Debbie!! You can definitely freeze this dough. I would freeze it in three loaf portions because it will raise a bit after you divide it up even when it's in the freezer. I freeze it after the first rise and before the second rise. Does that make sense?
Cindy
My question is about freezing. What do you do after it is froze and you are ready to bake it?
Alli
Hi Cindy, great question! I usually freeze the dough after the first initial rise after I've shaped it into loaves. It freezes best if you divide it into three loaves because they will rise a bit in the freezer as they cool down and freeze. Does that make sense?
Cindy
What I am wondering about when I take the dough out of the freezer. Do I just let it thaw and then bake?
Thanks
Ansley
Can I use sugar instead of honey?
Alli
Hi Ansley, you can use sugar instead of honey but it will change the texture of the bread. If you use sugar, use 2 tablespoons.
Janet M Demarais
I used bread flour so it came out heavier, but the flavor was great!!
Alli
So glad you liked it!
Franceskasethman
Thanks for this wonderful recipe! Only issue Only issue is rising. It doesnt seem to rise as much as it says. How cani get it to rise during each stage it's in the oven now
Alli
What kind of yeast are you using? And how old is it?
Franceskasethman
Instant and brand new kept in fridge. Today made it again. It seemed to rise but didnt make pretty loaves
Gina
Nothing beats homemade bread! Thank you for the recipe!
Alli
You're welcome!
Nellie Tracy
This really is the BEST homemade bread recipe! My family absolutely loves it!
Alli
So glad to hear it!
Jane
My mixer can not handle the recipe for two loaves. What would be the ingredients for making one at a time?
This is a brilliant recipe!!
Alli
Hi Jane! You can just use the slider bar on the recipe card under "servings" to cut it in half. Easy! I'm so glad you like the recipe.
Atomic
Awesome bread recipe! I’ve tried many and always come back to this one. My kids can’t get enough of it. Thanks for sharing this recipe!
Alli
Thank you so much!!! I'm so glad you love it.
Phyllis
How much bread machine yeast should use?
Alli
You can use the same amount that is listed in the recipe 🙂
Jennifer
I just tried this recipe, it was my first time ever making bread. It came out dense and didn’t want to brown. Was very pale in color. Any tips?
Alli
Hi Jennifer, there could be a few reasons for this. If the bread was too dense, I'd double check the kind of flour you used, if your yeast was good and if you followed the rise and kneading times precisely. All of that can impact bread texture. As far as not browning, that is probably an issue with your oven. I'd make sure it's actually getting up to the correct temperature. Hope that helps!
Linda Leiva
This bread looks wonderful. You might consider telling folks about the options of buying instant yeast: in a jar, in bulk or in packets. It would seem to me that the measuring favors a jar approach, since many packets might be involved in measuring the 1 1/2 tablespoons of Instant Yeast you state. If I just went out to buy yeast, then got home and realized in reading the recommendations more closely, that Instant was the recommended yeast, I'd have to go back and get that and if it was in packet form, I may not readily know how much was contained in a packet. It might be good if you told folks how many packets of Instant Yeast would be needed, in addition to your usual 1 1/2 tablespoons instant yeast in the recipe, rather than simply stating 1 1/2 tablespoons yeast. It would make easier shopping, for those of us who rush into the store with the recipe in hand. I cannot wait to try this this week. Thank you. It looks grand!
Alli
Hi Linda, I hope you love the bread! Thanks for trying it! I have a whole paragraph in the post dedicated to the type of yeast I use and why, and what to do if you have different yeast. Using a packet measurement would be inaccurate, as there may be different amounts in each packet. I felt that using consistent measurements throughout the recipe was the best way to ensure everyone had predictable results. Each packet of yeast will tell you how many teaspoons it contains, it's usually on the back. As for purchasing yeast in bulk, most stores have all the yeast together in a section so it would be easy to find a jar as well as a packet. Hope that helps!
Kait
This bread is spectacular! I used your recipe to make bread for the first time ever, and I am blown away by how easy it was. The bread turned out perfectly - fluffy with a great crust.
Could you give me some advice on how I should store the bread?
Thanks again, this is definitely going to be my go-to!
Alli
Hi Kait! I'm so happy that you loved the bread and it turned out so great! I think the bread stays freshest if I wrap it in plastic wrap and then store it in a bread bag. Sometimes I save the bags from store-bought bread or I buy these from Amazon. If I'm freezing the bread, I actually slice it into about 4 sections after it's cooled, wrap those in plastic wrap and then put them in gallon freezer bags.
Marika
I've made this recipe probably 10 times now and have been able to almost completely give up buying bread from the store. I just wanted to take the time to stop and thank you for such a lovely countertop bread. It's yummy and easy enough to make a batch every week. Thanks a lot!!
Alli
Thank you so much for leaving a comment to let me know! I truly appreciate it. I'm so glad you've loved the recipe!
Angie
Bread was very heavy. The rise was stubborn, the crust was rock hard n was still doughy in the center. Oven and bread temped out accurately. I have never been able to successfully complete bread.
Alli
Hi Angie, I'm sorry the bread didn't turn out. I'd love to help you troubleshoot! I know the recipe is good, I've made it hundreds of times and it's been made by thousands of others. I'd definitely check your yeast. From your explanation, that sounds like the most logical place to start. I'd be very surprised if the bread temperature was accurate and still doughy, that isn't actually possible so your thermometer may also be a good place to double check.
karen
Thank you so much for sharing this recipe... I have made it 3 times now and turns out perfect every time!!
Alli
I'm so glad you love it!
Casey
What is the carbs per serving? I see the label but it doesn't say how many servings are in the bread or anything.
Alli
Hi Casey, the serving size is listed in recipe card and the nutrition facts are related to that.
Marley
This recipe looks great... when you finally get to it! A “jump to recipe” button would be much appreciated in future posts.
Alli
Hi Marley, hope you enjoy the recipe! I have tested a jump to recipe button extensively and there are many reasons why it's not on my site, one of which is better user experience because of how I have things loading on the page.
Kanika
oh my god! This is the best bread I have ever tasted. Being a newbie into bread making I had 4 mini loaf tins. So made the bread in that.
They turned out fantastic.
The bread was gone almost before it got out of the oven!
Alli
I'm so glad to hear that, Kanika!! It always disappears quickly here, too! 🙂
Jessinda
I'd like to make this in 2 days, mixing the dough on day 1 and baking on day 2. Is this possible? At what step do I refrigerate the dough? Thanks!
Alli
Hi Jessinda, if you'd like to make it over two days I would recommend refrigerating the dough after the first rise. You can shape and do the second rise at room temperature the next day. Hope that helps!
Tim
Will this recipe work with wheat flour
I made the regular loaf and loved it but i like wheat bread a lot more just asking before i waste my time and ruin it
Alli
Hi Tim, great question! I think the bread is a little dense and dry with all wheat flour, however, some people try it and like it. Most who have tried it with wheat flour recommend using a 50/50 white flour to wheat flour ratio. I hope that helps! I'd love to hear back if you give it a shot.
Sandra
Thank you for this recipe. I’ve been wanting to make bread for years could never get it right my mother always made bread but she was the kind that didn’t measure and she would try to write down how much of this an that she used but I couldn’t get it the way she did. After reading your website on making bread I felt confident enough to try it. It was perfect I followed your instructions very carefully going over it more than once just in case I missed something. I was so happy with my bread my husband loves it. I felt so proud of my self. I definitely will be making it again.
Alli
I am so happy to hear this was a major success for you, Sandra!! You should definitely feel proud! Thanks for stopping by and letting me know <3.
Tracee Edgmon
First time ever making bread bc I got a standing mixer for Xmas and was eager to try it out!! So far so good....BUT after the first rise of the dough, I had a lot of trouble with the dough being super sticky and hard to separate. I had no idea how to do that and I basically just plopped as much dough as I could between the two baking pans. There was no way I could’ve formed it....is there a tip for this step???
Alli
Hi Tracee! This dough is a slightly sticky dough but if it's too sticky you'll need to add more flour as the note in the recipe card states. Shoot for the consistency shown in the video. If you have that right, you should be able to work with the dough fairly easily on a floured surface and floured hands. This does take practice, so don't get discouraged! And what an AMAZING Christmas gift!! You'll love having a stand mixer!
Ann
I have a packet of instant yeast that’s.32 oz. Is that enough for 1 1/2 tablespoonfuls. Making for Thanksgiving dinner and so much do not want to go to grocery store on Thanksgiving Eve!
Alli
Hi Ann! You can just measure the packet of yeast out, they are usually about 2 1/4 teaspoons per packet of yeast so you would need more for this recipe.
Aby KR
I went to make bread today and my bread machine blew (bright flash, smoke, the whole 9). Decided to look up some recipes and came across this one. I cut the recipe in half and made a round loaf on a cookie sheet and it turned out amazing. I only planned on using this recipe tonight in my pinch but it was so good i plan on making this a staple.
Alli
So sorry about your bread machine, but I'm really glad you found this recipe and like it!! Thank you for letting me know! I love the idea of making a round loaf.
Anonymous
I love that there is no oil or sugar in your recipe! Well done. Ty for sharing. Going to start making them right away!
Alli
I love the simple ingredients! I hope you love it.
Karen
Every recipe I have tried of your is phenomenal! This was by far the EASIEST bread recipe I’ve ever made. And so sooo delicious!! I’ve never made a bread recipe that doesn’t have oil in the dough, but it turned out amazing. Definitely a keeper!! Thanks so much, Alli!!
Alli
Thank you SO MUCH, Karen!!! That means the world to me. I'm so glad you loved this recipe! It's one of our absolute favorites.
Savannah
SO YUMMY! & SOOOO easy to make!
Question: are the nutritional facts per slice of bread?
Alli
Yay!! So glad you liked it. The nutritional facts are based on the "serving" listed in the recipe card. So in this case, I tried to estimate the slices per recipe (2 loaves) so it's per slice, yes. I never know what is the most accurate way to do breads, I could change it to per loaf but I wasn't sure how helpful that would be either. 🙂
Jennifer
This was a tremendous success! I have never made bread so easily and so successfully. Thank you.
Alli
I'm so happy to hear that, Jennifer!! Thanks for giving the recipe a try.
Misty Canfield
I've always loved to bake, but I've never found a bread recipe that turned out with the flavor and texture I was hoping for. THIS is the BEST bread recipe I've ever made! It's chewy, soft, buttery and perfect. Simple too! Thank you so much for sharing!
Alli
I'm so happy to hear that, Misty!! I'm so glad you liked the recipe, thank you for letting me know!
JaiJai
I just made this bread tonight. It was my first time making bread. I love it and mixed it by hand as well as kneaded it by hand. So proud of them. Easier than I thought it would be!! Thank you!
Alli
I'm so glad you liked it!! It really isn't too bad to do by hand, I'm so glad you gave it a go. Thanks for letting me know you liked it!
Garn
Can I use this recipe with my bread machine to mix the dough and then bake in the oven? I don't have all the fancy mixers to mix and kneed it and the bread machine would be much easier.
Thanks,
-Garn
Garn
Can I mix this bread recipe up in my bread machine as dough and then transfer it to pans for baking? I don't have any fancy mixers to start it.
Thanks,
-Garn
Alli
Hi Garn, no need for any kind of special equipment. I make this by hand all the time, and directions to mix it by hand are mentioned in the post as well as detailed specifically in the recipe card. You can definitely mix it in your bread machine, I don't have one so I'm not sure it the whole dough recipe will fit. There have been other comments on this post about using a bread machine, I'd read through and find them so you know exactly what to do. Hope that helps!
Stephanie
I made this recipe yesterday and it is perfect! The crust is so wonderful, and it smells amazing. It makes some of the best toast I've ever had as well. My husband is chomping at the bit for the next batch - I'm going to try it with wheat flour next! I didn't quite evenly separate the dough though, so one loaf is about two inches taller than the other...oops! Still delicious though. It's such soft dough too! I don't have a mixer strong enough to handle bread dough, so I mixed with my hands before kneading. Thank you for sharing this recipe!
Laura
SO YUMM!!!!!! I coated my pan with a local garlic infused olive oil. It added just a hint of extra flavor to the crust. I’ll be making this time and time again I’m sure!
Alli
I'm so happy to hear this, Laura!! Thank you! I love the infused olive oil idea, so great.
Elli
So I've only got active dry yeast, and I know you said to just bloom it in the water instead of putting it right in with the flour. I was reading my yeast packet and it said it needs to be in warm water and to add a little bit of sugar. Should I do that or will the yeast bloom in room temperature water?? I'm a bread newbie, haha, so I don't know how big a difference something like that (room temp or warm water with sugar) makes!
Alli
Hi Elli! Great question. You can definitely bloom the yeast in warm water with a pinch of sugar, just double check the water temperature isn't too hot (that will kill the yeast) by testing it on the inside part of your wrist. I hope that helps!!
Tricia
Any idea if this recipe would work with gluten free all purpose flour? Thanks!
Alli
Hi Tricia! Unfortunately, this recipe will not work with gluten-free flour. The reason that most yeast bread's require intense kneading steps (like this one) is to develop gluten - which is just a protein found in wheat. The gluten develops as the dough is kneaded and that is what provides the structure of the bread, all those little air pockets, the texture of the dough, and the rise the loaf gets is due to yeast and kneading and gluten development. That is why most gluten-free bread's are much flatter, dense loaves and need an additional leavener like baking soda or baking powder. I wish I had a good reference for a quality gluten-free bread recipe but I haven't run across one yet. Best of luck!
Hannah
Great recipe! I have a sandwich bread recipe I love, but was wanting a more dense, classic homemade bread for snacking and slathering with butter. This one is right on point! Everyone enjoyed it. Thanks for sharing!
Alli
Thanks so much Hannah! I'm so glad you liked it!
connie
this recipe is bomb....the key is to knead for the 8 mins in your kitchen aide....have made this twice now...my favorite recipe for bread
Alli
Thank you, Connie! And yes, you are right - kneading is key!! I'm glad you like the recipe.
Sara Withers
What setting do you put it on in your kitchen aid? Mine I have the artisan stand mixer and it doesn’t seem to be able to handle this recipe.
Alli
Sometimes the Artisan's can have a difficult time. For kneading bread, KitchenAid recommends to not use above setting 1 or 2.
Melissa
Yummy!!! One of the best I've made so far!
Alli
Awesome, Melissa!! I'm so happy to hear that. Thanks for letting me know!
CKP
how can we use this recipe for a bread machine?
Alli
Hey! I'm not sure, I don't have or use a bread machine. I asked some other bloggers and they recommended mixing the dough and doing the first rise in the machine and then doing the shaping and baking as per the recipe. I don't know how the dough will fit in the machine or how it will work. If you give it a try report back! I'd love to hear how it goes.
Linda Chandler
Hello Alli, I want to try this receipe, but I don't know what setting to use on my mixer for kneading. My mixer has settings 1 2, 3 4 Etc., Can you help me out by giving me instructions on what setting to use? Thank you for your help
Alli
I'd be happy to, Linda! For kneading bread, never go over speed 2. I start on speed 1 and then as the dough comes together I move to speed 2.
Anonymous
Thank you!
Emilio Barrios
Hello Alli, a friend recommended me tu use fresh yeast, the ratio is 2:1 from dry yeast, and it improves the flavor, it came great.
Alli
I'm so glad you left that information!! I am sure others are wondering and I don't know because I've never used it. Thank you so much, Emilio!
Sara
Where do you get your fresh yeast at? I have tried finding it before because I have several recipes that call for it , but with no luck. Any help would be appreciated, Thank you.
Alli
Hi Sara! Hopefully, Emilio gets back to you with an answer, but I've had good luck asking in local Facebook groups when I'm searching for specific ingredients. Maybe worth a try!
John Sutton
You can get it at any restaurant store. Like US Food's CHEF'STORE.
Dee
2 cups of flower to 1 cup of fresh yeast? Thanks!
Alli
Hi Dee, I think the ratio 2:1 from dry yeast means that you use twice the amount of fresh yeast as you would dry yeast. So for this recipe that would be three tablespoons fresh yeast.
Alli
All-time favorite bread recipe!
Anonymous
I made this bread today. I have never had any luck making bread, just have not had it rise properly in the past. The rapid rise yeast seems to be the key. It rose wonderfully and looked beautiful coming out of the oven. I was so excited. Tried a bite and have never been more disappointed! It had absolutely no taste what so ever. Looking again at the recipe, I realized it was made with WATER. I’m supposing in stead of water, milk and sour cream or maybe buttermilk would help?
Alli
Hello! I'd be happy to explain a little more about how making bread works for you. Bread flavor is (basically) determined by two things - one is ingredients but that only plays a minor role. The second factor that influences bread flavor is rise time - how much the bread is allowed to proof. Rise time influences bread flavor immensely, as yeast breaks down sugars in the dough, gas is released and other by-products of fermentation, creating flavor. This is why artisan bread recipes are typically made with a starter that has been allowed to rise for a few days - it increases the flavor. In the case of this bread recipe, adding milk or butter could improve the flavor, but it would also alter the texture significantly. To achieve the texture, crumb, and flavor I was looking for, I used water. I tested this recipe many, many, many times and this is how I prefer my quick homemade bread. If I am going for incredible flavor, I will make an artisan loave. I understand if you feel differently! It is vital to note, however, that using all milk or buttermilk would not be a good idea. That would create a biscuit or scone texture and be atypical of a yeast bread, which is what I was going for with this recipe. It is also important to note that the VAST majority of bread recipes use simple ingredients - water, flour, and yeast. Thanks for your comment! I wish you luck finding a recipe you love.
Janelle
Does this bread make good sandwich bread??
Alli
Hi Janelle! I think it is a little dense for sandwich bread, but give it a try and see what you think!
Vera
T his can be made in bread machine use 1/2 of recipe tried it fabulous
Alli
PERFECT!! Thank you so much for posting this information, SO helpful for others. I appreciate you!
Han
We LOVE this bread for sandwiches. The texture is not like store bought bread, but has better flavor, in our opinion!
Anonymous
I only have one loaf pan, Can I use this recipe for Rolls too?
Alli
Hello! Yes, I do that frequently. You can divide the dough in half like you were making two loaves. Make one loaf and then use the other half to make rolls. I usually make them golf-ball sized, let them raise, and then bake them until medium golden brown - about 15 minutes depending on the size. I hope that helps!
Sorry for the delayed response, I was doing some site maintenance and wasn't able to answer comments 🙂
Caroline
I made this recipe last night (my first time making homemade bread) and it was delicious! I kneaded the dough by hand, which was hard, but I felt so proud when it turned out! Thank you for sharing!
Alli
That is amazing Caroline! I am proud you kneaded by hand, that is no easy feat!! So glad you liked the recipe.
Amanda
Great recipe!
Alli
Thank you, Amanda!!
Brenda
Hi, I'm 65 and always wanted to make homemade bread. I never have been able too. I don't know what instant yeast is and don't know if a little town like Manning, SC would even have it. The only yeast I see in the store is Heischmann's instant yeast. I never can get it to get bubbles in it,so I just throw it away. Would this yeast be good to just put into the flour? Please email this to me because I'm in pintrest and I'll never be able to find again. I would love to try.
Alli
Hi Brenda! Heischmann's is just the brand, as long as the package says "instant" it is instant yeast and can be used according to the directions in the recipe. Instant yeast is quick rising, and made to be mixed straight into the flour. If you can only find active dry, it will be best to let it sit and "bloom" in the water and add it with the water. Does that answer your question? Thanks for asking!
Cheryl
I finally got around to making this recipe today. I am not a newbie to making bread, but not a expert. I did struggle a little with this. This bread recipe is definitely more dense than my usual recipe. The dough was very, very sticky. I ended up adding quite a bit extra flour, and was still sticky, but knew it was better to keep that way, than add too much flour. My go to bread recipe I usually use is a little " too light" , but this was just a little too dense, I might play with it and combine parts of both, for "my" perfect bread. Thanks for the great recipe, and will definitely make again. BTW, it tasted great!
Alli
Hi Cheryl! This bread is definitely more on the dense side. The heat of summertime as well as the difference in climate can play a big role in how sticky the dough is. This dough is a more sticky dough in general, and you may have to add quite a bit more flour depending on those differences. Kneading it for the full amount of time is critical for the texture as well. If you skip or lower the kneading steps the bread will be quite dense.
Erin
I just tried this bread--it's my first bread-making experience. I tried mixing it by hand. It never reached a workable point...stayed very wet and sticky. It did rise both times. In the oven the dough melted over the edges of the tin????. It's still in the oven and waiting to see if it turns into bread????. It sure smells good:) would love some tips....
Alli
Hi Erin! I'm glad you left a comment! If the dough stays too sticky to work, you'll need to add more flour - it might be quite a bit, a 1/2 cup or more if you live somewhere that is a lot more humid than where I live (the intermountain west). The dough should be mildly sticky though so working it will need to be done with a quick hand. When you are kneading, the dough will become less sticky as you create more gluten (protein) structure by folding/pressing it over itself. If the dough is a good consistency and I don't want to add more flour for kneading, I'll lightly coat my hands with oil and knead that way, using a bench scraper to help lift the dough from the counter.
The heat will make the rise steps go much more quickly and the bread can even rise too much if you're not careful. Did the bread rise and then deflate and fall over the edges of the pans? That can happen in the summer if it raises too quickly and there isn't enough structure in the dough - the kneading times (10 minutes) are very important to this recipe since it is a looser dough. There isn't anything in this dough that would actually melt so we can definitely figure that problem out easily enough!
Hopefully this information helps - please reach out again if you need further advice! And I hope the bread at least tasted good 🙂
Chinthaka Prabath
Hi.. Alli im new to this bread making thing. Can i know what type of yeats did u use?
Alli
Hi Chinthaka!I use instant yeast in this recipe because it can be mixed right into the flour and expedites the proofing steps.
Cheryl
What size pans do you use?
Alli
Hi Cheryl! I use standard size loaf pans, either 9x4 inches or 10x5 inches.
Kathy
What type of yeast do you use?
Alli
Hi Kathy! I use instant yeast, it doesn’t need to be bloomed in water like active dry yeast does.
Phoebe
Hi there! Can I substitute all purpose flour with bread flour? Will it change the texture of this bread a lot? Thanks!
Alli
Hi Phoebe! Bread flour will change the density and texture of the bread. It has a higher protein content, which will lead to more gluten development. Gluten is what gives bread its structure so increasing that could make the bread more dense and less soft. However, the change may not be something you are worried about or mind! Give it a try and see if you like the way it turns out. You could make the dough on the sticky side too. 🙂 Does that help?
Kim
This bread was so perfect. Thank you for the recipe. It's easy to make and with how expensive things seem to be getting lately it's inexpensive to make. It tastes perfect with some butter or jam on it. I really love it
Jess
Currently making my 6th loaf of this bread! My husband whose won't eat any bread other than Sarah Lee honey wheat said this is way better and only eats this now! So so good!
Alli
I love that Jess!! I'm so glad you and your husband love it. Thank you!!
Heather
I am new to bread making but this was super easy!! With the instant yeast and the kitchen aid it is definitely gentle on the wrists. I am new to bread making ( this is the 4th time I have tried a recipe). This is going to be the one I use. It's as good as my grandmothers bread, only without the hard work. I have a question however. Can you make these into rolls and if so when do you do it and how long do they take to rise and bake?
Alli
Hi Heather, I'm so happy to hear you like the recipe! And as good as your grandmothers?! That is the best compliment, thank you! Yes, I have made this recipe into rolls. I think I get about 24 rolls out of the dough (depending on size). Instead of shaping loaves, you would shape them into rolls (step 6 in the recipe card) by pushing your thumb up into the portion of dough, stretching the dough down, removing your thumb, and then pinching the bottom of the dough together. Let them rise until doubled, probably 30-45 minutes. And bake at the same temperature but for less time, about 15-20 minutes, brushing with butter at 15 minutes. I baked them on a greased cookie sheet. If you want soft sides, space them only 1 inch apart but if you want them to not touch, place them 3 inches apart. I hope that helps! Let me know if you have any more questions.
Jess
Well my loaves came out looking like the most perfect loaf of bread I ever saw! Perfect! Then I cut into it it and it and the bottom was very heavy and doughy which I'm going to say is because I didn't knead it long enough! Next time I'm setting the timer and making darn sure I don't skimp on that but otherwise this was so freaking yummy!!
Alli
Oh bummer! Was it not done baking completely? Or just dense? There could be a few reasons for that. I'm happy to troubleshoot with you if needed!
Jess
I can't eat to try this out! I absolutely love homemade bread but the recipes I found in the past were a bust! I don't have a kitchen aid mixer will mixing by hand turn out the same?
Alli
Hi Jess! I hope you end up loving this one! This bread should turn out fine if you knead by hand, but you will want to extend the knead times, 8-10 minutes by hand (step 4). That is a LONG time but it really makes a difference! I get tired kneading that long by hand so I usually do half the time, rest for 5-10 minutes, and then finish kneading. The dough should be very smooth and elastic by the time you are finished. Is that helpful? Let me know if you have further questions!
Kimberly Matney
This is an amazing recipe! Thank you so much. I did cut the recipe in half to make just one loaf and i did coat the top in butter twice 5 min apart at the end of the bake.
Alli
Thank you Kimberly, I'm glad you like it! Coating with more butter is always an excellent idea 🙂 . I'm glad the recipe worked halved as well!
Carella
If I can't use butter due to allergies can oil substitute?
Alli
Hi Carella! You could just leave out that step all together if you wanted too. While delicious, it isn't necessary for the bread to turn out. If you wanted to try an oil, I'd use a very mild flavored oil like vegetable oil and then sprinkle just a tiny bit of salt over the top after you remove them from the oven for the final time. Let me know if you try it and how it turns out!
Carella
Used a bit of grapeseed oil on top and turned out great! Thank you for this recipe:)
Alli
Awesome! Thanks for letting me know! I'm so glad you like it.
Kimberly Reule
Hi Alli. Made this recipe three days ago and it's my first time making bread. The best compliment ever is that my husband said it was as good as his mother made. Made it again today for the second time and my husband, and I, love it. Thank you so much.
Alli
Hi Kimberly! I'm SO happy to hear that you guys love the recipe! When my husband says that I know I hit the nail on the head too. Thank YOU so much!
Dina
I made this bread recipe today and it truely is the best I have ever had. The texture is just perfect and it's so moist. Well, like it said it's just perfect. I gave a loaf to my husband's bosses wife for her birthday and they offered to build a guest house next to their home so that could have a constant supply, lol. Thanks so much for sharing this recipe. I will be making it pretty regularly.
Alli
Hi Dina, I am SO happy you love the bread!!! I love that story - who wouldn't want a constant supply of delicious homemade bread, right?! Thank you for sharing! 🙂
Chelsea
This was the first time I've ever made bread - and this recipe was so easy. I've never made bread before because I thought it would be too hard. Not the case! thank you for sharing your recipe. I'm just wondering - is the bread supposed to be pretty dense/heavy? We're looking for something a little lighter and airy-er for sandwiches...but I'm not sure if I did something wrong of if it's supposed to be dense. Thanks!!
Alli
Hi Chelsea! I'm so glad the bread worked well for you! I would say it is a medium density bread, it has a heavier texture but it still has air bubbles throughout. Letting it raise until doubled will ensure it is as light as possible, but it probably won't ever be as light as a sandwich bread you would find in the store. My husband actually prefers I buy him bread from the store for lunches! 🙂 I hope that is helpful!
Lisa scroggs
First time trying recipe got it rising then decided to read comments. Should of read first. I screwed up and put melted butter in mixer with liquids. Do you think it will still turn out?
Alli
Hi Lisa! Yes! It will be fine 🙂
Lisa scroggs
Love this recipe. Turned out great. Will definitely make again. Thank you!!!
Alli
Thank you!! I'm so glad you loved it!
Mary
I must try your recipe~ it looks awesome and I love the idea of the butter before the last 10 min. of baking. Oh, and I totally agree that the Bread Baker's Apprentice is the best book ever on bread baking!
Alli
Let me know what you think!! I know, I seriously love that book 🙂
Grace
I've made this recipe multiple times and it's amazing! My entire family loves it! I would like to make it again today but realized I'm out of honey... could I substitute maple syrup instead? Wondering if anyone has tried this yet...
Alli
Hi Grace! You could certainly try syrup, you could also just use plain sugar and add a little more water. Let me know if you try it and how it turns out!
Lindsey
I accidentally left the honey out and it's still super yummy!
Alli
I've done that too, ha! 🙂
Crystal Townsend
Tried this today and it was amazing according to my almost 3 year old. We love this recipe cause he can have it because it does not contain milk. Right after it was done and still just a bit warm I cut him a slice and he told be it needed butter.
Alli
I'm so glad you and your son liked it Crystal! My 2 year old loves it too 🙂
Erica
Thank you! I didn't know about either of those tips. I will be trying bread again 🙂
Alli
No problem! Happy baking!
Erica
What size mixer do you use? My kitchenaide (regular size?) wants to quit after kneading this. Motor section is hot and burning rubber smell in kitchen. Any tips related to using mixer in this recipe? What setting to knead on?
Alli
Hi Erica! I have a KitchenAid 6 quart professional mixer - and it is a beast! In general, KitchenAid recommends kneading dough only on speed one or two. The standard size mixers can tend to get tired, especially if they are an older model. If this happens you can knead for four minutes, rest for 5 (or however many you think it needs), and then knead for the remaining time. Letting the dough rest is totally fine. Or you could get your arm workout in for the day and knead it by hand for 10-12 minutes 😉 But I'm not that tough!
Staci
Thank you for this recipe! It was my first attempt at making bread and it turned out great. Kneading is definitely the key. It turned out dense just the way I like it. Thanks again!
Alli
I'm so glad it turned out and you liked it Staci! Thank you for letting me know!
Ruth
update/outcome: the bread took significantly longer to cook than the recipe indicated. After an hour and a half of baking time (at 375 degrees), the bread is hard as a rock on the outside (as if its been toasted) and still slightly doughy on the inside. Apart from halving the recipe, I followed the instructions identically. My thoughts on what could have caused this: I used a glass pan, does that matter? I pre-heated the oven (the recipe didn't indicate whether or not to do that, but I did anyway). I used a premium white flour (I (perhaps, falsely) assumed that it was the same as all-purpose).
Alli
Typically all recipes will indicate if the oven should not be preheated, otherwise assume that when it says "bake at 375" it should already be up to temperature. It sounds like you have a malfunction with your oven. Baking this bread at 375 for an hour and half would definitely result in very black burned bread. Is there a chance you didn't divide the recipe in half correctly? It sounds like the ratios were off and there was an oven problem. I'm not sure what a premium white flour is, all flours usually indicate what type they are on the packaging. Using a glass pan shouldn't matter either. Sorry it didn't turn out! Let me know if you try it again.
Ruth
Ok. Thank you for the feedback, I was just curious what your thoughts were. I'm definitely going to try again and hopefully have a better report that time. Cheers!
Alli
Glad you're up for round 2! 🙂 I hope it turns out better!
Ruth
After the first one-hour rise in the mixing bowl, the dough was extremely sticky. So sticky that I couldn't get it out of the bowl without assistance. Is that how it's supposed to be? I have it in the bread pan now but was unable to fold it (I halved the recipe, so no need to divide). I just had to dump it in the pan as best as I could, while trying at the same time to pry it from my fingers.
Alli
Hi Ruth! As indicated in the recipe, the dough should stick to bottom of the bowl but clean the sides and be sticky to the touch. it sounds like yours was very sticky. The recipe also indicates to add more flour if that is the case.
Andy
All I have is self rising flour. I know I can omit the salt, but what about other ingredients....I'm pretty new at this. Please help!
Alli
Hi Andy! I wouldn't recommend using self rising flour. Basically self rising flour already has baking powder and salt in it, which is why it works great for things like quick biscuits. Since this recipe doesn't have any baking powder, I'm not sure what would happen if you used self rising flour. Additionally, the flavor would be off because even if you omitted the salt in the recipe, the ratio of flour to salt would be different in the self rising flour. That being said, there is nothing wrong with experimenting! You could always try it and see what happens 🙂 If you can get some all purpose flour that would be best. Let me know if you have further questions, or if you give it a try with the SR flour!
Bernardeta
Hi, the bread came out amazing. Everyone loved it and I'm passing the recipe to my sisters.
Question, do you have also a great recipe for the whole wheat bread?
Thank you so much!
Alli
Hi Bernardeta! I'm so glad you loved it, thank you for sharing the recipe! I don't have a recipe for whole wheat bread posted at this time. Something I'm working on though! I'll be sure to link to it here when it's posted. I also always post to Pinterest so be sure to follow me there and that will be a great place to find it when it's published.
Tracey
I made this exact recipe with ww flour and it was lovely....I might do 50/50 next time for lighter loaves, but it was delicious all the same!
Alli
Oh yes, I should have pointed her to your previous comment Tracey! Thank you!!
Carol
Hi, I have a couple of questions. I always use warm water, (120-130 degrees). Is that a problem or even necessary? I do not have instant yeast. I have always used dry active. I really prefer cake, but can no longer find it in stores. Also, I like to proof my dough in the oven with just the light on. It makes the dough even lighter & the bread very light. Is that a problem with this recipe?
Alli
Hi Carol! Water temperature isn't a huge deal unless you're using ice cold water. I usually go with lukewarm and don't stress too much about the exact temp. If you are using active dry instead of instant yeast, you can bloom it in the water instead of adding it with the flour. Proof steps are always more successful when done in a warm, draft free area so your oven is the perfect spot! Sounds like you're a bread pro! Let me know if you have further questions.
Tracey
I have been making this recipe nearly every week for months now and have excellent results!! I make 3 loaves instead of two just due to my bread pans! Today I'm trying Whole Wheat.....wish me luck!! Thanks for the best bread recipe ever!
Alli
You are welcome! I am so happy to hear this!!! Let me know how the whole wheat turns out, I'm excited to know!
Tracey
It turned out amazing! I did not have to split it in 3, and it made two lovely, dense loaves! My husband says it's the best ever! He loves whole wheat! I'm sure if I had only done half whole wheat and half white, I'd have had lighter loaves, but what an awesome treat with soup or stew in the cold weather! Success again!!
Alli
Thats great, thank you for letting me know! I want to try it now 🙂
Christine
Hi there! How do you store the bread? I can't wait to try this recipe, thank you!
Alli
Hi Christine! I use bread storage bags similar to these (https://www.amazon.com/Count-Clear-Bread-Bags-Cable/dp/B00JH73LAS/ref=sr_1_2?ie=UTF8&qid=1483217014&sr=8-2&keywords=bread+storage+bags) but I just picked them up at my local grocery store. If I'm freezing a whole loaf of bread, I double bag it. 🙂 I hope you love the recipe!
Devon
Hi, I was wondering if the yeast is fast active yeast or yeast that needs to be activated? I always use the latter
Alli
Hi Devon! I use instant yeast so it doesn't need to be activated. If you used active dry, you could activate it in the water in the recipe. If you didn't activate it, it would still turn out it may just raise more slowly and not as well.
Jamie
Hi there! What kind of honey did you use? Also yeast? Should I heat honey a bit to mix easier?
Alli
Hi Jamie! I use instant yeast, so it doesn't need to be activated. The honey I use is honey we harvest from our bees or honey harvested from my father's bees, but any type of honey will work fine! I often set my honey jar in a bowl of warm water to heat up a bit for easier pouring. Or I'll run the measuring cup under hot water before measuring so it slides out easier. It seems to mix in pretty well either way since there is a long kneading step in the recipe 🙂 .
Kristen
If I only want to make 1 loaf at a time due to the size of my stand mixer can I just cut the recipe in half for everything?
Alli
Hi Kristen! Yes, just cut everything in half and it should still turn out fine.
Tracy
Just wondering how the 2 Tbsp of butter figure into the recipe. Dry ingredients? Wet ingredients? (Melted) or for greasing the pans?
Alli
Hi Tracy! They are used after the bread is almost done baking, you brush the tops with butter. Does that make sense? It should be step 8. Sorry it took me so long to get back to you! For some reason your comment got filed under spam and I don't check those comments as often as my main folder. Let me know if you have further questions!
Alice
I really want to try this but I accidentally bought bread flour instead of all purpose. Would that work or it needs to be all purpose? Thank you.
Alli
Hi Alice! You can still make the bread, it will just be more dense and probably won't raise as much. Let me know if you try it and how it turns out!
Alise
May be a silly question but did you not use a bread pan?
Also do you cover the dough to let it rise? And do you let it rise on the counter or in the fridge? Sorry I've never made bread before.
Alli
Hi Alise! No silly questions, I'll add these details to the recipe - thanks for helping me clarify! I did use a bread pan, mine are 9x4" but 10x5" would work fine as well. I do cover my dough for all proofing (raising) steps in this recipe as well. I lightly spray the top with cooking spray and then loosely place plastic wrap over the dough. For this recipe, I proof at room temperature. Let me know how it turns out when you give it a go!
Alise
So, first I added 2 tablespoons of chia seed and 2 tablespoons brown sugar instead of honey. I covered the dough with a regular kitchen towel. I then cooked the bread without the pan. This was my first time cooking bread. It came out so good! My family ate it all the first day and they keep bugging me to make more. Thank you so much. I'm going to try it in a pan today.
Alli
That sounds great!! I'm so glad it worked out and your family loved. it. Sounds like you're a pro already!
Skylar
I made this yesterday and it turned out fantastic! Thanks for sharing the recipe.
Alli
I'm so happy to hear that! Thank you for letting me know.
Tiffany
Hi there! I would love to try this recipe. Do you sift your flour before you measure? Or do you weigh it out? Very excited to make something resembling our favorite sandwich bread.
Alli
Hi Tiffany! I don't sift for this recipe but I always fluff up my flour a bit with the measuring cup a few times before actually measuring it into the recipe. Does that make sense?
Lisa Hawkins
What kind of flour did you use?
Alli
Hi Lisa! I used all purpose flour, I'll add that to the recipe. Thanks!
Robert Haynes
I tried this bread recipe last week and thought it was great! We have set this as one of our top bread recipes for the family. We have moved away from buying store bread and move into making it all. Thanks again for the recipe!
Alli
Thank you, I am so happy to hear that Robert! Nothing beats homemade bread - I try to make it as often as possible too.