

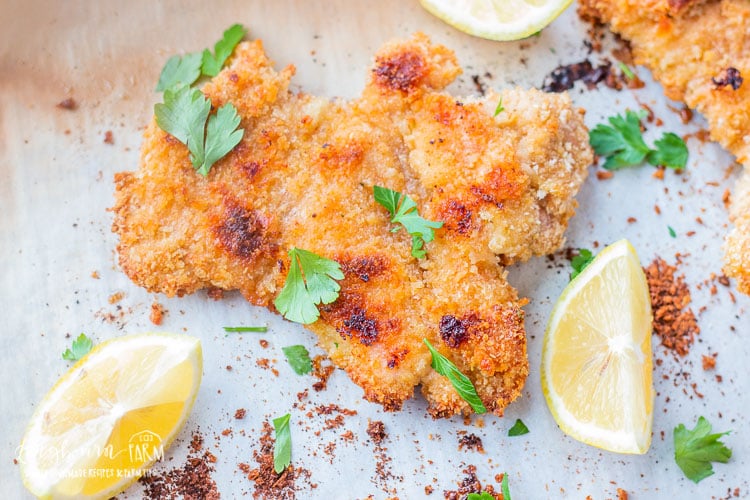
Golden, crunchy Crispy Baked Chicken Thighs with a double panko breadcrumb coating baked to perfection. An easy chicken recipe for boneless skinless chicken thighs in the oven that's juicy inside with a restaurant-quality crispy crust!
WANT TO SAVE THIS RECIPE?
Enter your email below and we'll send it straight to your inbox. Plus you’ll get great new recipes from us every week!
Quick Recipe Overview

WHAT: Boneless chicken thighs coated in seasoned flour, egg wash, and double breadcrumbs, then baked until golden and crispy.
WHY: Delivers perfectly crunchy, oven-baked chicken without frying—juicy inside with a restaurant-quality crispy coating and incredible tenderness every time.
HOW: Bread chicken thighs in three stations, bake at 400°F for 20 minutes total, flipping halfway and adding butter for ultimate crispiness.
Jump to:
- Quick Recipe Overview
- Why I Love Making Crispy Baked Chicken Thighs
- Ingredient Notes
- Perfect Crispy Baked Chicken Thighs
- How To Make Boneless Chicken Thighs in Oven
- FAQs for Crispy Baked Chicken Thighs
- My Best Tips for Making Boneless Chicken Thighs in Oven
- What to Serve With Crispy Baked Chicken Thighs
- Storage & Reheating Tips
- More Favorites From Longbourn Farm
Why I Love Making Crispy Baked Chicken Thighs
There's nothing quite like biting into perfectly crispy baked chicken thighs with that satisfying crunch that gives way to tender, juicy meat underneath. This chicken thigh recipe has become my answer to those weeknight dinners when we're craving something comforting but don't want to stand over a hot fryer.
What makes these chicken thighs so special is the triple-coating technique. The flour mixture creates a dry base, the egg wash acts as glue, and the combination of panko and regular breadcrumbs delivers that restaurant-quality crispiness we all crave. The secret weapon? Butter placed on top before and during baking, which helps the coating turn an irresistible golden brown while keeping the chicken incredibly moist.
I've served this recipe countless times for family dinners, potlucks, and even meal prep Sundays. I love that I can customize the chicken seasoning to match our mood – sometimes mild and classic, other times kicked up with cayenne for the adults. Like many of my simple recipes, this one is endlessly adaptable.

🩷 Melissa
Here's my secret to perfect breading: I always pat those chicken thighs bone-dry with paper towels before I even think about coating them—trust me, moisture is the arch-enemy of crispy perfection.
Then I really press those breadcrumbs into each piece like I mean it, creating a thick, golden crust that'll stick through the entire baking process and give you that satisfying crunch in every bite. That crispy coating is my favorite part!
Ingredient Notes
Season Salt: This adds a flavor boost beyond regular salt. If you don't have it, substitute with additional regular salt plus a pinch of your favorite all-purpose seasoning blend.
Panko Breadcrumbs: These Japanese-style breadcrumbs are coarser than regular breadcrumbs and create superior crunch. Look for them in the Asian food aisle or near regular breadcrumbs. Plain (not seasoned) works best so you control the flavor.
Butter: Using real butter (not margarine) is crucial for achieving that golden, crispy coating and rich flavor. The butter melts into the breadcrumbs during baking, creating an almost fried texture without the oil.
Spices: Feel free to customize the seasoning blend to your taste. The combination of paprika, garlic powder, and onion powder creates a well-rounded flavor profile. You can also add thyme or other dried herbs for extra depth.
For the exact amounts needed, please see the recipe card below.

WANT TO SAVE THIS RECIPE?
Enter your email below and we will send it straight to your inbox. Plus you will get great new recipes from us every week!

Perfect Crispy Baked Chicken Thighs
Equipment
Ingredients
- 8 chicken thighs (boneless, skinless)
- 1 cup flour
- 1 teaspoon salt
- 1 teaspoon seasoned salt
- 1 teaspoon black pepper
- ½ teaspoon paprika
- ½ teaspoon garlic powder
- ½ teaspoon onion powder
- 4 eggs
- 2 tablespoons water
- 1 cup panko bread crumbs
- 1 cup plain breadcrumbs
- 4 tablespoons butter
Instructions
- Preheat oven at 400ºF.
- In a shallow dish (like a pie plate), combine flour, salt, seasoned salt, pepper, paprika, garlic powder, and onion powder.1 cup flour, 1 teaspoon salt, 1 teaspoon seasoned salt, 1 teaspoon black pepper, ½ teaspoon paprika, ½ teaspoon garlic powder, ½ teaspoon onion powder
- In a separate shallow dish, combine eggs and water. Whisk well.4 eggs, 2 tablespoons water
- In a separate shallow dish, combine panko and plain breadcrumbs.1 cup panko bread crumbs, 1 cup plain breadcrumbs
- Pat chicken thighs dry. Dip each chicken thigh first in the flour mixture, then in the egg mixture, then in the breadcrumb mixture. Be sure the chicken thighs are spread out as flat as possible when doing this.8 chicken thighs
- Place coated chicken thighs on a parchment-lined baking sheet.
- Repeat with all remaining chicken thighs.
- Divide 2 tablespoons of the butter between all the chicken thighs, placing a small amount on top of each chicken thigh.4 tablespoons butter
- Bake chicken thighs for 10 minutes.
- Remove from oven, flip each chicken thigh over, and divide remaining 2 tablespoons of butter over the chicken thighs.4 tablespoons butter
- Bake an additional 10 minutes, or until the chicken thighs register 165ºF. The juices should run clear when the chicken is fully cooked.
Notes
Nutrition
How To Make Boneless Chicken Thighs in Oven

Step 1: Set up three shallow dishes with the seasoned flour mixture, whisked eggs with water, and combined breadcrumbs. Preheat your oven to 400°F and line a sheet pan with parchment paper.
Step 2: Pat each chicken thigh completely dry, then flatten it slightly. Coat thoroughly in flour, shaking off excess, then dip in egg mixture, and finally press firmly into breadcrumbs to coat all sides.
Step 3: Place breaded chicken thighs on the prepared baking sheet with space between each piece. Divide 2 tablespoons of butter into small pieces and place on top of each thigh.
Step 4: Bake for 10 minutes, then remove from oven, flip each piece, and top with remaining 2 tablespoons of butter divided among the thighs. Return to oven for another 10 minutes until golden brown and the internal temperature reaches 165°F.
FAQs for Crispy Baked Chicken Thighs
Yes, but you'll need to increase the cooking time to 35-40 minutes total, ensuring the internal temperature reaches 165°F. Bone-in thighs may not get quite as evenly crispy. If you prefer bone-in, skin-on chicken thighs for that crispy skin texture, skip the breading and simply season them well, then bake at a higher temperature (425°F) to crisp up the skin.
The key to maintaining crispiness is ensuring your chicken thighs are thoroughly patted dry with a paper towel before breading. Excess moisture is the enemy of crispy coatings. Also, make sure to place the coated chicken on a baking sheet lined with parchment paper to prevent sticking and promote even browning.
Yes, you can cook these two different cuts of chicken at the same time. This is perfect if you want to do a mixture of breasts and thighs as not everybody enjoys white or dark meats, so you can customize this meal to your family’s tastes. Just make sure to pound out the breasts to the same size thickness as the thighs or to slice them into smaller pieces so that they can all cook at the same pace and be finished together.
Using both creates the ultimate texture – panko provides extra crunch while regular breadcrumbs fill in the gaps for complete coverage. However, you can use all panko if that's what you have on hand. Just avoid using only regular breadcrumbs as they won't be as crispy.

My Best Tips for Making Boneless Chicken Thighs in Oven
☞Spread Each Thigh Flat During Coating: Press the chicken thighs to flatten them as much as possible when dipping in each coating station. This creates more surface area for the crispy coating and ensures even cooking throughout.
☞Don't Skip The Butter: Placing small pats of butter on top of the chicken before and after flipping isn't just for flavor. The butter helps the breadcrumb coating brown beautifully and adds richness that mimics the results of deep frying.
☞Let The Coated Chicken Rest: After breading all your chicken thighs, let them sit for 5-10 minutes before baking. This allows the coating to set and adhere better, resulting in less coating falling off during baking.
☞Use A Wire Rack For Extra Crispiness: If you want even crispier results, place a wire cooling rack on your baking sheet and arrange the breaded chicken on top. This allows hot air to circulate underneath, creating an all-around crispy texture.
What to Serve With Crispy Baked Chicken Thighs
These crispy chicken thighs pair beautifully with classic comfort food sides. Creamy mashed potatoes or garlic mashed cauliflower are perfect for those who love a hearty plate. Coleslaw adds a fresh, crunchy contrast that cuts through the richness of the breaded coating.
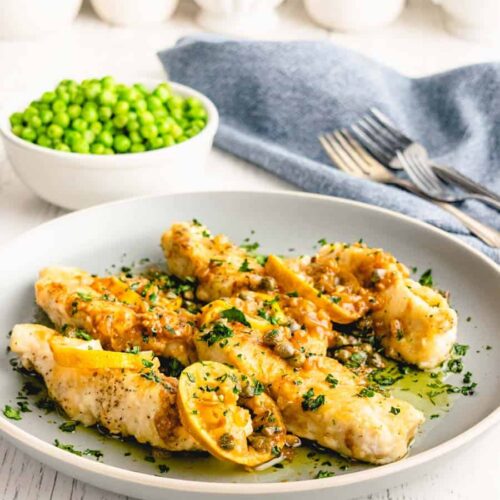
For a lighter meal, serve alongside roasted vegetables like Brussels sprouts, peas, or asparagus drizzled with olive oil. Mac and cheese is always a crowd-pleaser, especially with kids, while Caesar salad keeps things simple and satisfying.
Honey butter biscuits or dinner rolls round out the meal nicely, and don't forget the dipping sauces! Ranch dressing, honey mustard, or barbecue sauce all make a delicious chicken dip that complements the crispy coating perfectly.
Storage & Reheating Tips
Room temperature
Crispy baked chicken thighs are best served immediately while the coating is at peak crispiness. They should not be left at room temperature for more than 2 hours.
Refrigerator Storage
Store leftover chicken thighs in an airtight container in the fridge for up to 3-4 days. Note that the coating will soften somewhat during storage, but they're still delicious cold or reheated. Leftovers make excellent sandwiches or salad toppers the next day!
Freezer Storage
Freeze cooked chicken thighs in a freezer-safe container or bag for up to 3 months. Freeze pieces individually on a baking sheet first, then transfer to a container to prevent sticking.
Reheating
For best results, reheat in a 375°F oven for 10-12 minutes until heated through and the coating crisps up again. You can also use an air fryer at 350°F for 5-7 minutes. Avoid using the microwave as this will make the coating soggy.
Make Ahead Tips
Bread the chicken thighs completely and arrange them on the baking sheet up to 4 hours ahead. Cover loosely with plastic wrap and refrigerate. When ready to cook, let them sit at room temperature for 10 minutes, then proceed with the butter and baking instructions. This is perfect for dinner party prep.
More Favorites From Longbourn Farm


Did you make this recipe? Leave a ⭐️ review and share it on Instagram, Facebook, or Pinterest!


Anonymous
Can you make and freeze or cook and freeze for later.. looking to prep for a trip..
thanks for any advice.
Alli
This isn't the best recipe to bake ahead and freeze. I do have a baked chicken recipe that isn't breaded that would work better: How to Meal Prep Chicken Breast.
Cathy
I made this today. They turned out really good. One change was I put 1 T pickle juice with the egg. I forgot it was supposed to be 2 T and had to mix 1 more egg and juice to finish. I baked on a dark pan giving me a good crisp on the chicken.
Alli
So glad you liked it!
Leona
These were the worst thighs I have ever eaten. Besides a lot of preparation for 6 thighs I had to throw them away after we each ate one. What a sin to throw the time spent to prepare them & spend the money on the meat, eggs, etc. I had intended to have 2 meals out of this recipe & had to eat something for one meal only to throw the rest away. Never again!
Alli
Hi Leona, I'm sorry the recipe didn't work out for you. I've tested this recipe multiple times and it turns out each time. I'd be happy to help you troubleshoot!
Debbie
Love this recipe…delicious!
Alli
So glad!
Rick
I put the spices on the chicken instead of in the breading for more flavor .After baking 20 minutes I added swiss cheese to top and bakes for another 5 minutes.. Put one tablespoon of warm spaghetti sauce for a great crispy and easy chicken parm.
Anonymous
Delicious
Alli
I'm glad you liked it!
Rebecca
Yummm... I'm a huge fan of chicken thighs are they are so moist and flavorful. This recipe would also be so good diced and put on a salad too!
Alli
Oooo yes!! I agree! They would be awesome over a salad.
Cindy
Going to try this on the weekend and maybe the holiday too. Can I use olive oil instead of butter do you think?
Alli
Yes for sure. They may not brown quite as much with the olive oil but if that's the case you can broil for about a minute to get them a little more crispy.
Ashley
We love these baked chicken thighs! They are our go-to when we don't know what else to make for dinner.
Alli
Thank you!
Alli
Extra crispy and delicious!