
Learn how to build a DIY Chick Brooder for your homestead with our easy guide, including materials, safety tips, and temperature management for healthy baby chicks. Perfect for beginners!
WANT TO SAVE THIS RECIPE?
Enter your email below and we'll send it straight to your inbox. Plus you’ll get great new recipes from us every week!
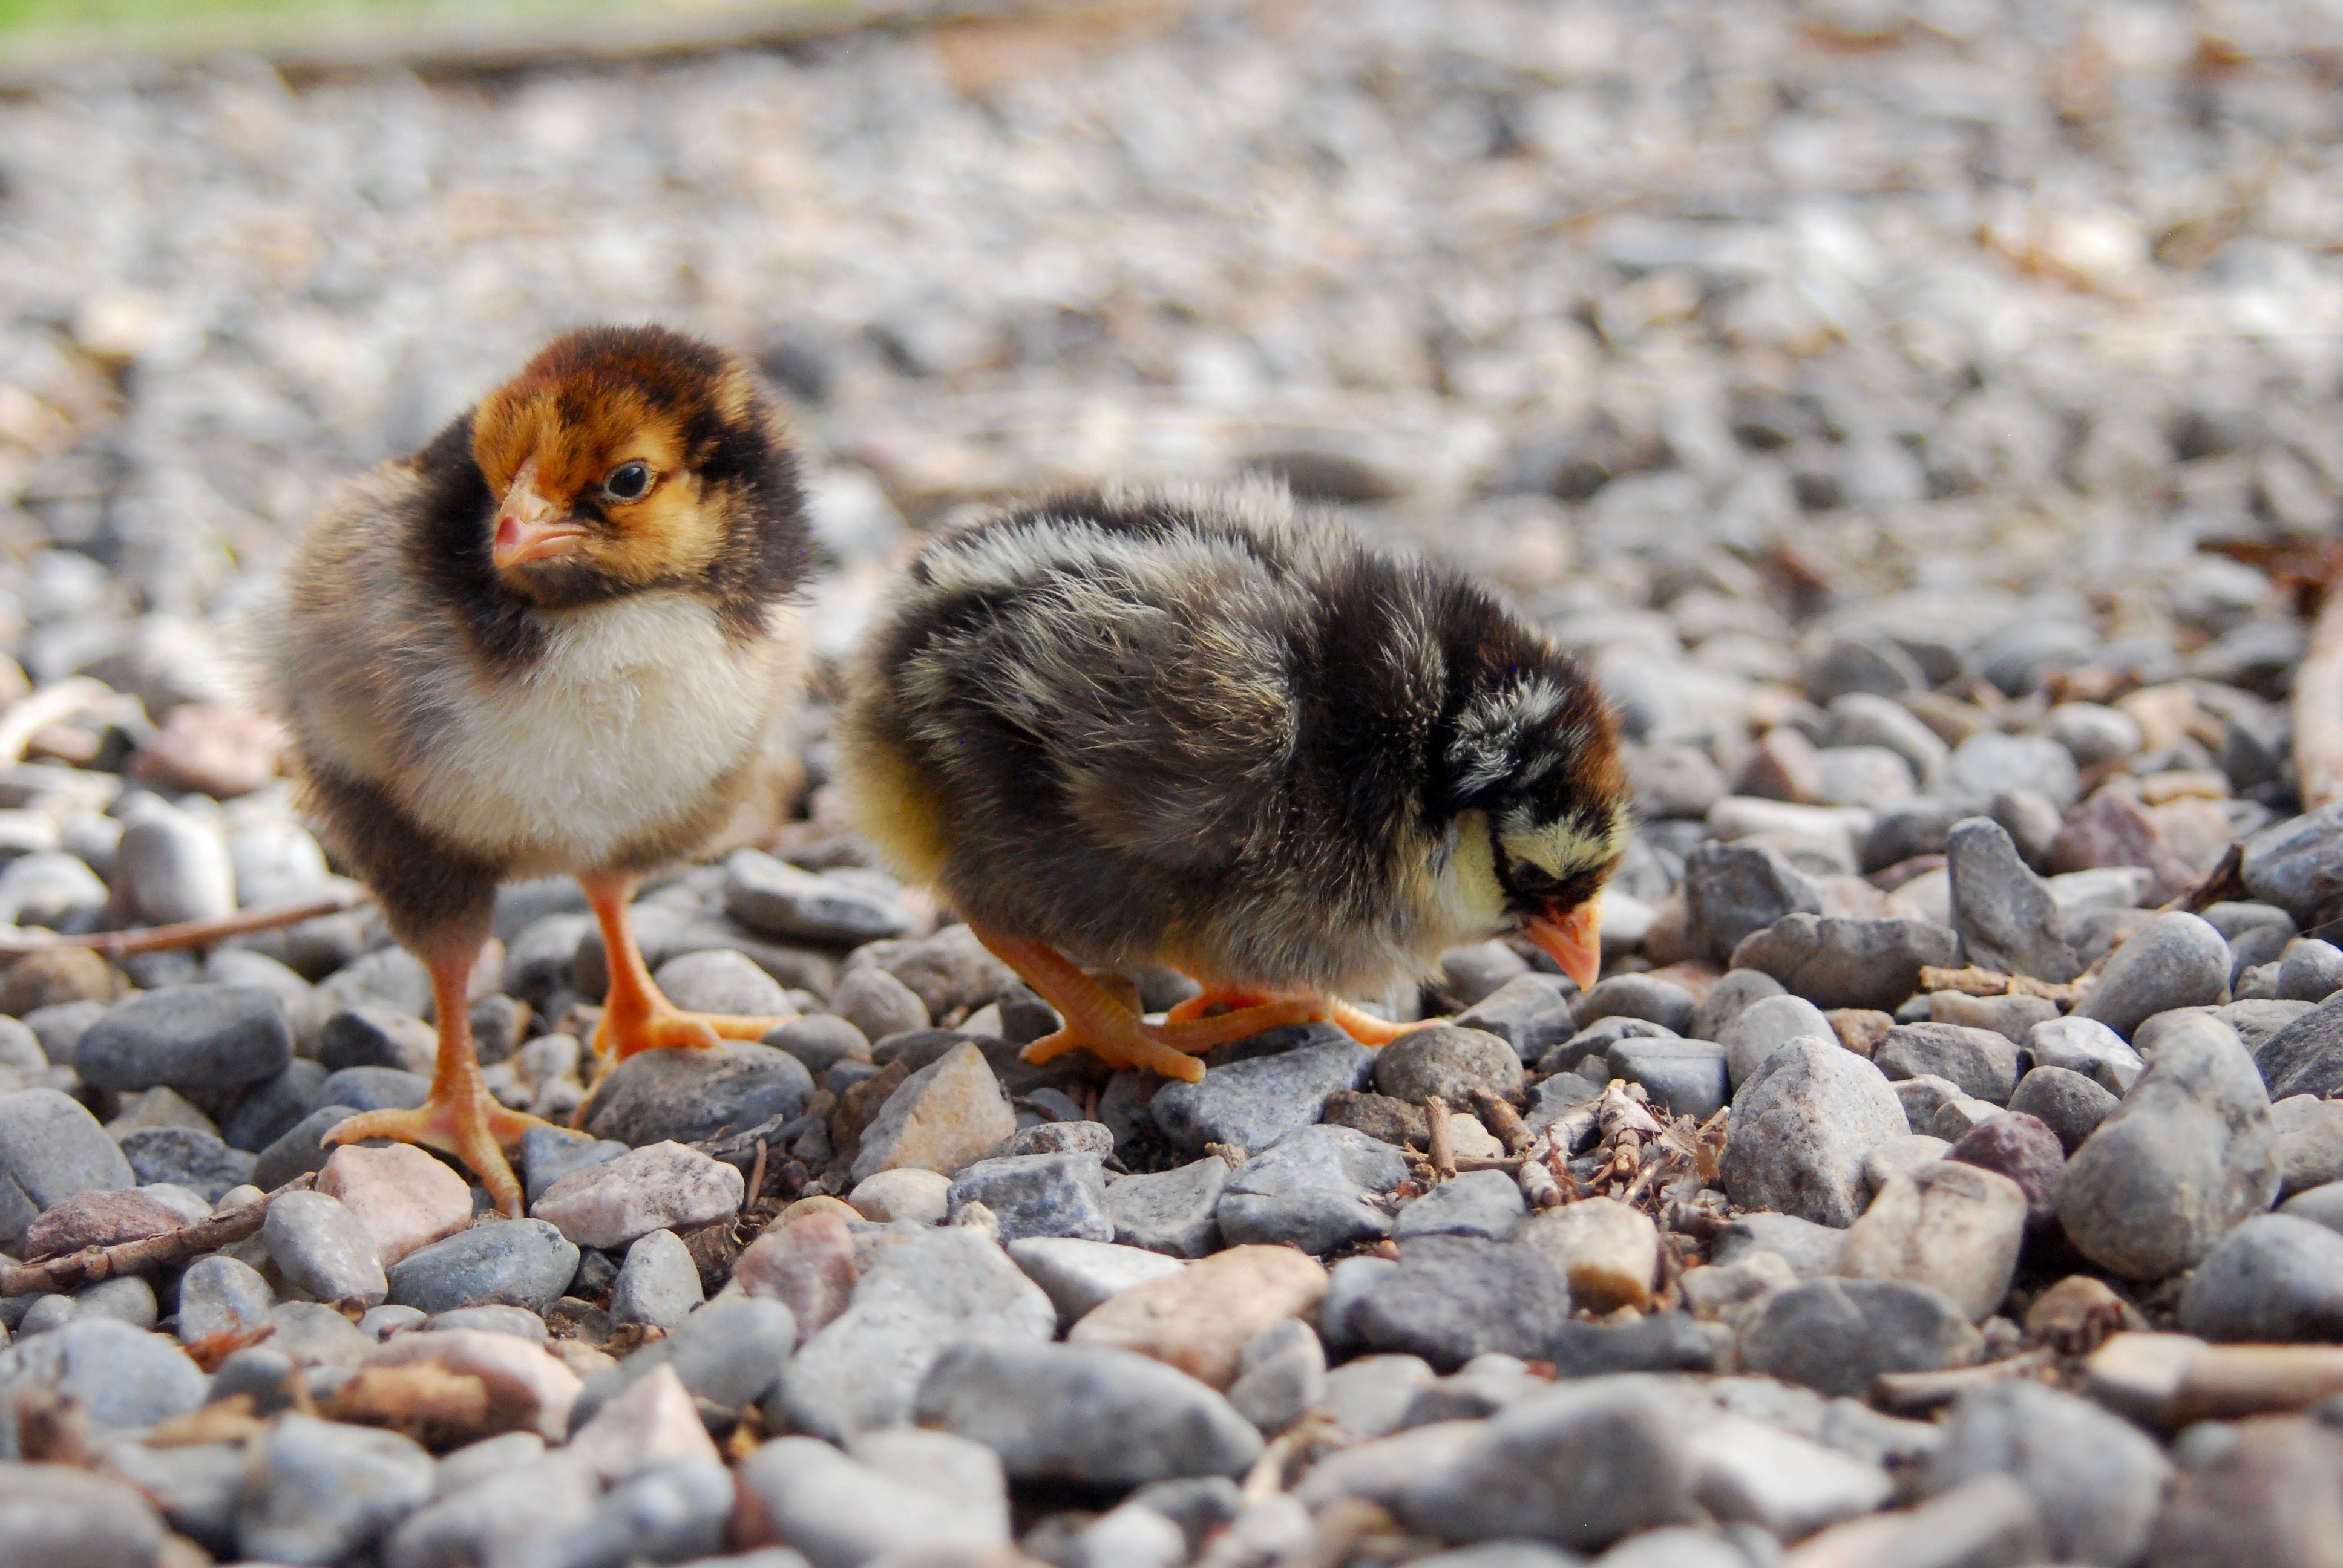
Whether you've just purchased baby chicks from the local farm store or hatched eggs from an incubator, you need a place to safely keep the little ones.
When it comes to animal housing I have three main rules: Safe, sturdy, and easy to clean. Which is why my DIY chick brooder is pretty much the easiest thing you'll ever make for your farm!
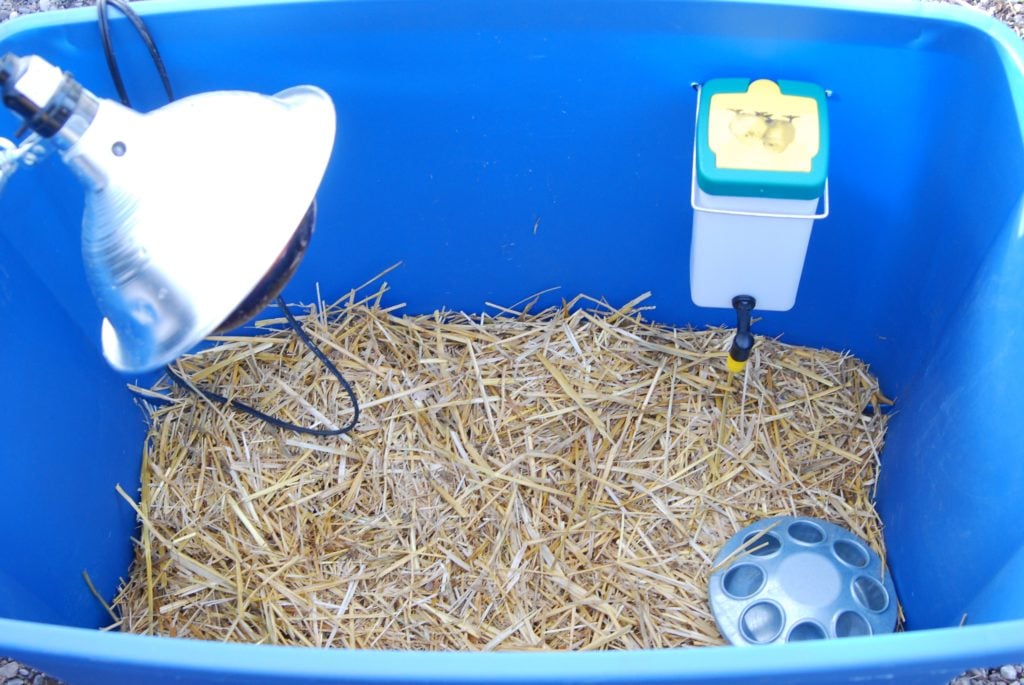
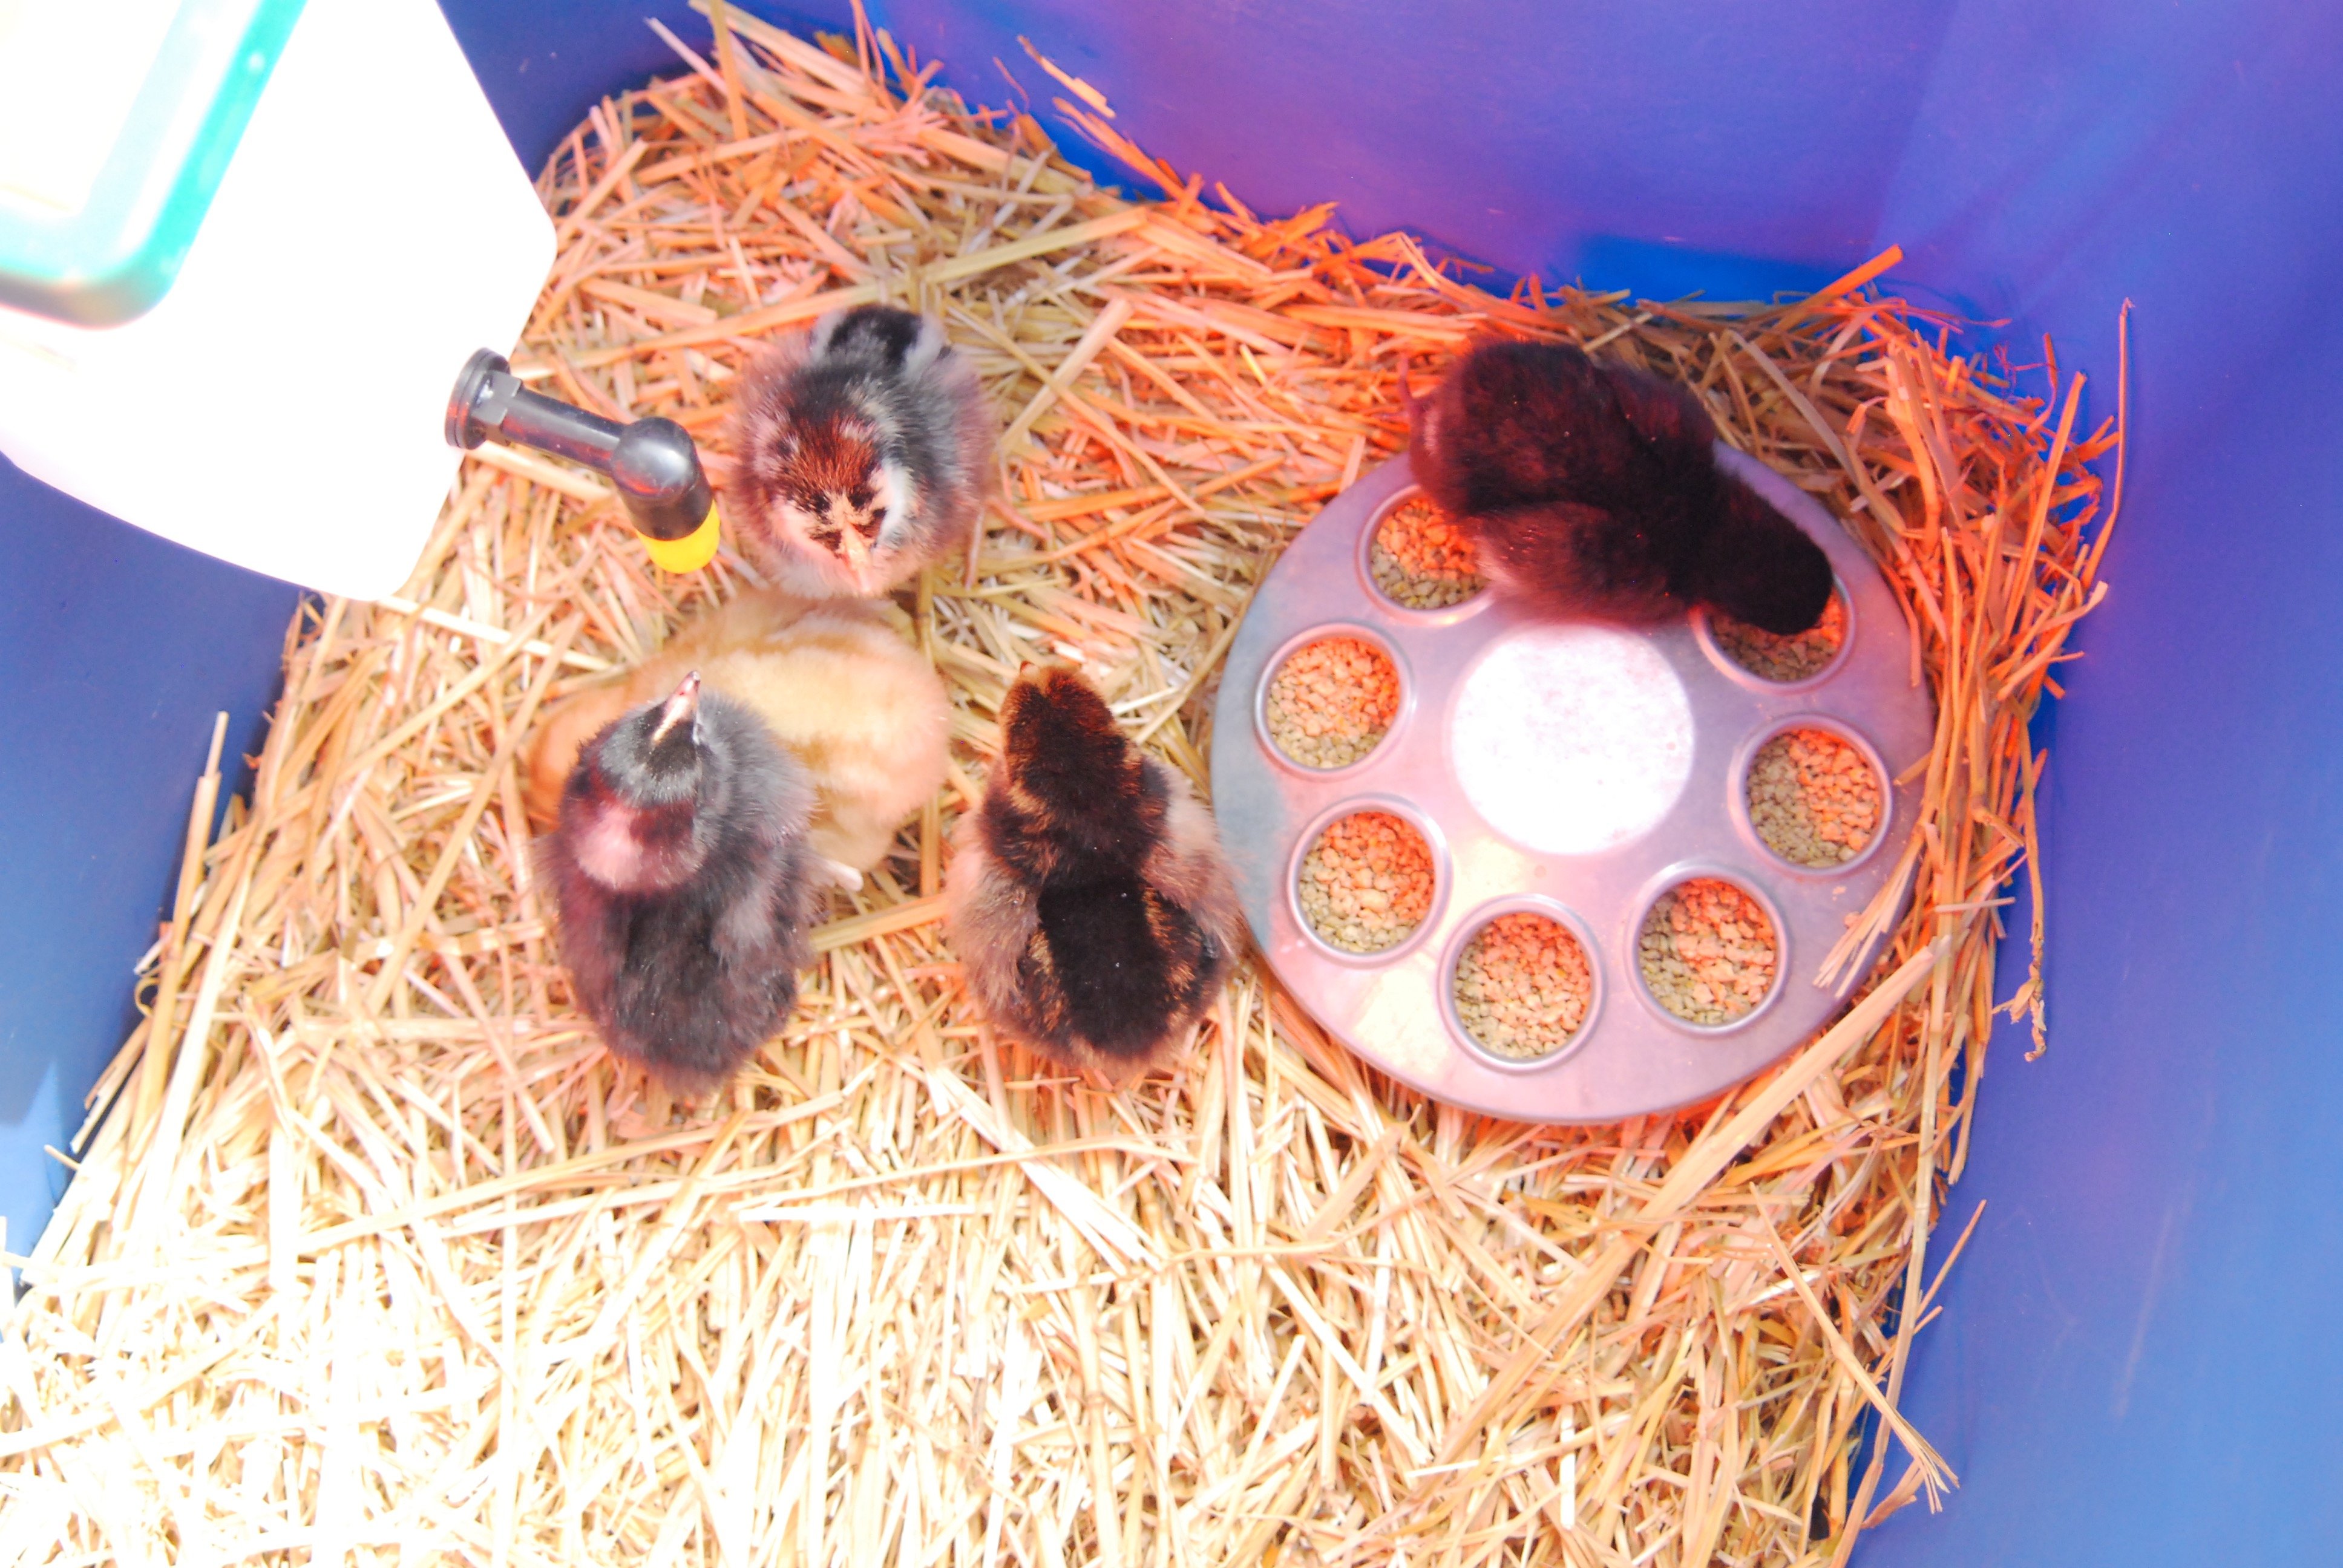
The reason my brooder is so easy is that it's just a large plastic tote. Mine is about 18 inches wide, 36 long and 18 deep. But the size all depends on how many chicks you want to have. I have 5 in mine right now, I could probably raise 8 in this chick brooder.
What is a Chick Brooder?
A chick brooder is a heated enclosure that mimics the warmth and protection a mother hen would naturally provide. For the first 6-8 weeks of life, baby chicks cannot regulate their own body temperature and require an external heat source to survive.
A well-designed brooder maintains the proper temperature, provides adequate space, and protects chicks from predators and drafts.
Why Build Your Own DIY Chick Brooder?
Building a DIY chick brooder offers several advantages over purchasing commercial options. You can customize the size to accommodate your specific flock size, use materials you may already have on hand, and create a design that fits your space and budget.
Most importantly, a homemade brooder often costs significantly less than store-bought alternatives while providing the same level of functionality.
What is Needed in a Chicken Brooder?
A good brooder for chicks needs the following basic amenities to keep them safe, warm, and fed.
- Heat source such as aheat lamp or heat plate
- Box or container with room for the chicks to move around
- Bedding
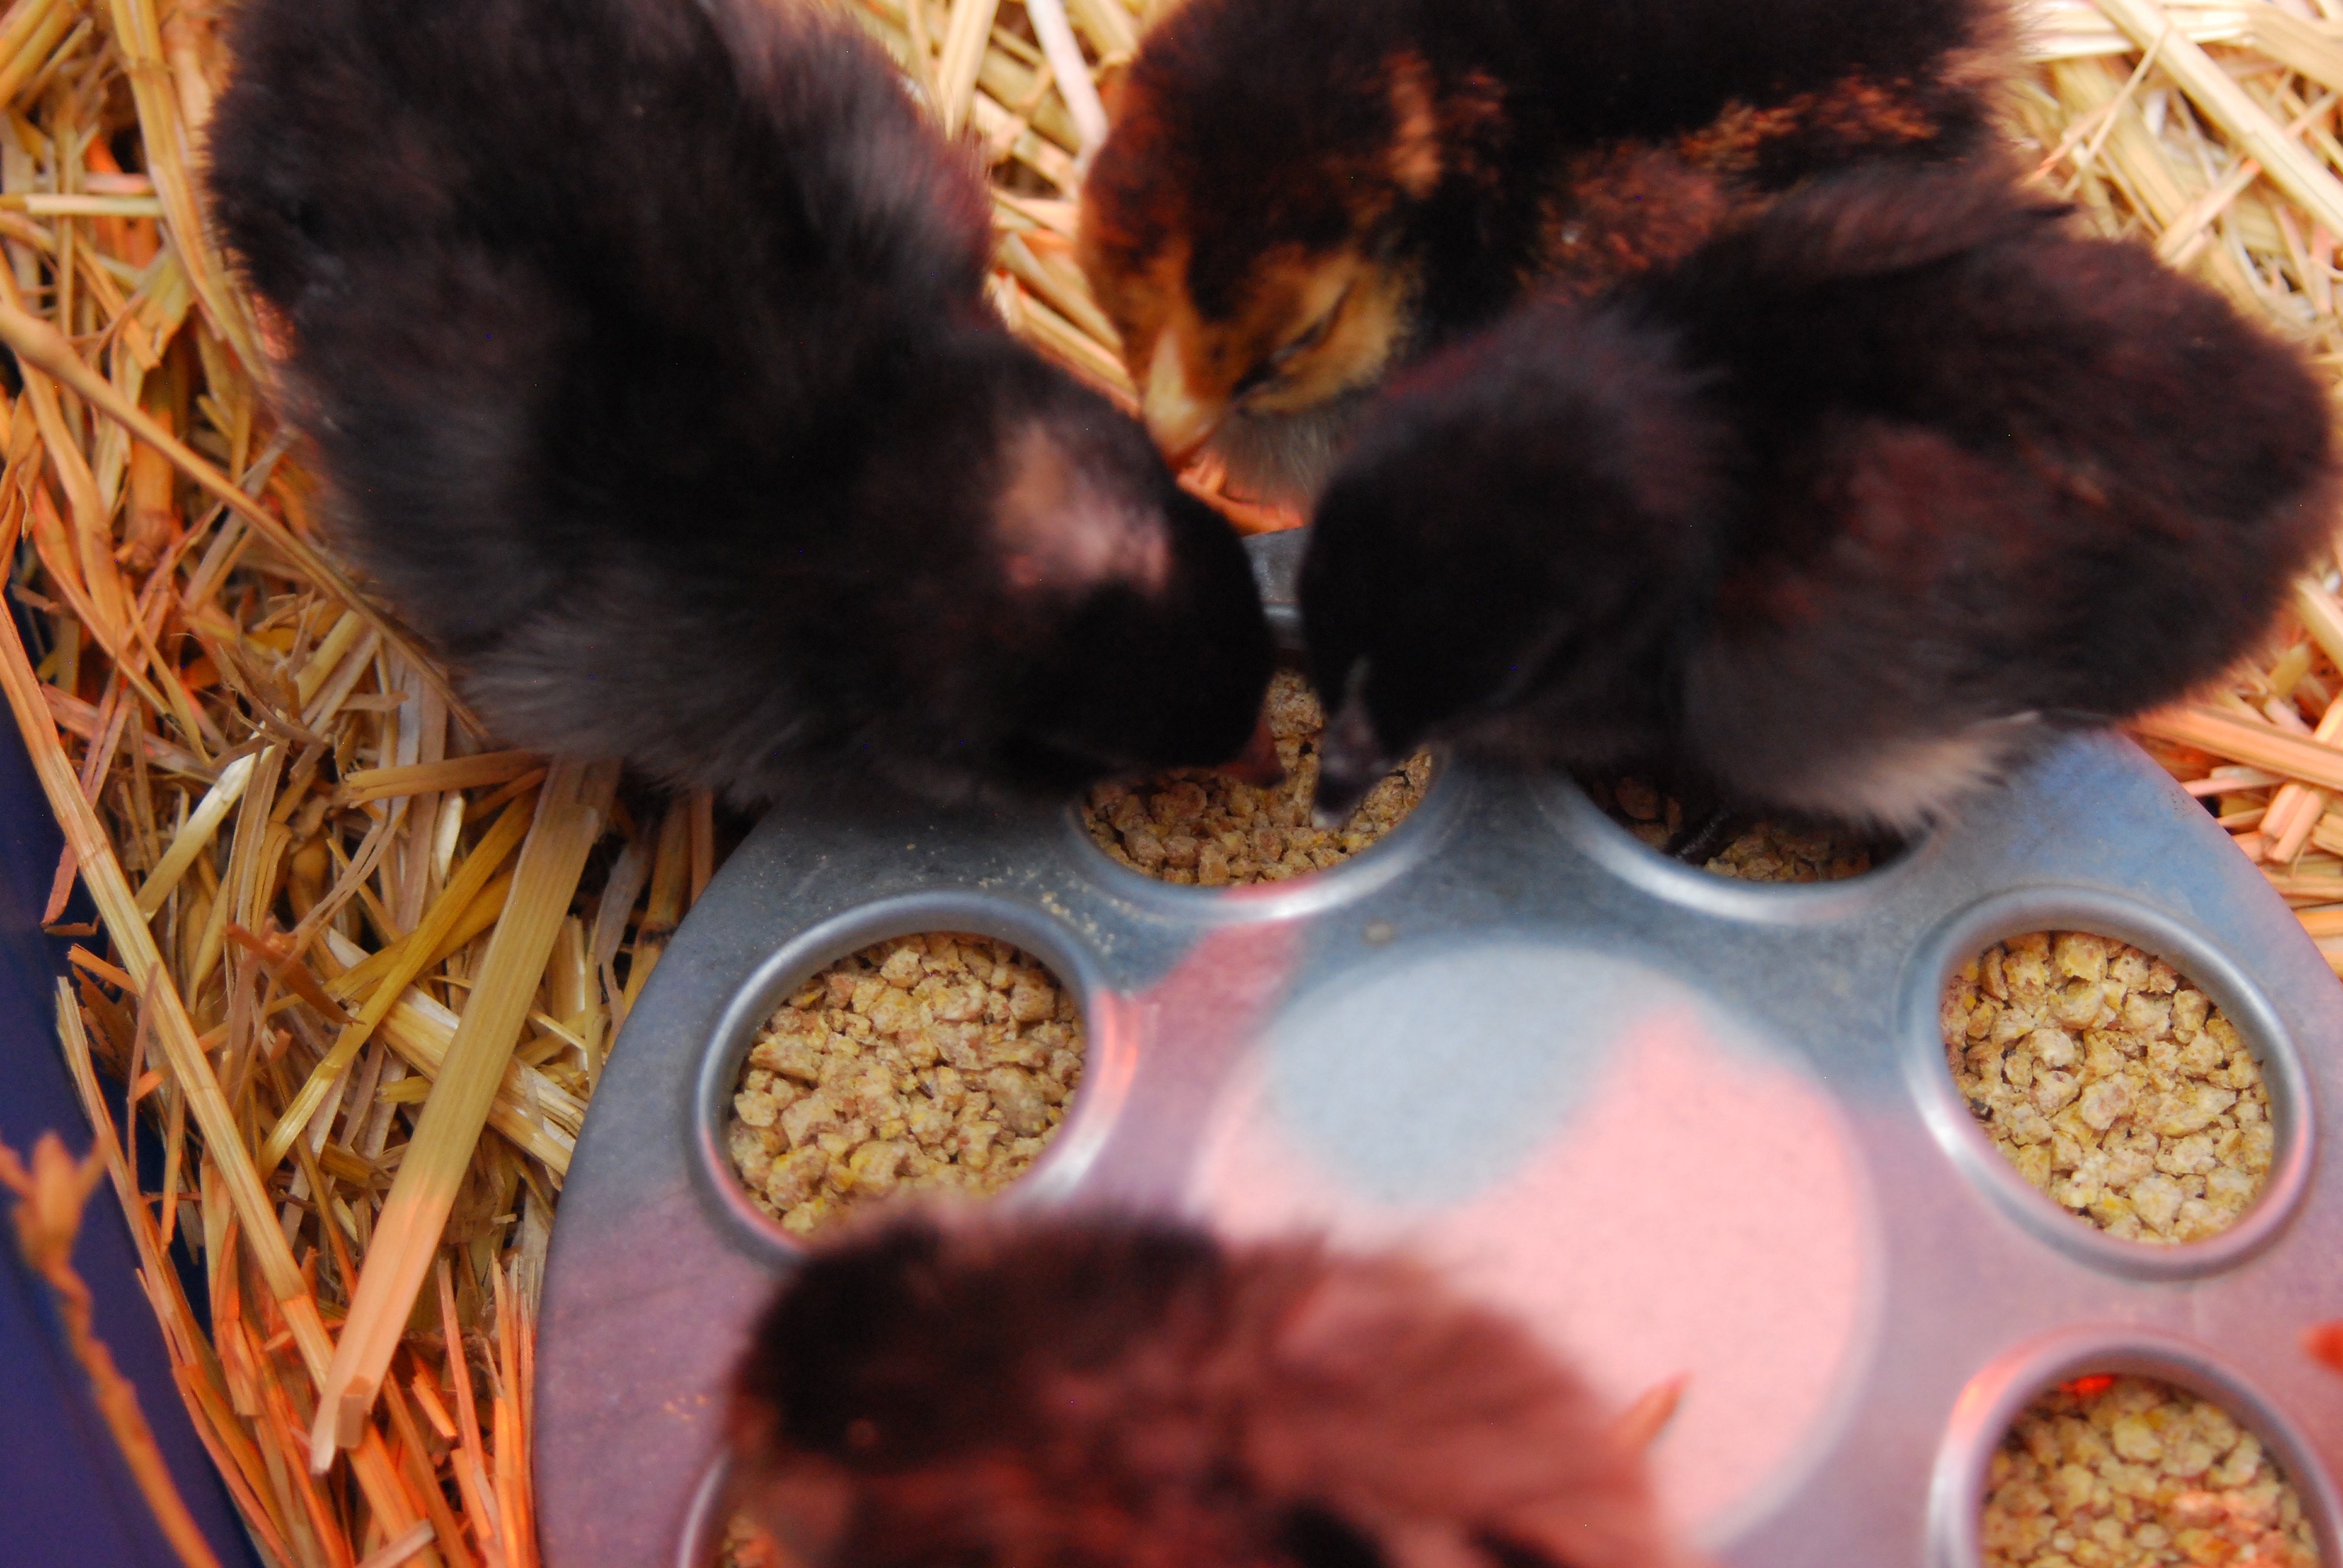
- Food
- Water
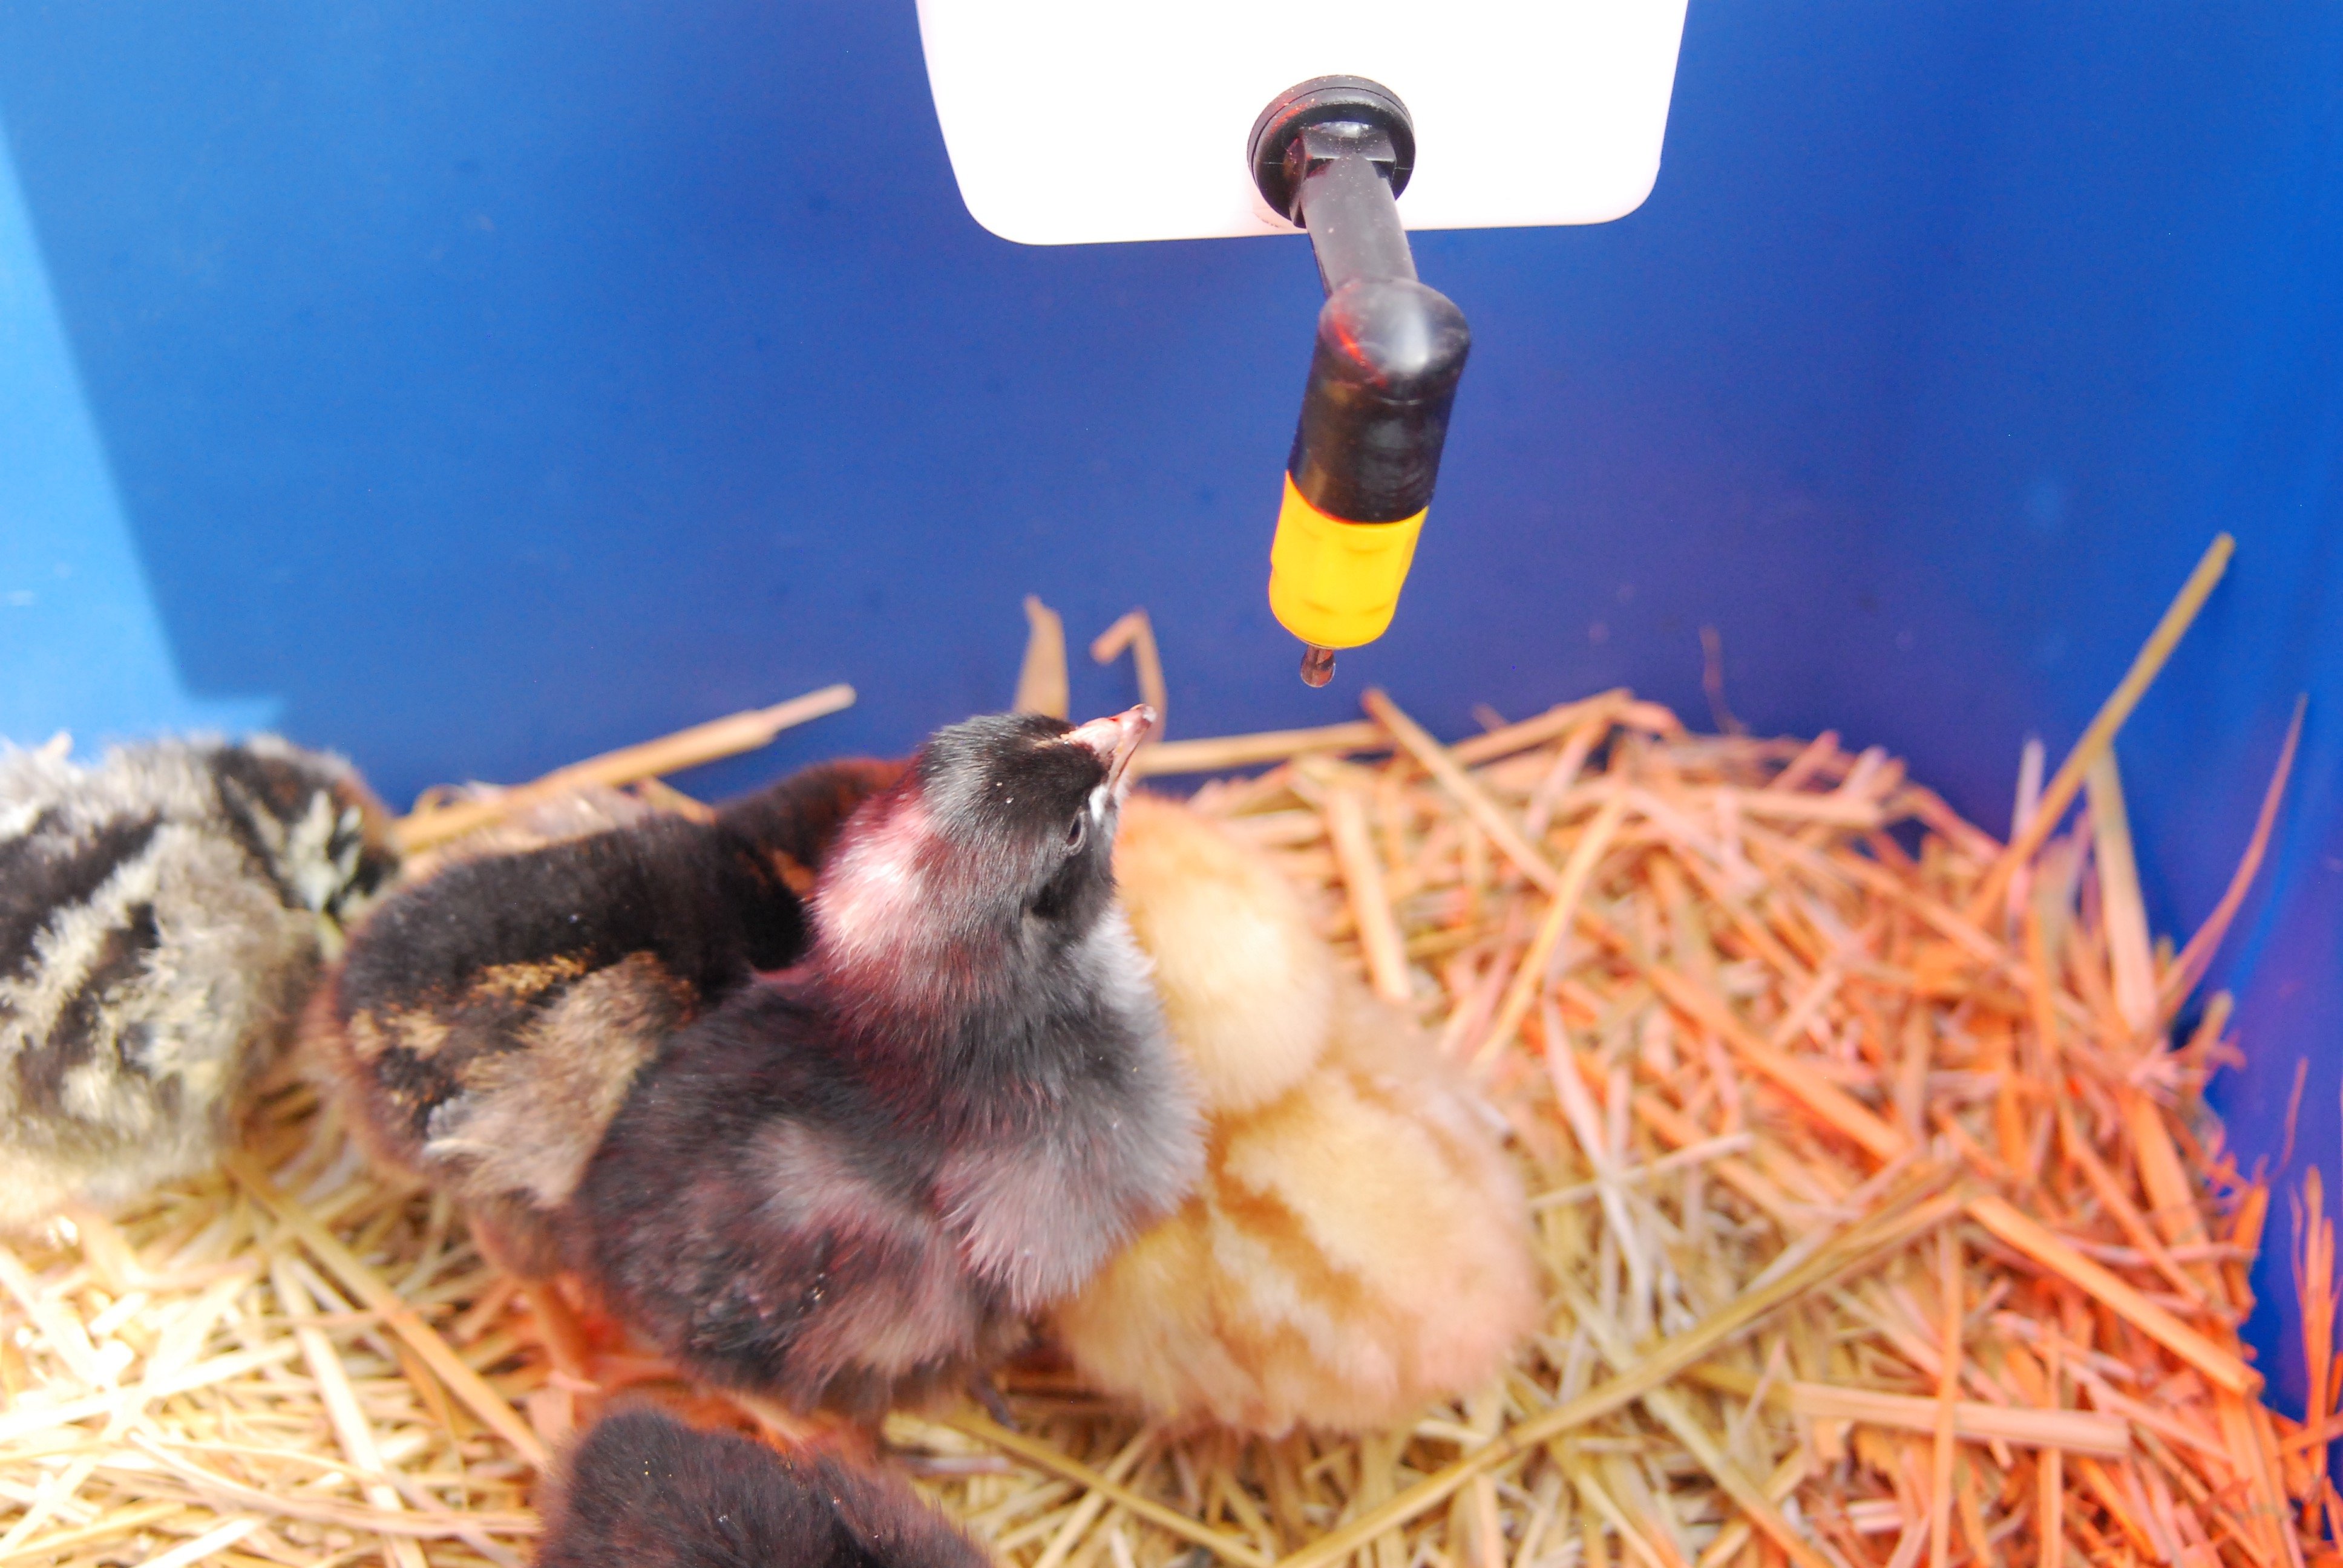
Heat Source
The most critical element of any chick brooder is the heat source. Baby chicks need temperatures starting at 95°F during their first week, decreasing by 5°F each subsequent week. Popular heat source options include:
- Heat lamps with red bulbs: Traditional and effective, but require careful positioning to prevent fires
- Radiant heat panels: Energy-efficient and safer than heat lamps
- Ceramic heat emitters: Provide heat without light, ideal for maintaining day/night cycles
Since writing this post originally, I have purchased and use a heat plate. I like the heat plate for safety, but it can hide sick chicks or they can be reluctant to leave it. Be sure to check under it regularly and make sure everyone is moving about, eating, and drinking.
Brooder Box or Container
Your brooder container should provide adequate space for your chicks to move around while maintaining heat efficiently. Suitable containers include:
- Large cardboard boxes (temporary solution)
- Plastic storage tubs
- Wooden boxes built from scratch
- Repurposed items like kiddie pools or large dog crates
Bedding Material
Proper bedding absorbs moisture, provides traction, and contributes to overall cleanliness. Recommended bedding options include:
CAUTION: With chicks, stay away from cedar shavings for bedding. The strong aromatic oils can irritate their respiratory tracts and cause permanent damage.
Here are the options for bedding materials:
- Pine shavings
- Paper towels (for the first few days)
- Straw or hay
- Sand (for older chicks)
I bed the brooder with straw or pine shavings.
Food and Water Systems
Chicks need constant access to fresh water and appropriate starter feed. Use shallow dishes or specialized chick feeders and waterers to prevent drowning and contamination.
For feeders, I just use a basic feeder, nothing special. It does get pooped in, but such is life with chicks!
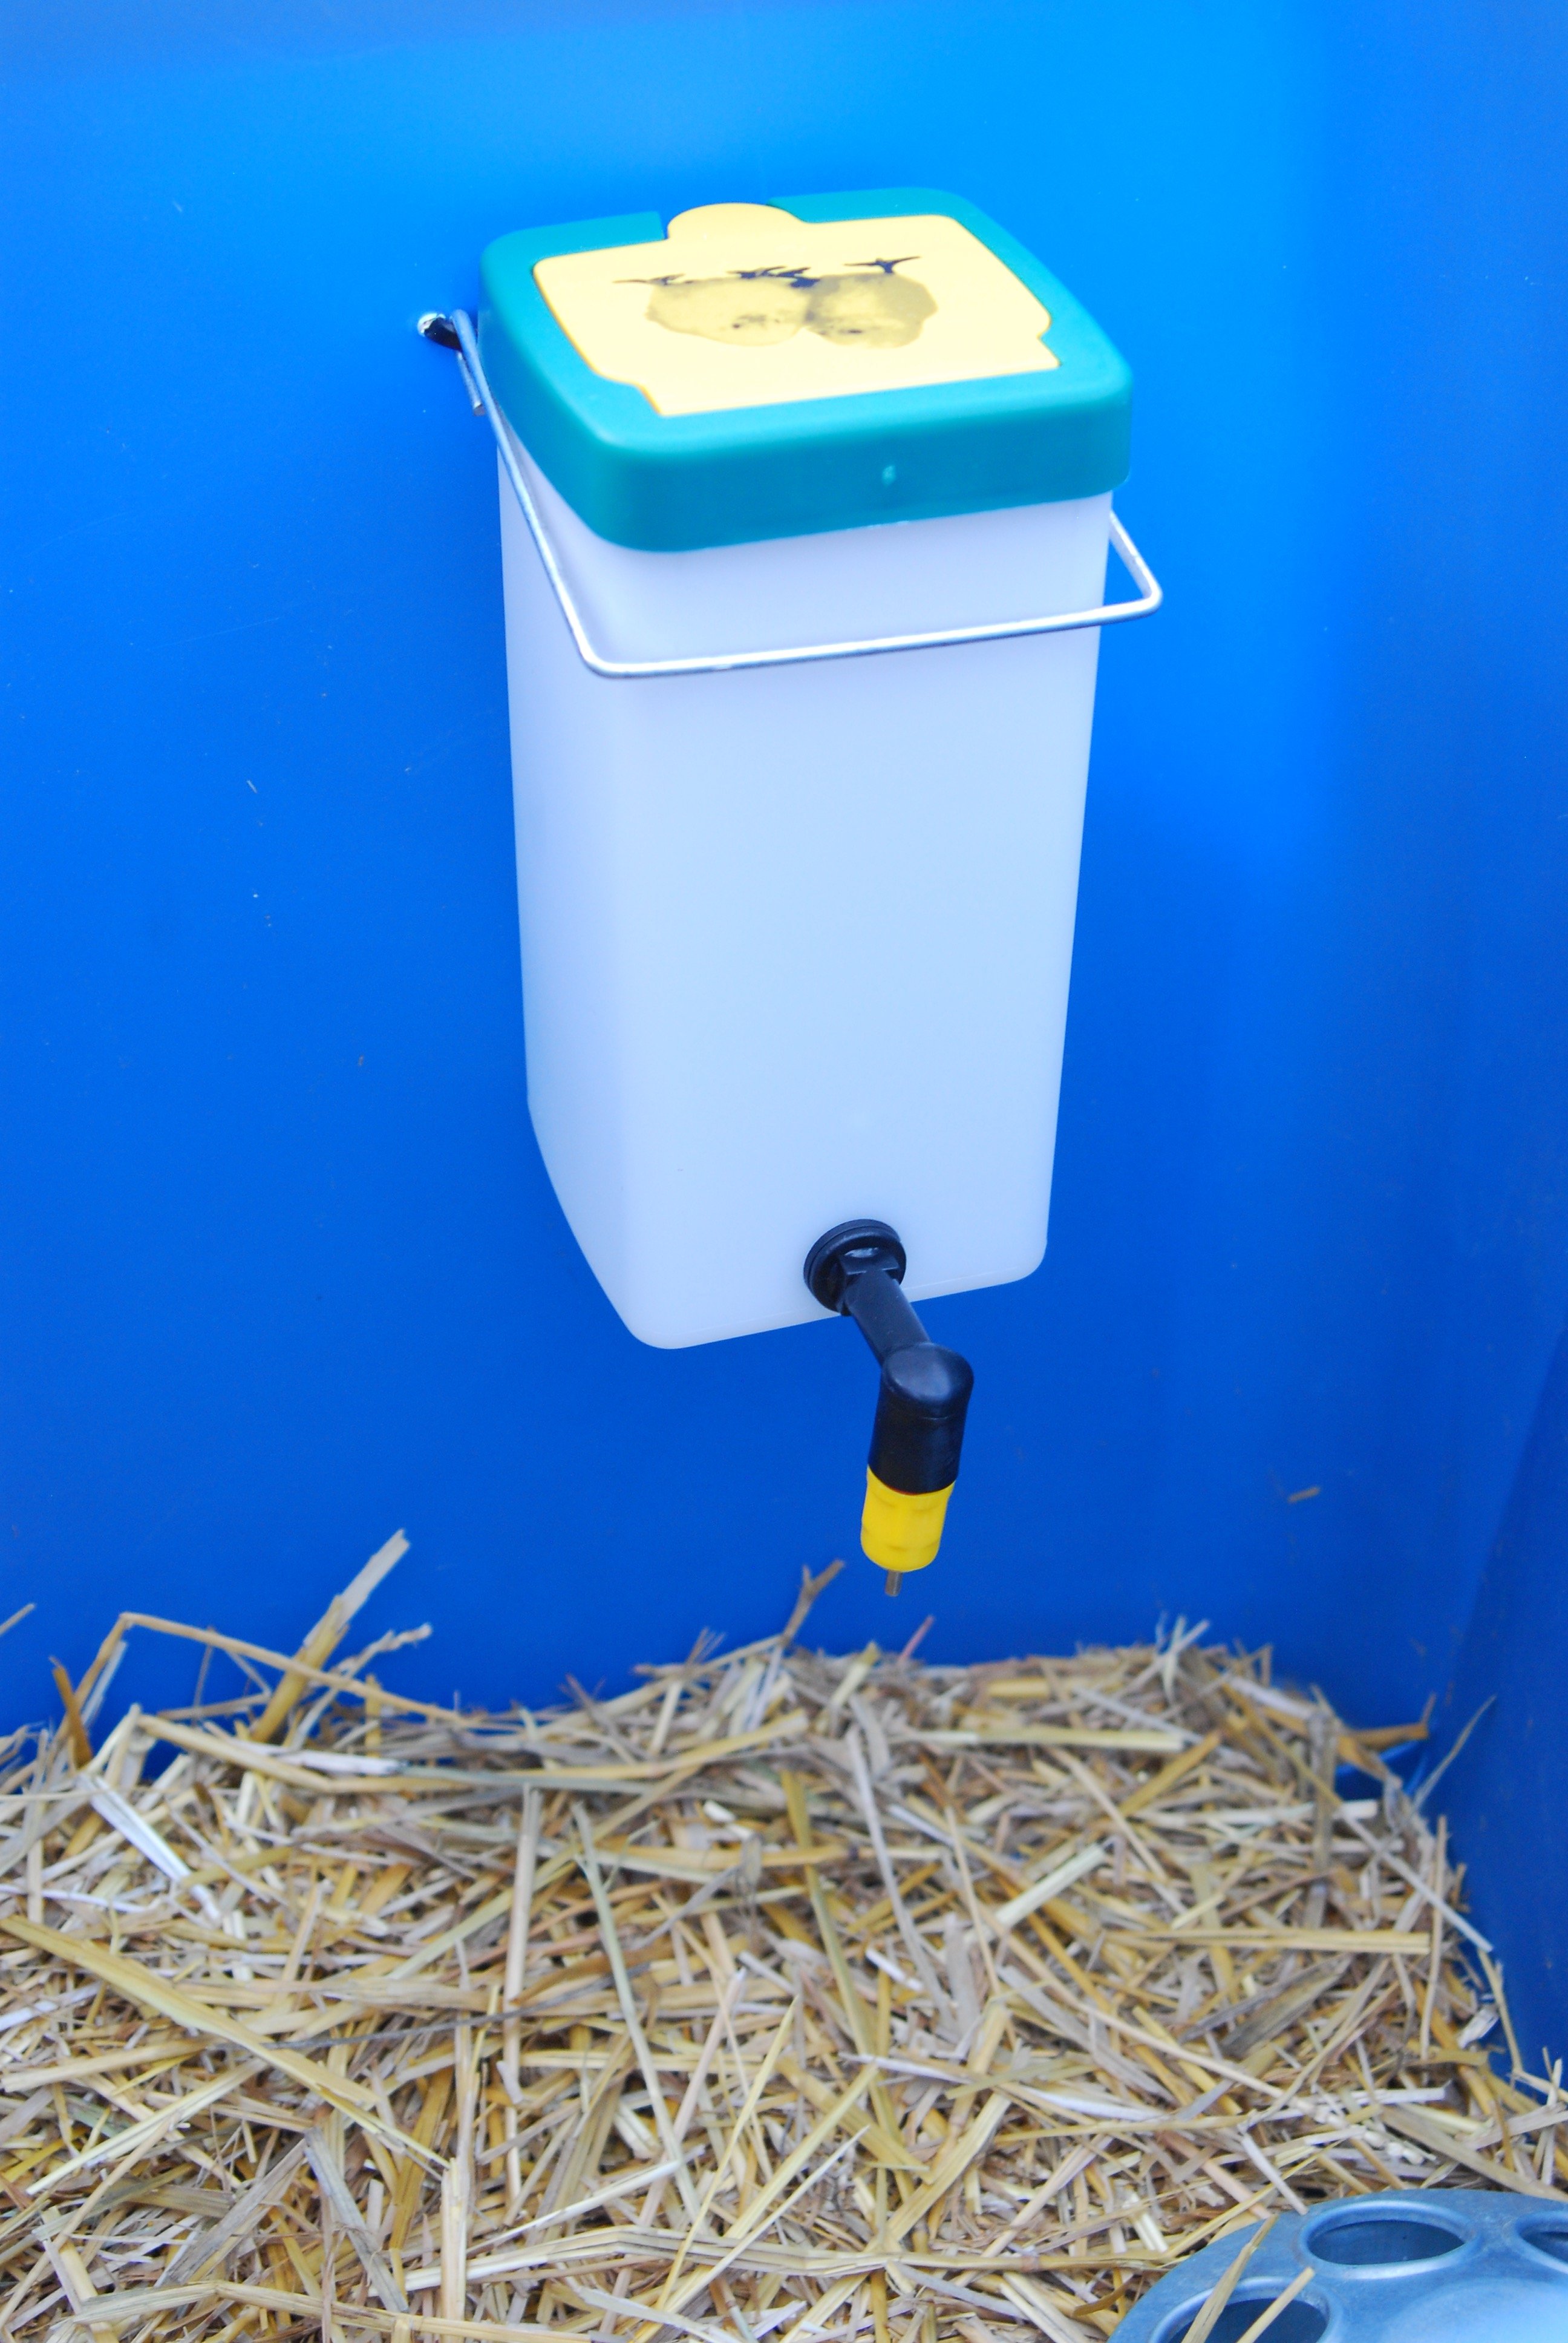
Waterer for a Chick Brooder
The waterer I use is a nipple drinker made for chicks. The only thing that makes it different from a nipple drinker made for hens is that it's small. You can also just order nipples with screw tops and attach them to water bottles. How is that for easy?
Just know that if you use one of these waterers, you will have to teach your chicks to drink out of it—see below for tips!
This is waterer is working SO much better than just using a traditional on-the-ground waterer. I always had issues with spilling and soiling the water literally seconds after changing it but no more!
How to Mount a Waterer in a Chicken Brooder
Note: See the photos below for visual help following these steps.
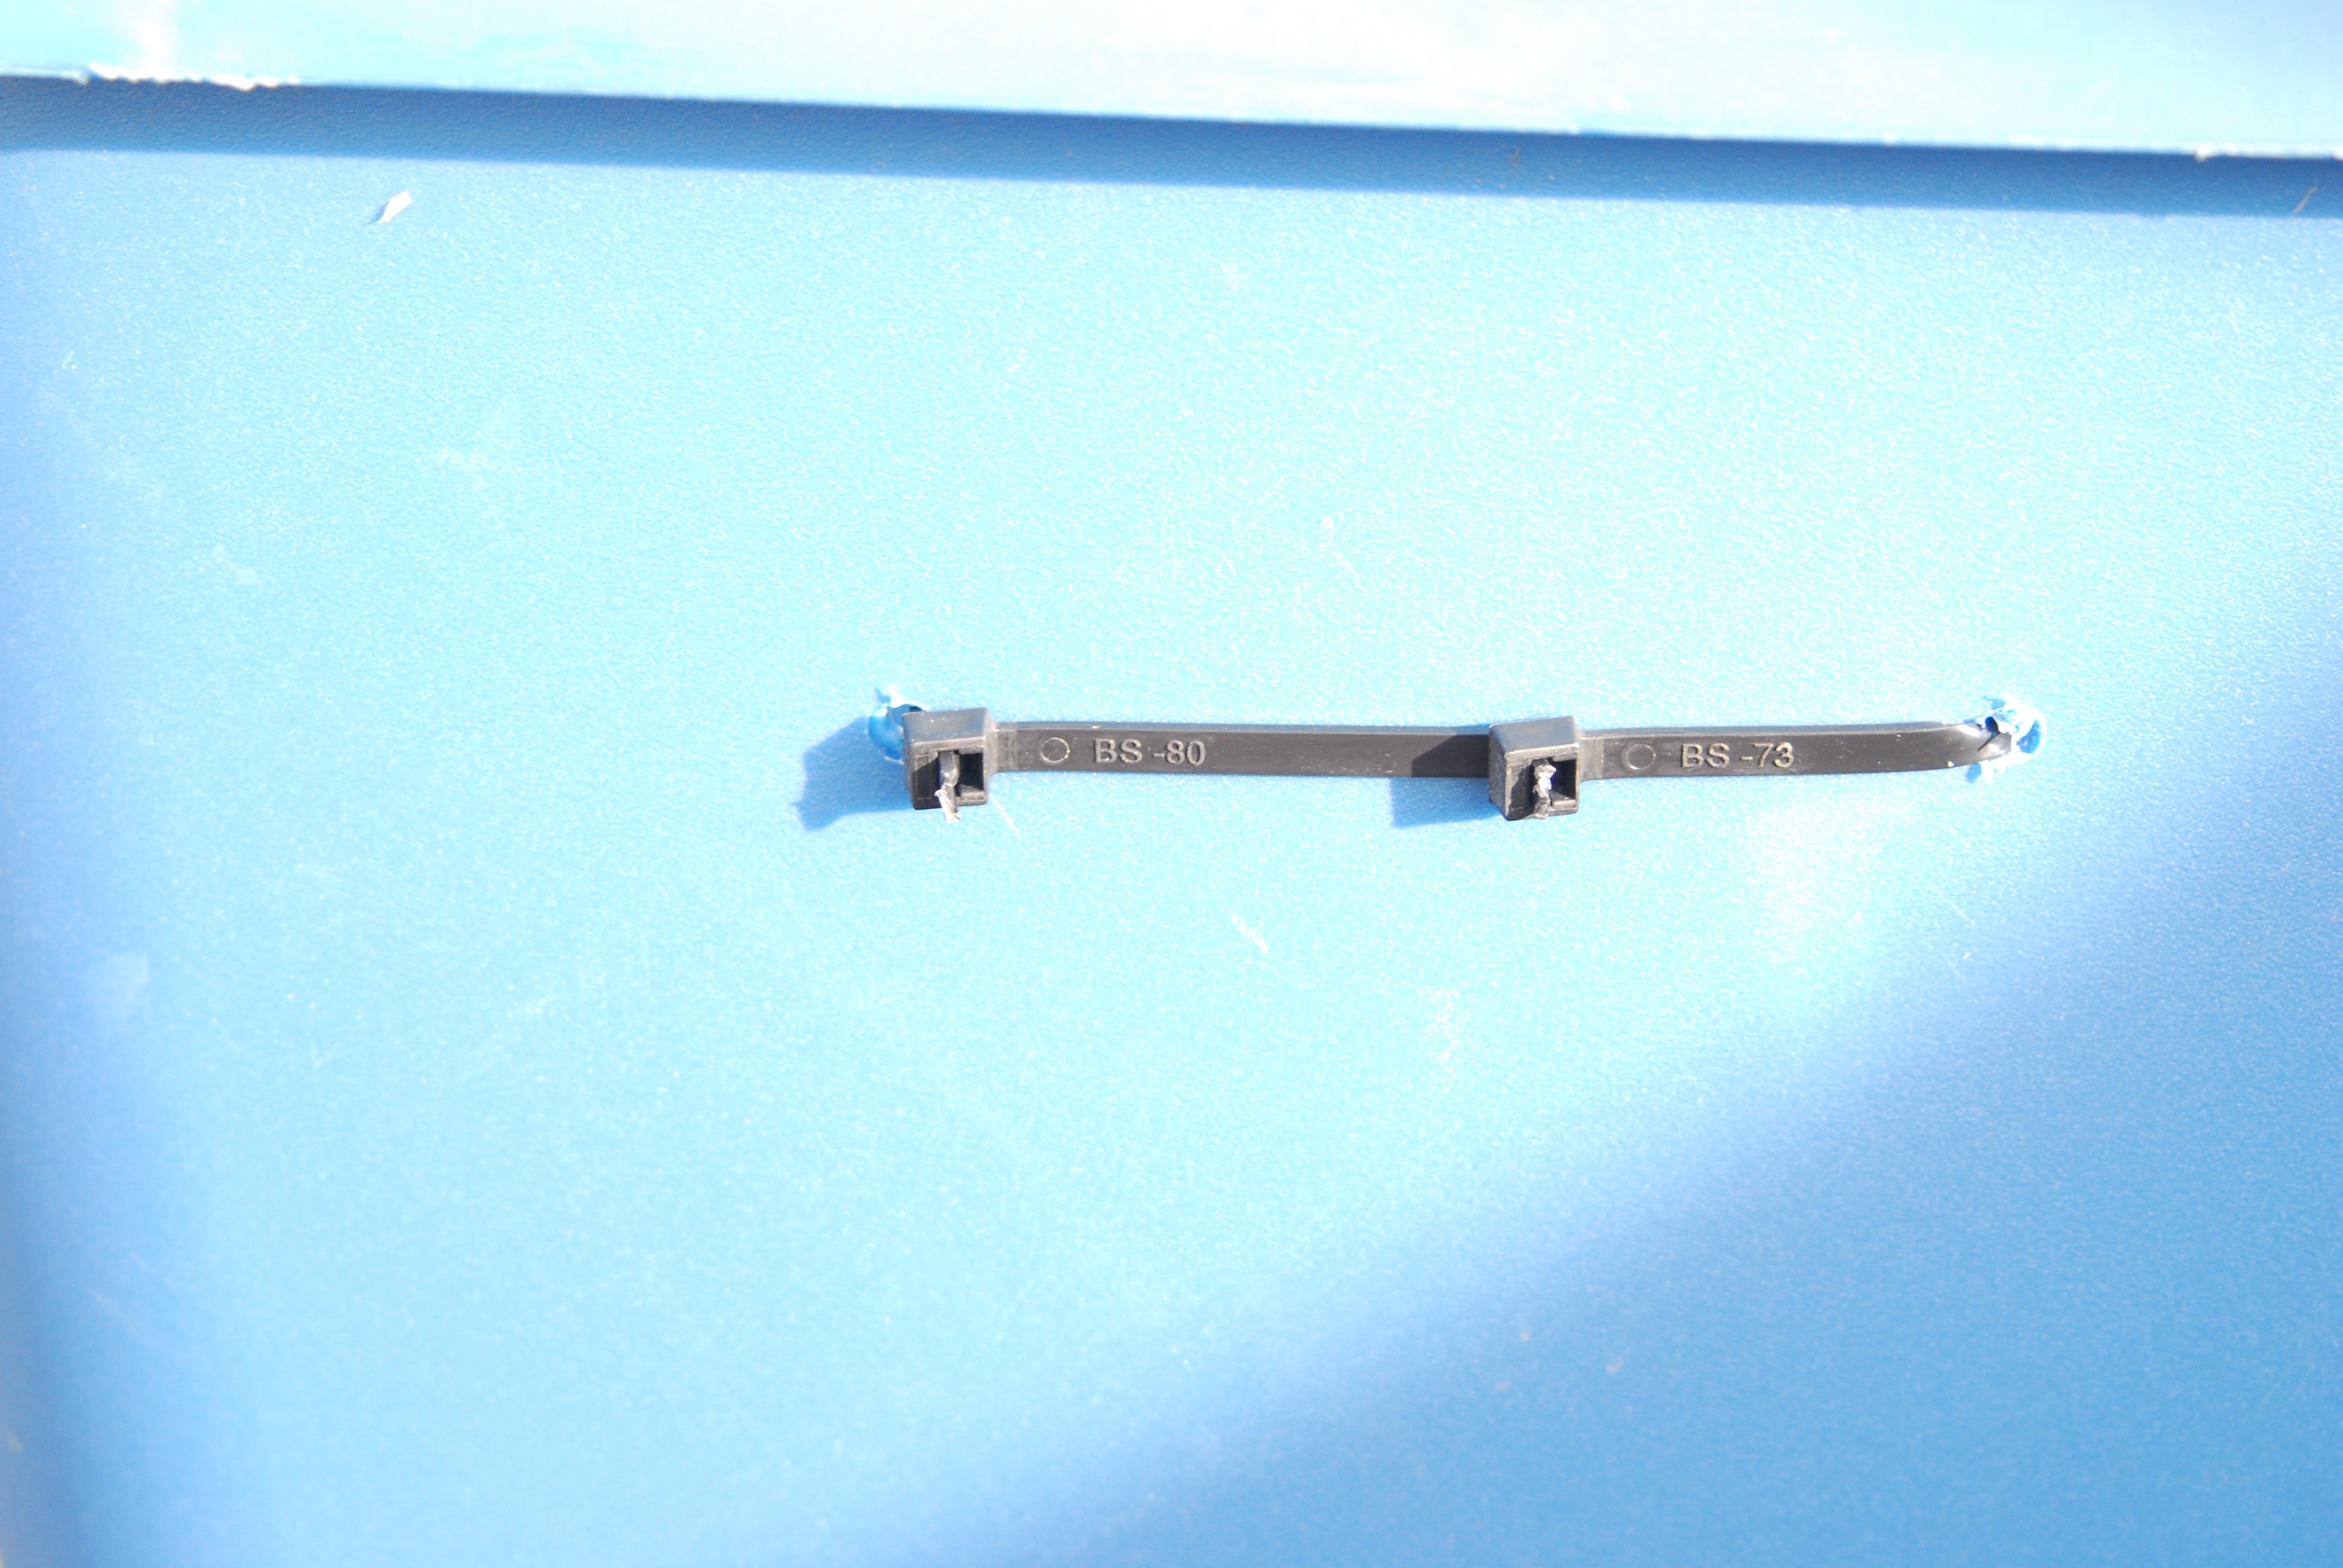
- Drill holes in the tote slightly narrower than the waterer; this will keep it secure.
- Loop a zip tie through them.
- Hooked the wire holder through the zip ties.
- The waterer will slide in through the top.
Teach Chicks to Drink Out of a Nipple Waterer
- Gently hold a chick up to the waterer.
- Tap its beak gently against the waterer until one drop of water comes out.
- Wait for the chick to drink.
- Repeat with 2-3 other chicks.
- Observe to make sure at least 3 chicks are drinking out of the waterer.
- The rest will follow and copy their flock mates!
How to Clean a Chick Brooder Box
- Remove heat source.
- Remove chicks and place them in a safe, contained area.
- Remove feeder and waterer.
- Remove dirty bedding.
- Spray out with a mild soap and water.
- Dry thoroughly.
- Replace bedding, food, and water.
- Add chicks back into the brooder.
- Replace heat source.
WANT TO SAVE THIS RECIPE?
Enter your email below and we will send it straight to your inbox. Plus you will get great new recipes from us every week!
DIY Chick Brooder
Equipment
- 20 zip ties
Materials
- 1 plastic tote (I recommend a 36x18x18" tote for 8 chicks.)
- 1 feeder
- 1 waterer
- 1 heat source , such as a heat lamp or heat plate
- shavings or straw (NOT cedar!)
Instructions
- Cut out the interior of the lid.
- Drill holes around the edges.
- Secure wire to the top with zip ties.
- Cut a slit in the handle to hold the heat lamp secure, if using.
- Add 1-2 inches of bedding in the bottom.
- Put the waterer in the tote, and add water and food.
- Place your chicks in their new home!
More Favorites From Longbourn Farm


Did you find this info helpful? If so, please share it on Instagram, Facebook, or Pinterest!


Deedee
Great idea! I love it. I was looking online to purchase a brooder for my quail and decided to try and find a diy brooder and your project came up. Thank you soo much you saved me $150. 🤗 deedee