
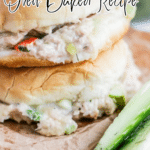


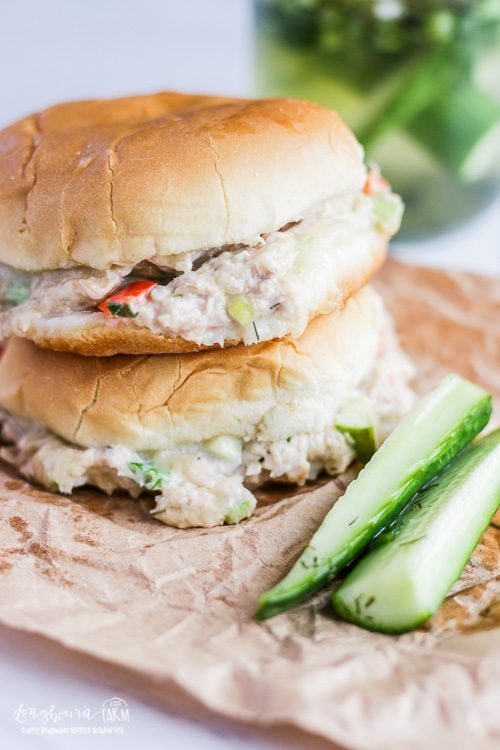
The best bread for tuna melt starts with a thick bun, that offers a sturdy foundation for this yummy sandwich. A classic tuna melt is so simple to throw together and makes the perfect lunch. It's filling, flavorful, and great to make ahead!
WANT TO SAVE THIS RECIPE?
Enter your email below and we'll send it straight to your inbox. Plus you’ll get great new recipes from us every week!
A “melt” sandwich is a hot sandwich similar to a grilled cheese but with added fillings that are usually made with a mayo or mustard base. In our case, we have a mayo-based tuna filling. These sandwiches can be served open-faced or closed face (meaning with or without a top slice of bread).
You know how the bread can totally make or break a tuna melt? Trust me, this recipe uses the best bread for a tuna melt. It’s sturdy enough to hold all the cheesy, melty goodness but still has that perfect crunch when you bite into it.

Why You’ll Love Making This Tuna Melt
- Simple and Satisfying: The combination of toasted bread, melted cheese, and seasoned tuna salad creates a hearty meal that requires minimal prep and basic ingredients you likely have on hand.
- Perfect for Groups: Since these sandwiches can be assembled and baked together on a sheet pan, you can easily serve a crowd without standing over the stovetop making individual portions.
- Budget-Conscious Choice: Canned tuna is an affordable protein option, and when combined with pantry staples like bread and cheese, it creates a filling meal that won't break the bank.
- Customizable for Everyone: From the choice of bread to cheese varieties and tuna salad mix-ins, each person can adjust their sandwich to match their taste preferences while keeping the classic appeal.
🥪 If you’ve got a hungry crew to feed, go for an Italian beef sandwich—it’s messy, delicious, and absolutely worth it!
Recipe Ingredients
For The Tuna Filling:
- Canned tuna
- Mayonnaise
- Onion
- Pickles
- Pickle juice
- Salt
- Pepper
For the Sandwiches:
- Hamburger buns
- Sliced cheese
For the exact amounts needed, please see the recipe card below.

How to Make The Perfect Tuna Melt

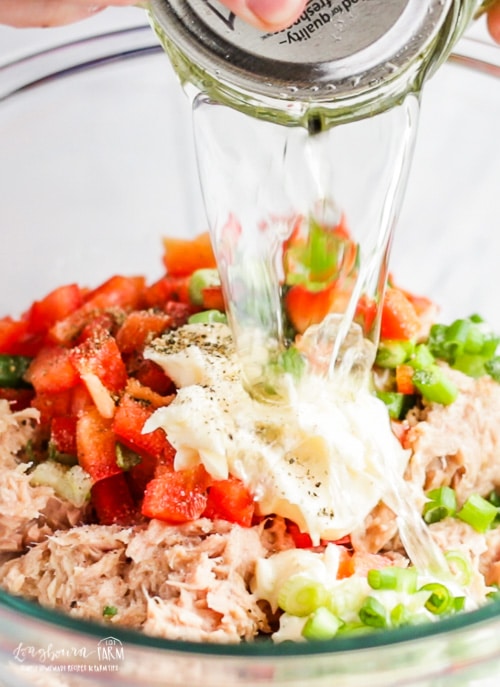
Step 1: Preheat your oven to 400° F. Prepare the tuna filling by mixing together all of the ingredients until well combined.
Step 2: Place a bottom hamburger bun piece onto a piece of foil and then top the bun with about ¼ cup of tuna filling.
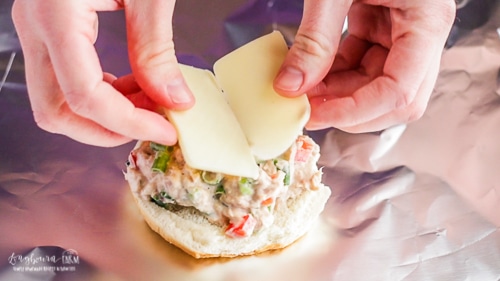

Step 3: Top with a slice of cheese and the top hamburger bun.
Step 4: Bring the sides of the foil up and wrap the sandwich completely.


Step 5: Bake in the oven for 10 minutes or until the cheese has melted.
Step 6: Serve and enjoy!
Pro Tip: You can use any veggies that you want, but I really like the slight sweetness of the pickles with the pepper and the mild flavor of the green onions. Adding in a tablespoon of pickle juice helps to change up this filling for the better!
Recipe FAQs
The best bread for tuna melts is thick-cut sourdough because its sturdy texture prevents sogginess and its slightly tangy flavor complements the tuna filling. If sourdough isn't available, other excellent options include crusty rye bread, country white, or Italian bread - just make sure to slice them about ½-inch thick. Avoid using soft sandwich bread or pre-sliced white bread, as these tend to fall apart under the weight of the tuna mixture and become soggy quickly.
You can prepare the tuna salad up to 2 days in advance and store it covered in the refrigerator. However, wait to assemble and toast the sandwiches until just before serving to maintain the crispy texture of the bread and prevent sogginess.
Toast both sides of your bread slices lightly before adding the tuna mixture. This creates a barrier that helps keep the bread crispy. Additionally, drain your tuna very well and avoid using too much mayonnaise in your tuna salad mixture.
Expert Tips
- Let Your Tuna Salad Rest: Mix your tuna salad and let it sit in the refrigerator for at least 30 minutes before using. This allows the flavors to meld together and helps the mixture hold its shape better when placed on the bread.
- Use Room Temperature Tuna Salad: Take your tuna salad out of the fridge 15-20 minutes before assembling your sandwiches. Room temperature filling helps the cheese melt more evenly and prevents cold spots in your sandwich.
- Add a Thin Layer of Butter on the outside: Rather than mayonnaise, spread a thin layer of butter on the outside of your bread before grilling. This creates a more even golden-brown crust and adds a subtle richness to the sandwich.
- Season at The Right Time: Add a light sprinkle of salt and pepper on top of the cheese just before melting. This final seasoning enhances all the flavors and adds an extra layer of taste that makes a difference.
What to Serve With Tuna Melts
Finding the perfect sides to go with your main dish doesn’t have to be complicated. These simple, flavorful options are guaranteed to round out any meal and keep everyone coming back for second
- Creamy and comforting, Homemade Mac and Cheese makes a perfect side dish for hearty mains like roasted chicken or ribs. Its rich flavor pairs well with simple vegetable sides or a crisp salad.
- Quick and easy to prepare, Frozen Carrots and Peas are a versatile side that complements everything from baked chicken to pot roast.
- Golden and seasoned to perfection, Crispy Potato Wedges are an ideal side for burgers, sandwiches, or any grilled protein. Their crunchy texture adds the perfect contrast to creamy or saucy dishes.
- Packed with flavor, Bacon Ranch Pasta Salad is a crowd-pleaser that pairs beautifully with BBQ dishes, sandwiches, or even as a standalone lunch option. The creamy ranch dressing makes it irresistible!
Delicious Sandwich Recipes You Have To Try
If you loved this tuna melt, you’re in for a treat with these other mouthwatering recipes!
- Juicy chicken wrapped in crispy bacon takes center stage in the chicken bacon recipe, delivering a simple yet unforgettable combination for dinner.
- Kickstart your day with biscuit breakfast sandwiches, a customizable, make-ahead option filled with eggs, cheese, and savory meats.
- For a hearty, crowd-pleasing meal, try the Italian beef sandwich recipe, featuring tender, slow-cooked beef with bold seasonings served on crusty rolls.
More Favorites From Longbourn Farm


Did you make this recipe? Leave a ⭐️ review and share it on Instagram, Facebook, or Pinterest!
WANT TO SAVE THIS RECIPE?
Enter your email below and we will send it straight to your inbox. Plus you will get great new recipes from us every week!

Baked Tuna Melt
Equipment
Ingredients
For the Tuna Filling
- 10 ounces tuna (two small cans, drained)
- 2 tablespoons mayonnaise
- 3 tablespoons dill pickles (chopped)
- ⅓ cup red pepper (chopped, about half of a pepper)
- 2 tablespoons green onion (chopped)
- 1 tablespoon pickle juice
- ½ teaspoon salt (or to taste)
- ¼ teaspoon pepper ( or to taste)
For the Sandwiches
- 6 hamburger buns
- 6 slices cheese (Monterey jack, or your favorite)
Instructions
- Preheat your oven to 400° F.
- Prepare the tuna filling by mixing together all of the ingredients until well combined.
- Place a bottom hamburger bun piece onto a piece of foil and then top the bun with about ¼ cup of tuna filling.
- Top with a slice of cheese and the top hamburger bun.
- Bring the sides of the foil up and wrap the sandwich completely.
- Bake in the oven for 10 minutes or until the cheese has melted.
- Serve and enjoy!
Notes
- After opening your tuna cans, drain them thoroughly and even press with a fork to remove excess liquid. This prevents a watery tuna salad that can make your sandwich soggy.
- When making multiple sandwiches, arrange them on a sheet pan and prepare them all at once.
- Place cold cheese on warm toasted bread, then add room temperature tuna salad. You'll be able to achieve a perfect cheese melt without overcooking the bread.
- Build your sandwich in this order: toasted bread, cheese slice, tuna salad, more cheese, top bread. This creates a sealed environment that holds everything together beautifully.


Alli
Such a delicious and easy meal!