

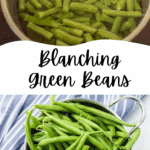
Learn How to Blanch Green Beans perfectly every time with this simple step-by-step guide. Master this essential cooking technique for preserving flavor, color, and nutrients in your fresh green beans. Your beans will have the perfect texture for salads, side dishes, or freezing!

WANT TO SAVE THIS RECIPE?
Enter your email below and we'll send it straight to your inbox. Plus you’ll get great new recipes from us every week!
🫛 Whether you're freezing a summer harvest, preparing for a dinner party, or creating a cold bean salad, properly blanched beans are the foundation for countless delicious dishes!
My 2 Best Tips For Learning How To Blanch Green Beans
Use a Large Pot: Choose a pot that allows the beans plenty of room to move freely in the water. Overcrowding can lead to uneven blanching and a drop in water temperature that extends cooking time.
Time Precisely: Keep a timer handy and be strict about your blanching time. Even 30 seconds too long can mean the difference between perfectly crisp beans and slightly overcooked ones.

Despite sounding fancy, blanching is incredibly easy to master with minimal equipment and just a few minutes of your time.
Blanching halts the enzymes that would otherwise cause your beans to lose flavor, color, and nutrients over time, making it essential for freezing or preparing ahead.
This method gives you that ideal crisp-tender bite every time, eliminating both mushiness and excessive crunchiness. Your beans will have the perfect texture for salads, side dishes, or freezing!
🩷 Melissa
WANT TO SAVE THIS RECIPE?
Enter your email below and we will send it straight to your inbox. Plus you will get great new recipes from us every week!

How to Blanch Green Beans
Ingredients
- As many green beans as you have to preserve (*it can be a large or small amount)
- A pot of water
- A large bowl of ice water
Instructions
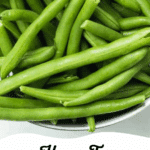
- Prepare your green beans by washing them, breaking off the stem ends, and snapping them into bite-sized pieces.

- Bring a pot, half filled with water, to a boil. You can add ½ teaspoon salt to the water if you'd like.
- While the water is boiling, add in some green beans, working in batches if needed, as to not over fill the pot.

- Bring the water back to a boil and boil the green beans for 1 minute.
- Use a slotted spoon to remove the green beans from the boiling water and place them in the bowl of ice water to stop the cooking process.
- Repeat the boiling and ice water bath process as needed to use all of your green beans.
- Your green beans are now blanched and you can put them in freezer safe containers and freeze or use them in recipes that call for blanched fresh green beans.


Notes
Nutrition
Recipe FAQs
The ideal blanching time for green beans is just 1 minute once the water returns to a boil. This brief cooking time is sufficient to deactivate enzymes while maintaining the beans' texture and nutrients. For slightly thicker beans, you might extend to 1.5 minutes, but be careful not to overcook.
Yes! The ice bath (or "shocking") is a crucial step that rapidly stops the cooking process. Without this step, the residual heat would continue cooking your beans, resulting in a softer texture and duller color. The ice bath is what gives blanched beans their signature crisp texture and vibrant appearance.
Absolutely. Blanching before freezing is essential as it deactivates enzymes that would otherwise break down the beans' quality, resulting in loss of texture, color, flavor, and nutrients during freezer storage. Never freeze fresh green beans without blanching them first.
More Favorites From Longbourn Farm


Did you make this recipe? Leave a ⭐️ review and share it on Instagram, Facebook, or Pinterest!


Leave a Reply