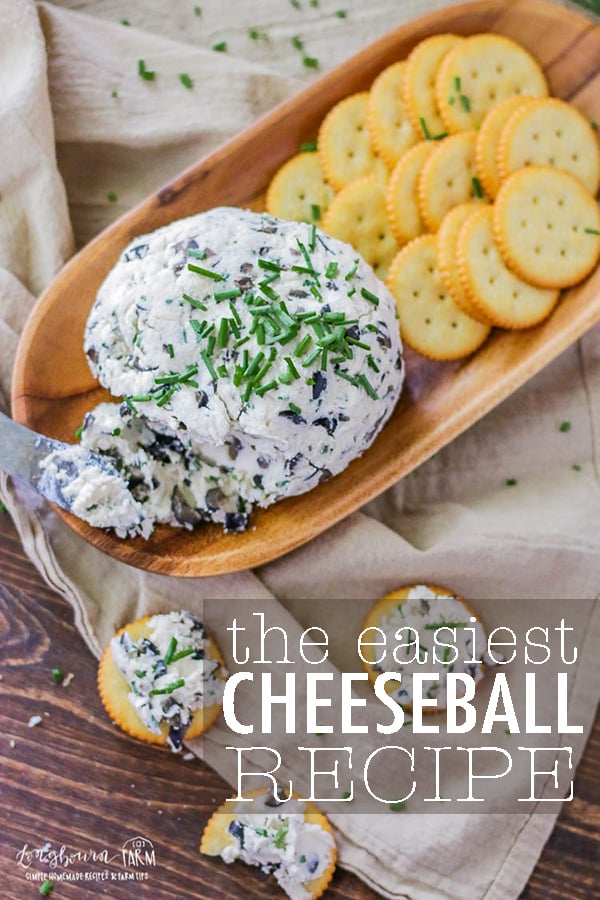
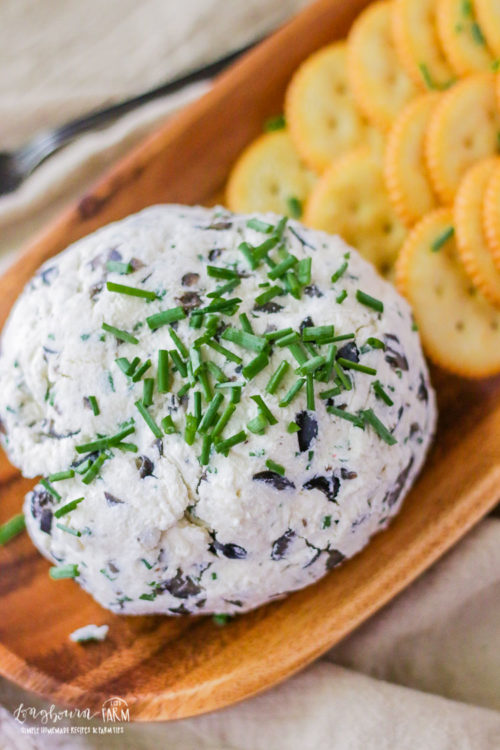
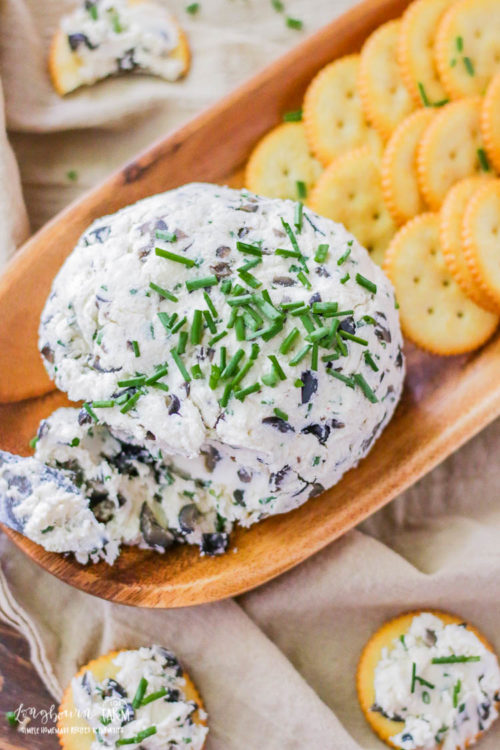
My easy cheese ball recipe is the only appetizer you need for your next party. With equal parts butter, black olives, and green onions combined with the perfect amount of cream cheese, it’s a true show-stopper!
This is hands-down the best cheese ball recipe you’ll ever find! Trust me, I’ve tried many cheese ball recipes, and this one is the only one that turns out perfectly every time. It’s not too soft, not too firm, has the perfect balance of flavors, and never falls apart. You can count on this cheese ball to be a crowd-pleaser at any event. Plus, it’s super easy to make and doesn’t need any fancy ingredients or equipment!
Just be warned; you may need to make a double batch because it always disappears quickly! This is actually one of my grandmother’s classic holiday recipes, and it’s always a hit. Your family and friends will lick the plate clean and be begging for more!
You Will Love This Simple Cheese Ball Recipe
- There’s minimal prep work. The hands-on time for this recipe is less than 10 minutes! The longest part is waiting for it to firm up in the fridge. This makes it the perfect party appetizer or snack for when you have limited time to prepare.
- It’s super versatile. Don’t like green onions but love chives? Swap them out! Want to add some heat? Add in a bit of cayenne pepper or red pepper flakes. You can make this recipe your own and customize it to your liking.
- Feed a crowd or scale it down. This recipe serves 10 people easily. If you have a smaller gathering, simply halve the recipe, and it will still turn out great. You can also double or triple the recipe for larger parties.
Cheese Ball Recipe Easy Ingredients
- Cream cheese
- Butter
- Black olives
- Green onions
- Salt
- Pepper
For the exact amounts needed, please see the recipe card below.
How to Make a Cheese Ball with Cream Cheese
- In a large bowl, combine all ingredients until well mixed.
- Taste and adjust seasoning as needed.
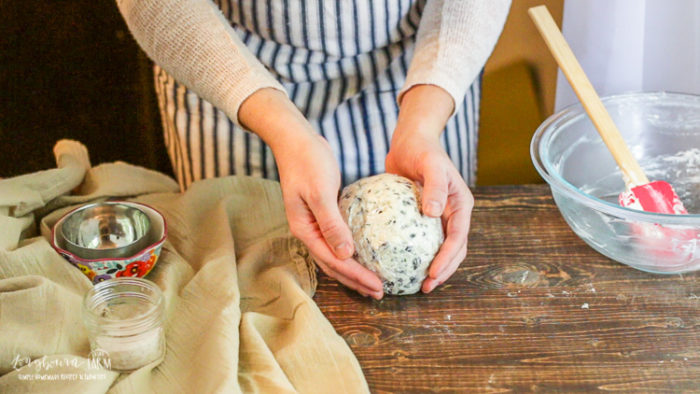
- Form the mixture into a ball with your hands.
- Wrap tightly in plastic wrap and refrigerate for at least 1 hour before serving.
The only trick to this recipe is letting the cream cheese and butter soften! Not really a trick at all, but if you want a creamy, smooth consistency this step is a must!
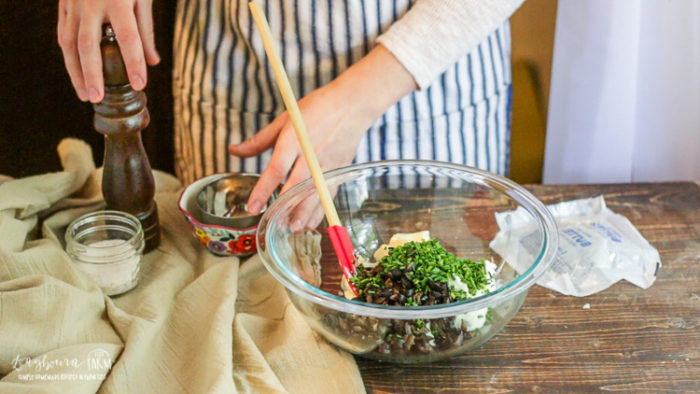
I do prefer to chop the olives myself for this recipe, as opposed to purchasing a can of chopped olives. I like the olive pieces to be a bit bigger than what typically comes in a can. You can use chives or green onions, both are delicious.
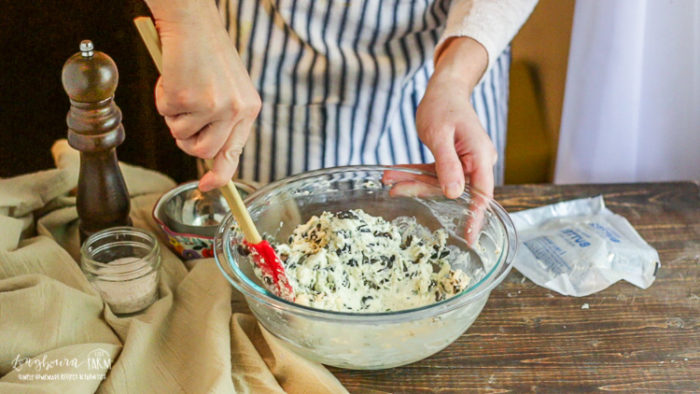
The last thing you need to do before shaping the cheeseball is to taste it! Make sure the seasonings are right and it tastes as it should, there is not going back once it’s refrigerated.
How to form a Cheese Ball
Here’s a step-by-step guide on how to form the perfect cheese ball:
- Make sure the cream cheese is softened slightly for easier mixing. Leave it out at room temperature for about 30 minutes before starting the recipe.
- Combine the cream cheese with the other ingredients thoroughly. The cheese mixture must be smooth to create the perfect ball.
- Lay out some plastic wrap so you can easily transfer the cheese ball to the refrigerator once it has formed.
- Use your hands to shape the cheese mixture into a ball. If the mixture is too sticky, wet your hands slightly with water or non-stick cooking spray.
- Don’t roll the ball on the kitchen counter, especially if it’s sticky. Instead, gently shape it with your hands until it’s smooth and round. It’ll come together pretty easily.
- Place the formed cheese ball on the plastic wrap and use it to tightly wrap the ball. This will help hold its shape while chilling in the fridge.
I wrap it in plastic wrap and then shape it into a nice ball. I like it to be slightly flat so it looks better on the platter.
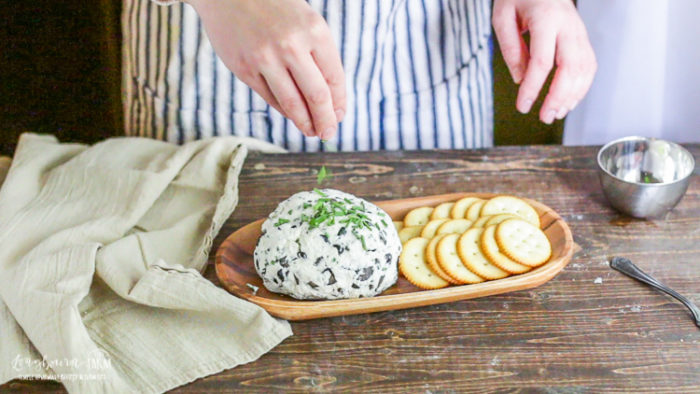
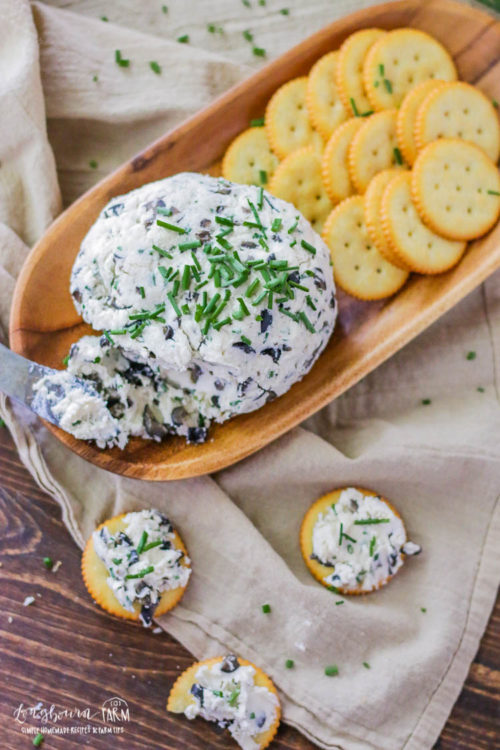
Once you’ve let it set in the refrigerator for at least 1 hour, pull it out, unwrap it and top it with more chives! It will be a total hit and gone in no time at all.
What to Serve With This Easy Cheese Ball
I love serving my cheese ball with some crackers on a charcuterie board. It just looks so fancy and appetizing! Any crackers will do, but I prefer using a mix of plain and flavored crackers for variety. Sliced fruit or veggies, such as apples, pears, or carrots, also pair well with the savory cheese flavor. As does a side of sliced meats, like salami or prosciutto.
Bread is, of course, another delicious option. My homemade garlic knots, ciabatta bread, or French bread recipe would all be a great base for the cheese ball.
How to Store a Cream Cheese Ball
Store your cheese ball wrapped in plastic wrap on the bottom shelf of your refrigerator. This is the best place to keep it fresh and ready to eat! I would avoid freezing a cheese ball, as the consistency may change once thawed and it won’t hold its shape as well.
How long does a Cheese Ball last?
The cheese ball will last 5-7 days in the refrigerator or until the expiration date of the cream cheese, whichever comes first.
If you’re looking for another fantastic holiday appetizer, try out my Cracker Bacon Appetizers. They are to die for and a total crowd pleaser!! Another holiday favorite that is gone in seconds. Or my Homemade Chocolate Fudge Recipe, so creamy and dreamy and delicious.
Olive Cheese Ball Recipe FAQs
How do you firm up a cheese ball?
Chilling the cheese ball in the fridge for at least 1 hour will help firm it up.
How long should a cheese ball sit out before serving?
If your cheese ball is a little too firm, let it sit out at room temperature for about 10-15 minutes before serving. This will make it easier to spread on all your favorite crackers and bread. However, don’t leave it out for more than 2 hours at room temperature to avoid any food safety concerns.

Cheese Ball with Cream Cheese
Equipment
Ingredients
- 8 oz cream cheese one package, softened
- 1/2 cup butter one stick, softened
- 1/2 cup black olives chopped
- 1/2 cup green onions chopped fine, or chives
- 1 teaspoon salt
- 1/2 teaspoon pepper
Instructions
- Combine all ingredients.
- Mix well. Taste and adjust seasonings.
- Form into a ball and wrap in plastic wrap.
- Refrigerate for at least 1 hour before serving.


Alli says
Easy and delicious!