
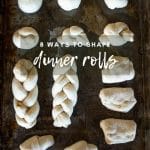

Learning how to shape dinner rolls is so easy! Learn eight different techniques with step-by-step photos to ensure your success.
WANT TO SAVE THIS RECIPE?
Enter your email below and we'll send it straight to your inbox. Plus you’ll get great new recipes from us every week!
This post is a collaboration with Rhodes Bread. I received compensation, but all opinions are my own.
Holiday’s and family gatherings are the perfect time to show off your culinary skills! Unless you’re trying to plan a huge meal and are in charge of everything. My rule for entertaining is to make some of the dishes easier by eliminating preparation time.
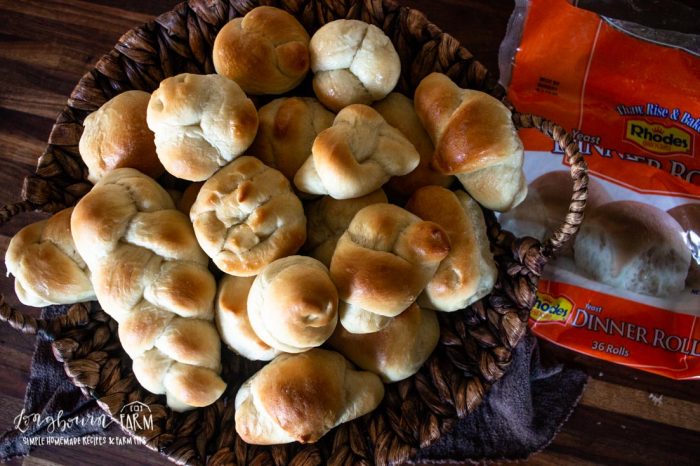
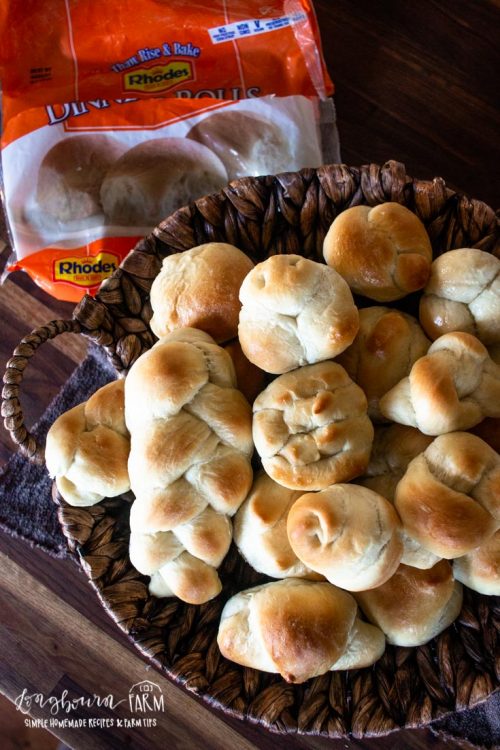
Enter Rhodes Rolls! I love having these on hand in my freezer. They are a great price and taste amazing. I love homemade rolls and I love Rhodes Rolls. So does my family! If I am feeding a crowd, these are my go-to.
There are a some really easy dinner roll shapes that look fancy but only take seconds. Rhodes Frozen Roll dough makes everything a uniform size as well, ensuring an even bake on all the rolls.
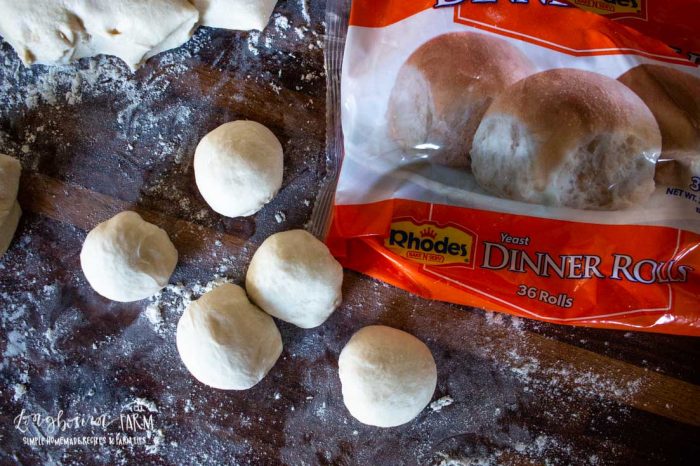
How to Thaw Rhodes Rolls
The best way to thaw Rhodes Rolls is to spray or line a sheet tray, then place individual rolls on the tray so they are 2 inches apart. Cover the tray and set it in the fridge overnight. The rolls will be thawed and ready to shape the next day.
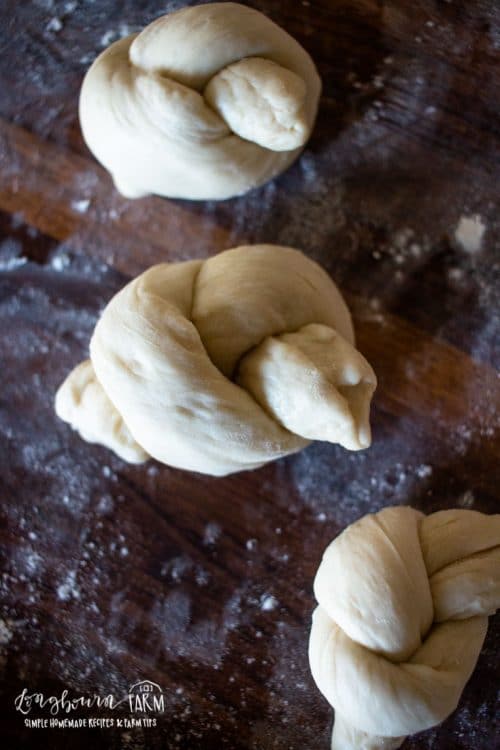
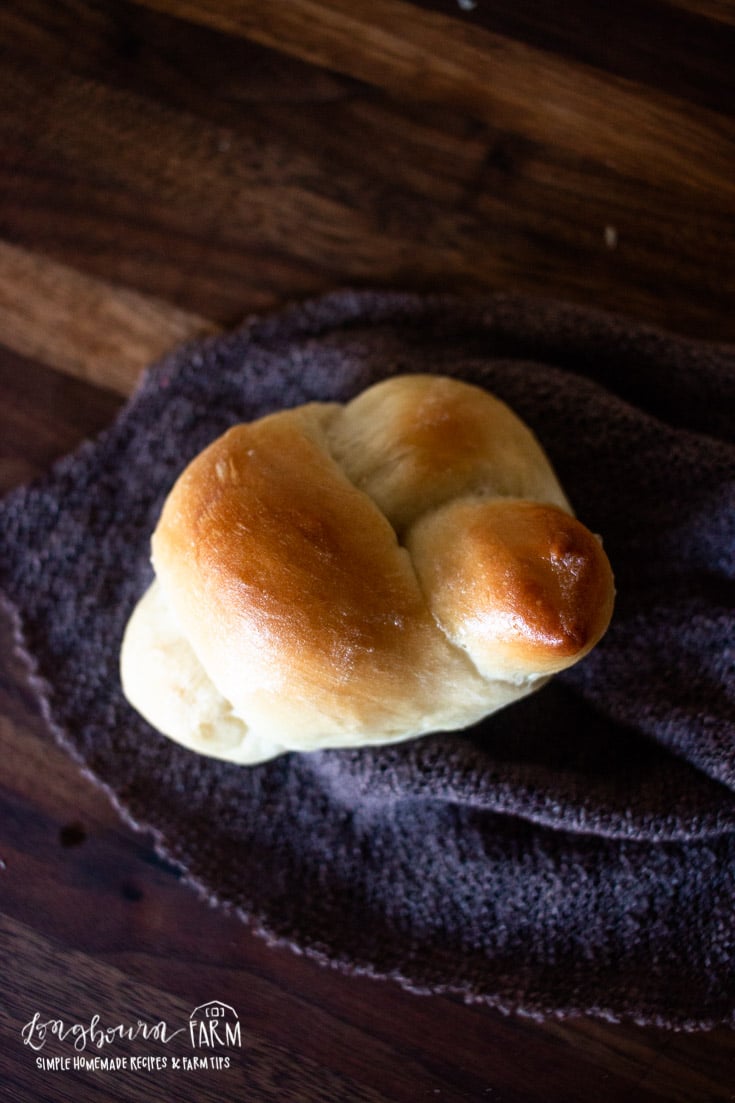
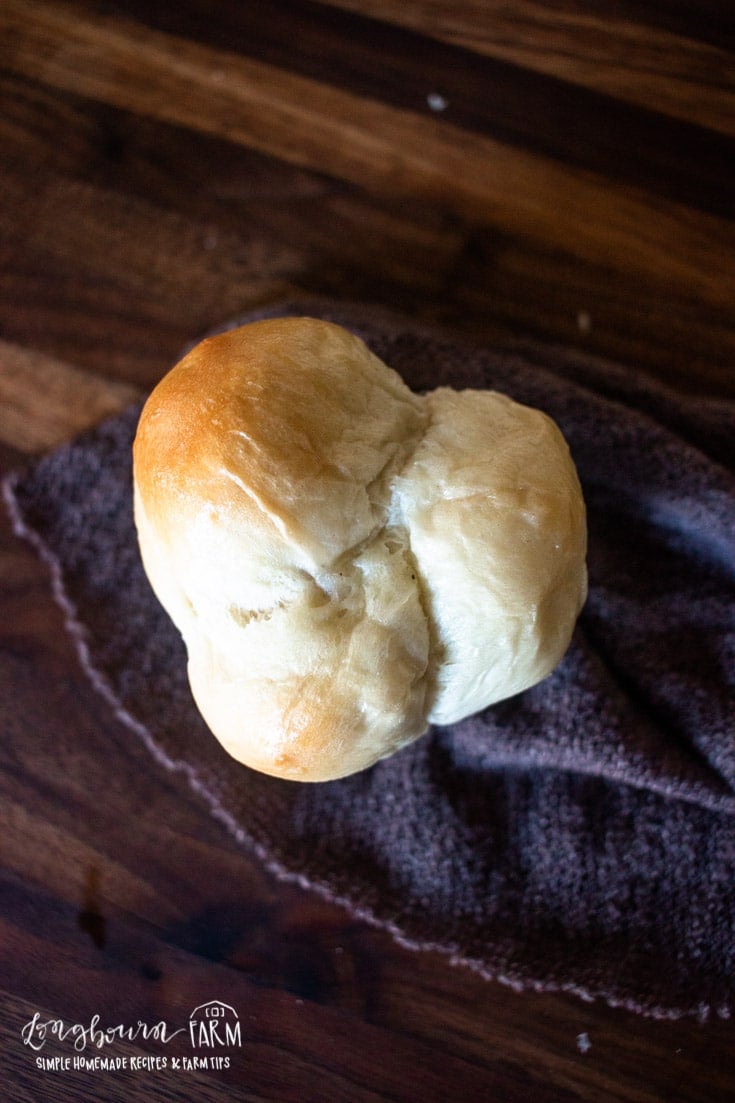
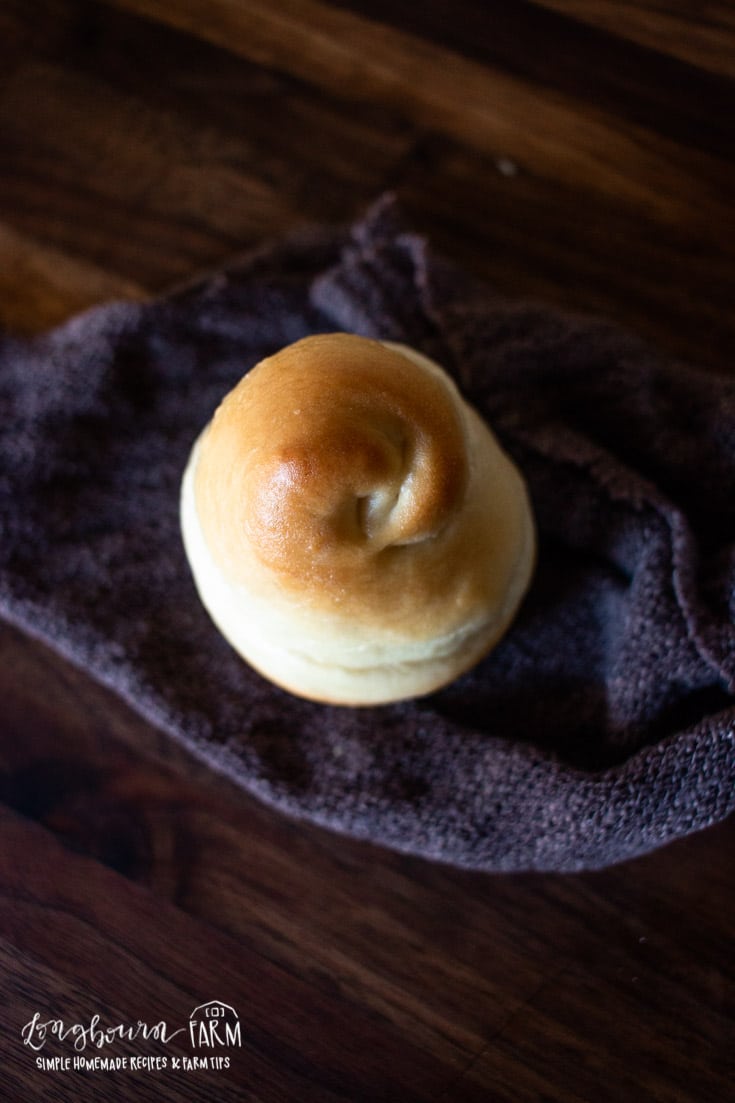
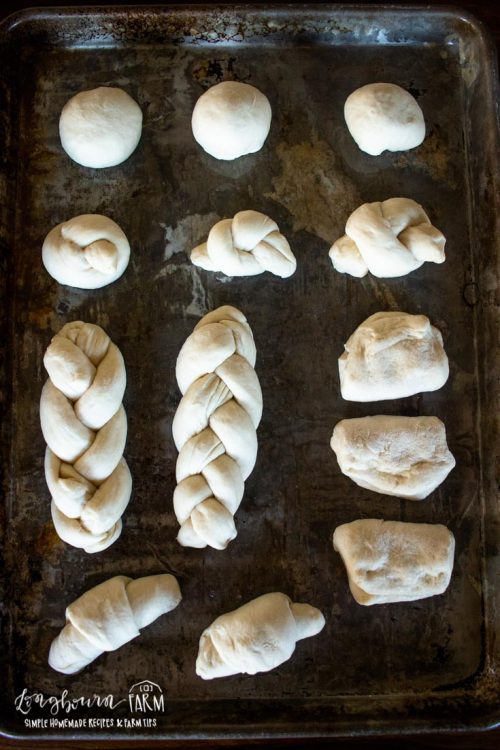
The Knot
This was one of my grandmother’s classic roll shapes. It is done just like you’d think – you tie a knot.
- Start with one thawed portion of dough.
- Roll it into an even rope, about 6 inches long.
- Gently take both ends, bring them up and then cross them, leaving one end slightly longer than the other end.
- Loop the longer end through the circle you created when you crossed the ends.
- You can leave the ends loose or tuck them back under the roll for a more finished look.
- Let it rise for about 30 minutes before baking.
- Bake as directed on the bag.
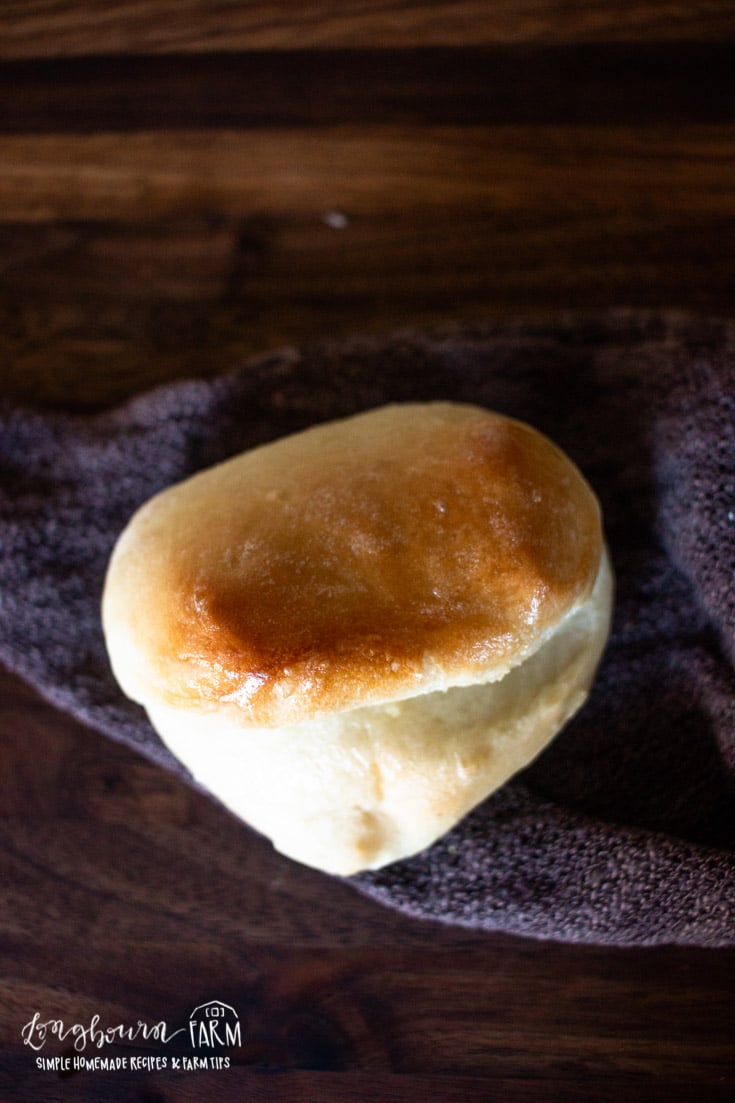

The Fold
This shape is one of the easiest. In these example photos, I left the centers of the rolls empty but you could spread them with something delicious before baking. Some ideas are plain butter, garlic butter, Nutella, sweetened cream cheese, or jam. The possibilities are endless!
- Start with one thawed portion of dough.
- Roll it out flat with a rolling pin so that it is very thin and about 4 inches in diameter.
- If you’d like to add anything to the center of the roll, do it at this point. Spread a small amount of your filling evenly over the dough.
- Fold the dough in half, pressing the edges together slightly.
- Let rise for about 30 minutes before baking.
- Bake as directed on the bag.
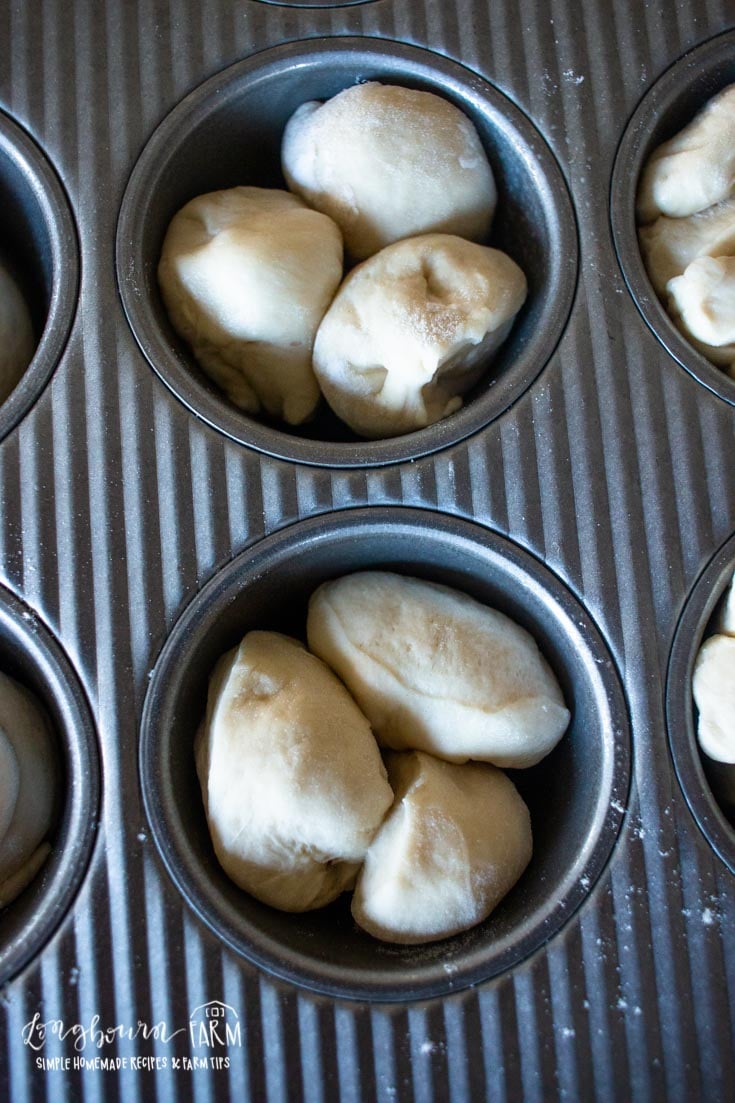
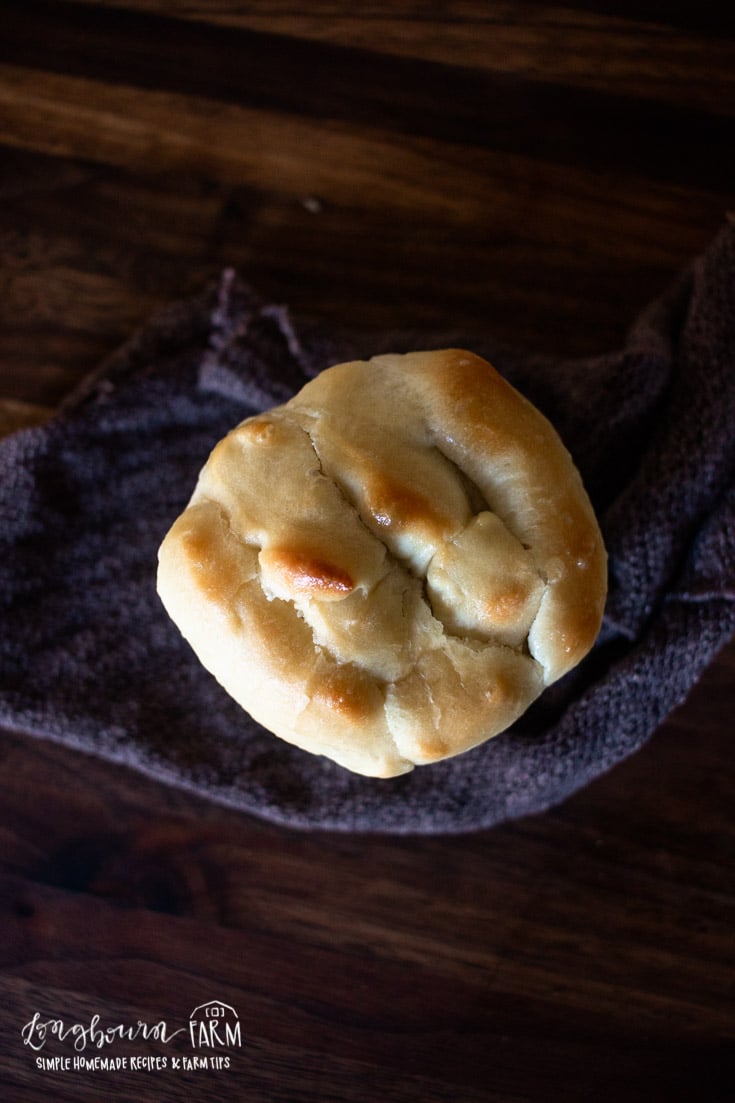
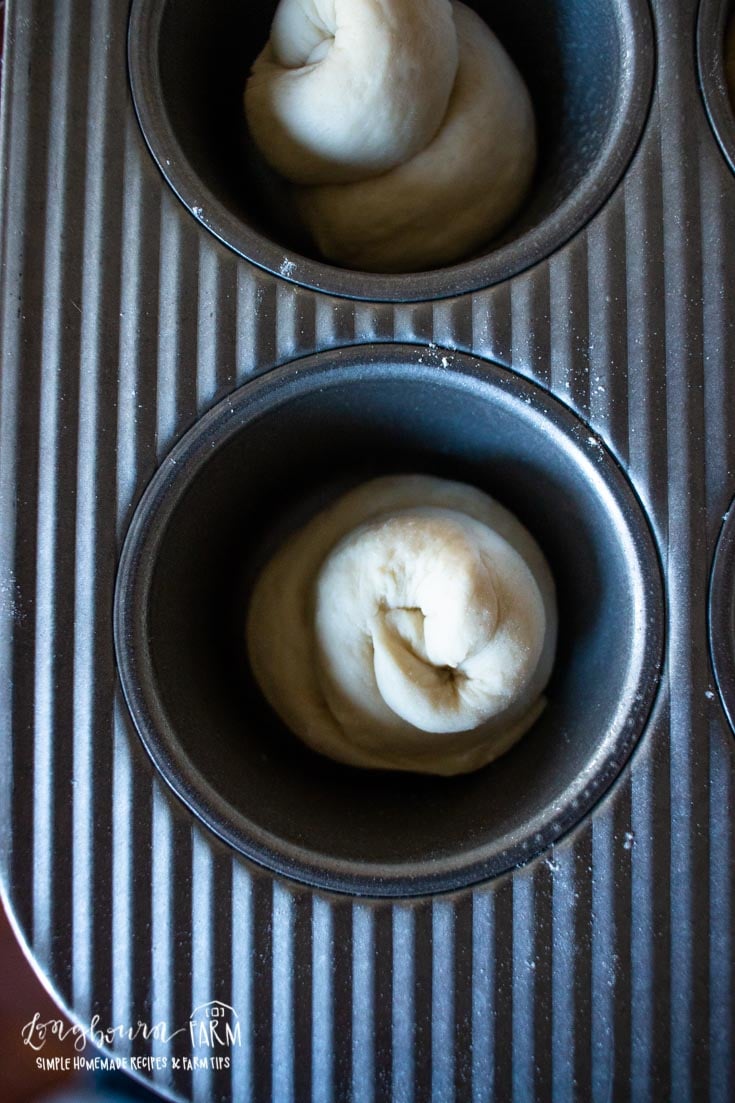
The Clover
This shape is really simple and bakes in muffin tins. My kids love helping me make these!
Each roll will use one and a half portions of thawed dough. So, for example, if you make 12 of these rolls, you’ll need 8 portions of thawed dough.
- Start with thawed portions of dough.
- Cut the portions of thawed dough in half.
- Roll the halves into small balls.
- Place them in a lined or sprayed muffin tin.
- Let rise about 30 minutes before baking.
- Bake as directed on the bag.
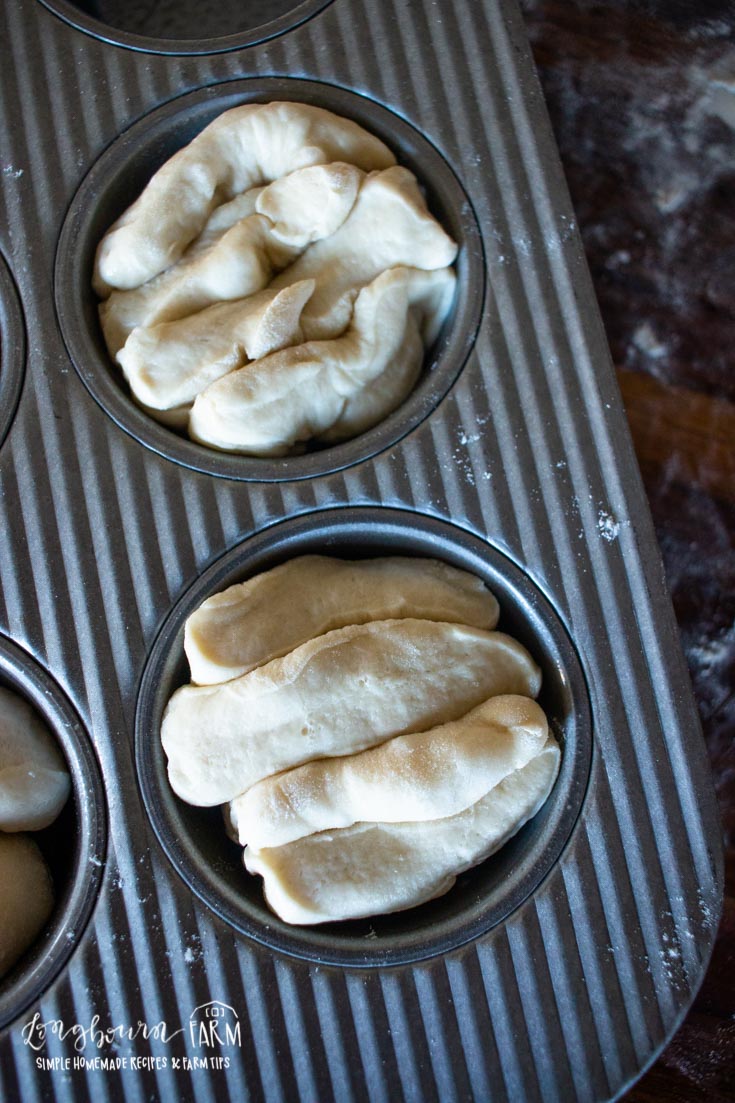
The Layer
This shape also bakes in a muffin tin! Each roll will use two portions of thawed dough. So, for example, if you make 12 of these rolls, you’ll need 24 portions of thawed dough.
- Start with thawed portions of dough.
- Cut the portions of thawed dough in half.
- Flatten out each half of the dough
- Stack the flattened dough pieces on top of one another.
- Place them in a lined or sprayed muffin tin so that the edges are all facing up.
- Let rise about 30 minutes before baking.
- Bake as directed on the bag.
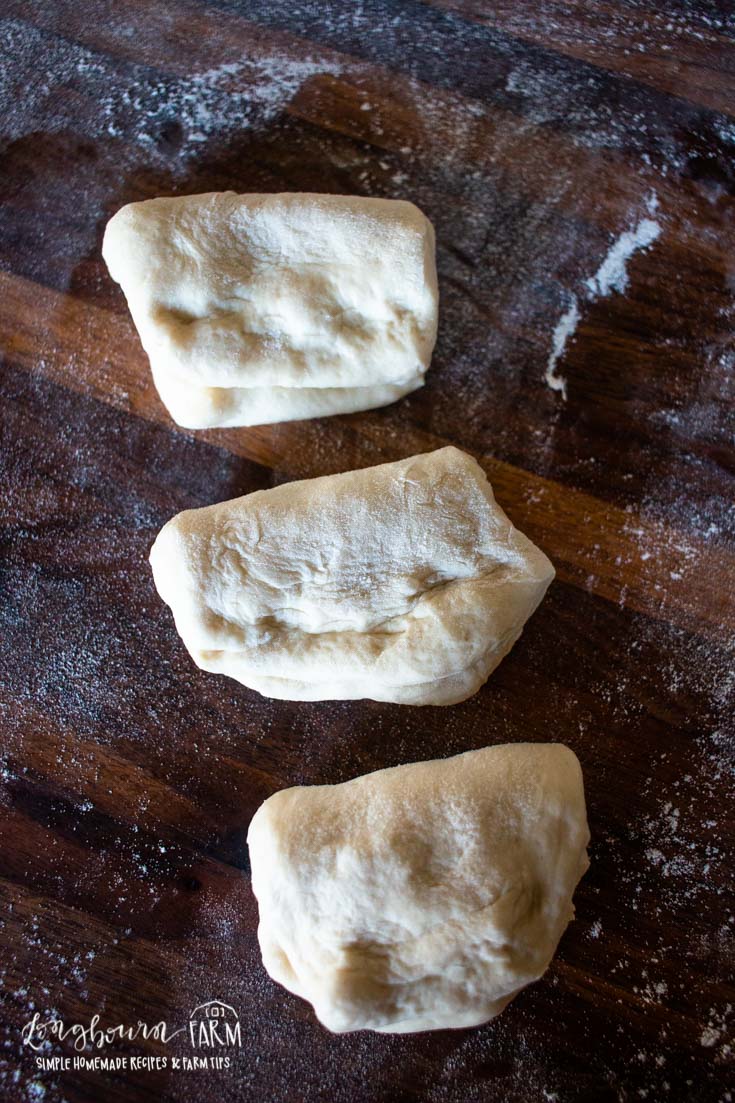
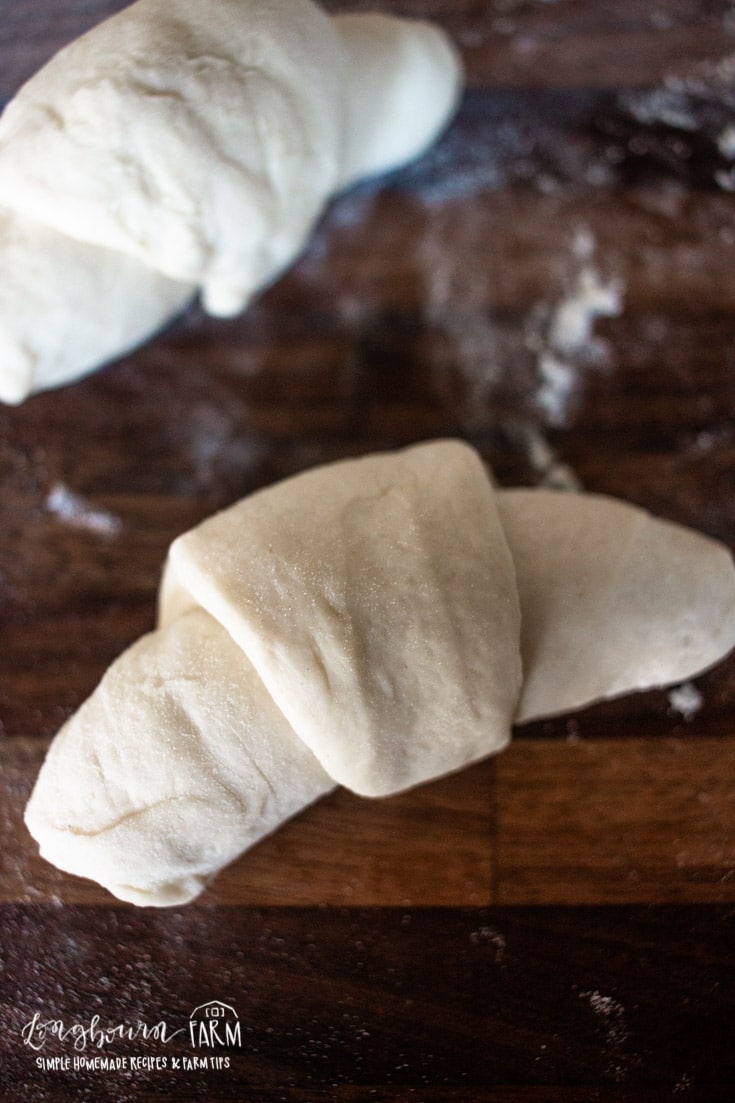
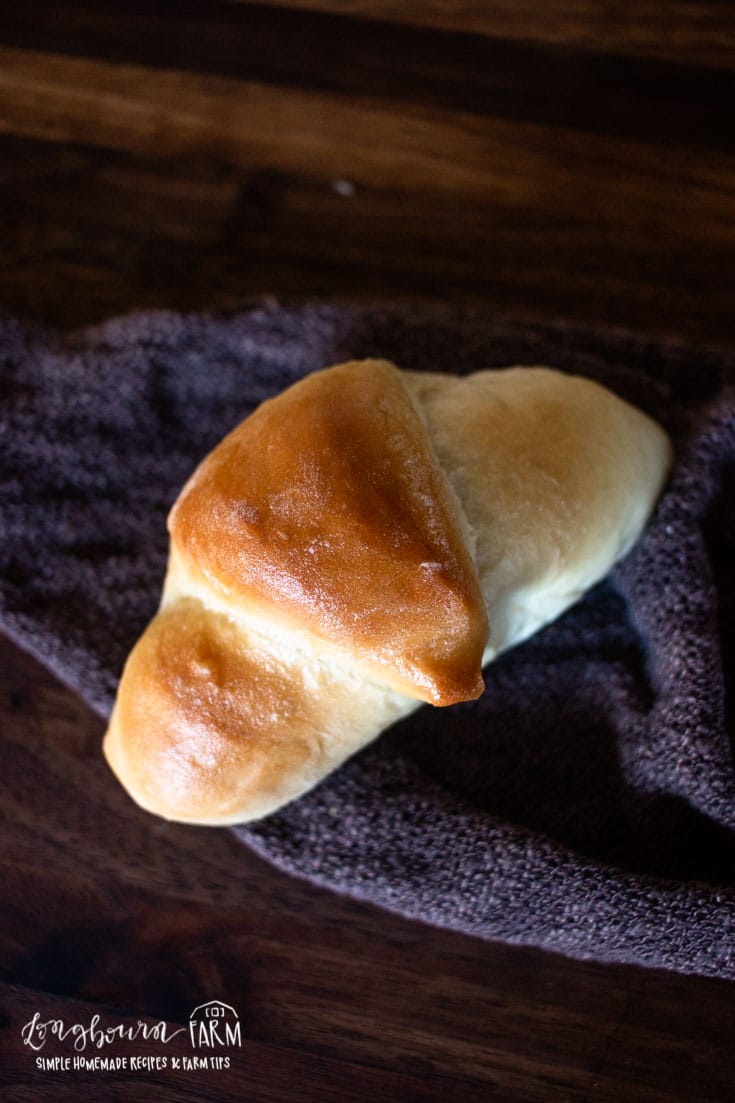
The Crescent
This shape looks fancy but is, as usual, super easy! It can be a little tricky to get the roll into a triangle shape but with a little coaxing it’s, possible.
- Start with one portion of thawed dough.
- Roll the dough portion into a flat triangle.
- Starting with the long edge of the triangle, roll the dough up so the point is on top.
- Place on the baking tray so that the layers are visible.
- Let rise about 30 minutes before baking.
- Bake as directed on the bag.
The Swirl
This roll shape is super fun for kids to make. Sometimes we end up with “snakes” and “snails” but some of the rolls end up looking nice and properly swirled.
- Start with one thawed portion of dough.
- Roll it into an even rope, about 8 inches long.
- Coil the rope twice and then bring the coil up onto itself, creating a small cone shape.
- Place them in a lined or sprayed muffin tin.
- Let it rise for about 30 minutes before baking.
- Bake as directed on the bag.
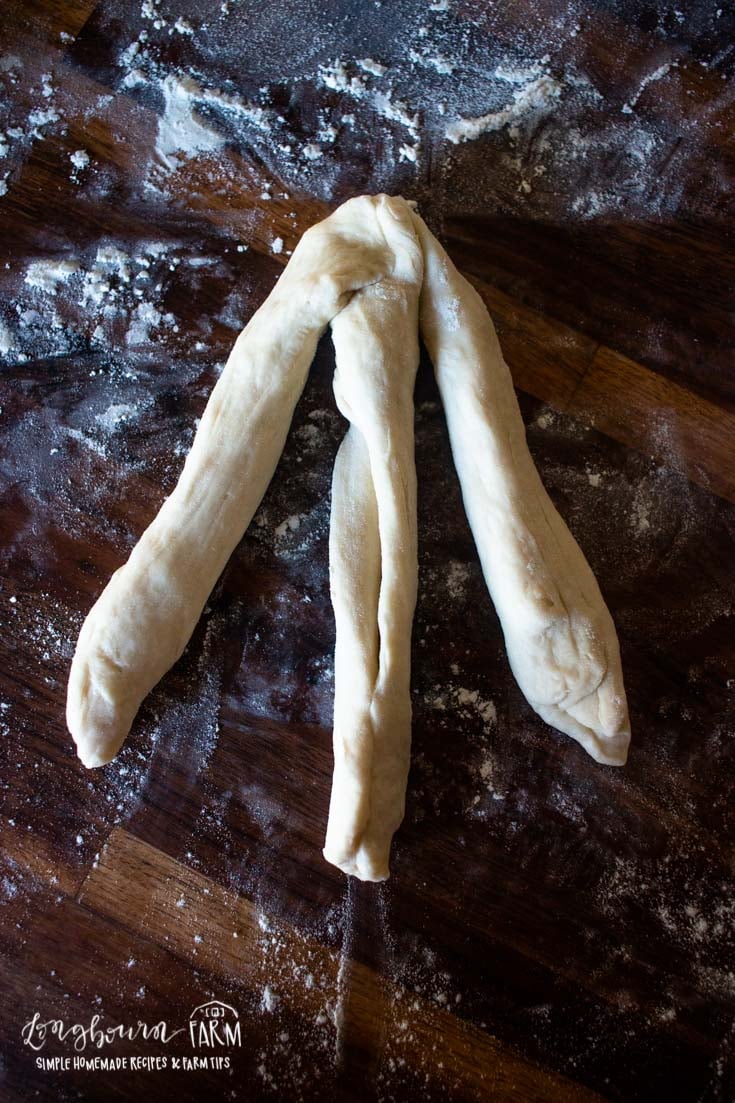
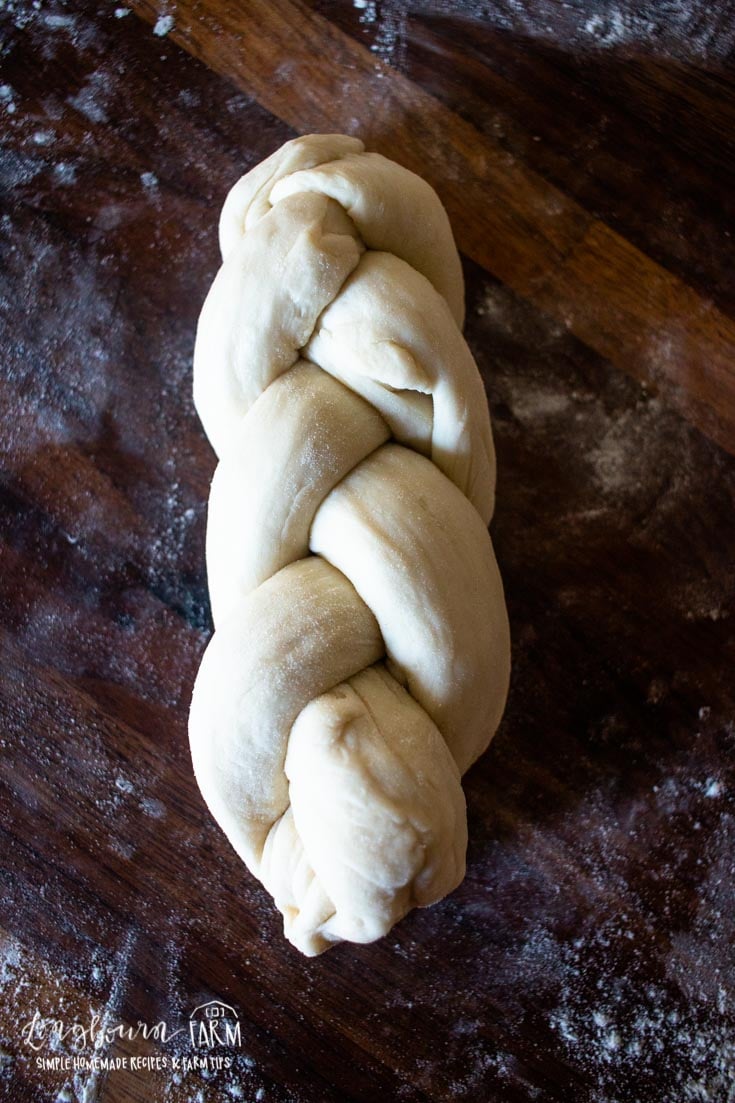
The Braid
This is one of my personal favorite shapes. It looks fancy but is so easy. Even if you can’t braid hair, you can pull this dinner roll shape off.
- Start with 3 portions of thawed dough.
- Roll each portion out into a rope about 8 inches long.
- Place the ropes parallel to each other.
- Bring the ends together at the top.
- Bring the right side over the middle strand and place between the left strand and the middle strand (it is now the middle strand).
- Bring the left side over the middle strand and place between the right strand and the middle strand (it is now the middle strand).
- Repeat until the strands are all braided.
- Pinch the end together and tuck it slightly under the braided strands.
- Do this with the top, if necessary. Adjusting if any strands at the top came loose while braiding the rest of the roll.
- Let rise about 30 minutes before baking.
- Bake as directed on the bag.
The Classic
Rhodes Rolls make getting that classic dinner roll shape a breeze. The rolls are usually perfectly round straight out of the bag.
- My only tip is if you’d like soft edges on your rolls, place them next to each other so that they start to touch while raising.
- Rise as directed on the bag.
- Bake as directed on the bag.
You are now prepared to be the star of any family or holiday party! Don’t stress over sides, let Rhodes Bread take care of that for you! All you have to do is decide which dinner roll shape you like best and bake. Easy as that.
Don’t forget to stock up on Rhodes Rolls next time you’re at the store. Affordable, simple, and delicious. They are a staple in our home!


Leave a Reply