
Check out how I made DIY garden boxes for free and didn't have to build a thing. I used the most plentiful material on my property: Rocks!
My garden is done!!
For this year. Ha.
I'm not sure when it will be completely and positively finished. Next year? But for now, it is lookin' soooooo much better than last year.
Let's recap the garden last year:
- I planted seeds the first week of June. Yep, sure did.
- Things grew. Mostly weeds.
- Weeding became challenging as my belly became larger and my energy levels dropped dramatically. I think there is an inverse relationship there, fo sho.
- I planted seeds. IN JUNE. Because I had them. And because when I'm pregnant, thinking clearly isn't my strong suit. I feel like that is dangerous.
So this year, I was determined to have a decent garden. I didn't want to invest in wood to build boxes, mainly because I'm cheap and also because building them out of wood would involve, well, building. Not my forte. But I didn't want to plant directly into the ground either. Avoiding weeding was pretty high on my priority list :). There are about 10 billion and half rocks on our property so as I tried to think of where I was going to put the ones I picked out of the pasture, the lightbulb went on.

I'll just build my boxes out of the rocks.
So that's what I did. Easy DIY garden boxes!

WANT TO SAVE THIS RECIPE?
Enter your email below and we'll send it straight to your inbox. Plus you’ll get great new recipes from us every week!
First, I prepped the area. I created a weed barrier/mulch layer out of a mixture of straw and manure. Every time I cleaned stalls, I would just dump it in my garden area. Eventually, I needed more down than I had dumped over the winter. There is some old straw in one of our buildings that I wouldn't use to bed with so I took that and spread it around where I needed it, about 4 inches thick. However, it works much better if the grass and weeds aren't too long yet. Or if it's winter and they are all dead. Go figure.
Then, I bought soil. I wasn't sure how many boxes I was going to plant so I would just buy enough for a few boxes at a time. Each DIY garden box is about 2 ft x 3 ft and took 6 cubic feet of soil. The only exception is the herb box. That DIY garden box is 3 ft x 9 ft. I don't plan to rotate that box because some of the herbs will grow back from year to year. I can't decide if I like the 2 ft x 3 ft size. I'll keep you posted. {To see how this turned out and what I changed, check out this post!}

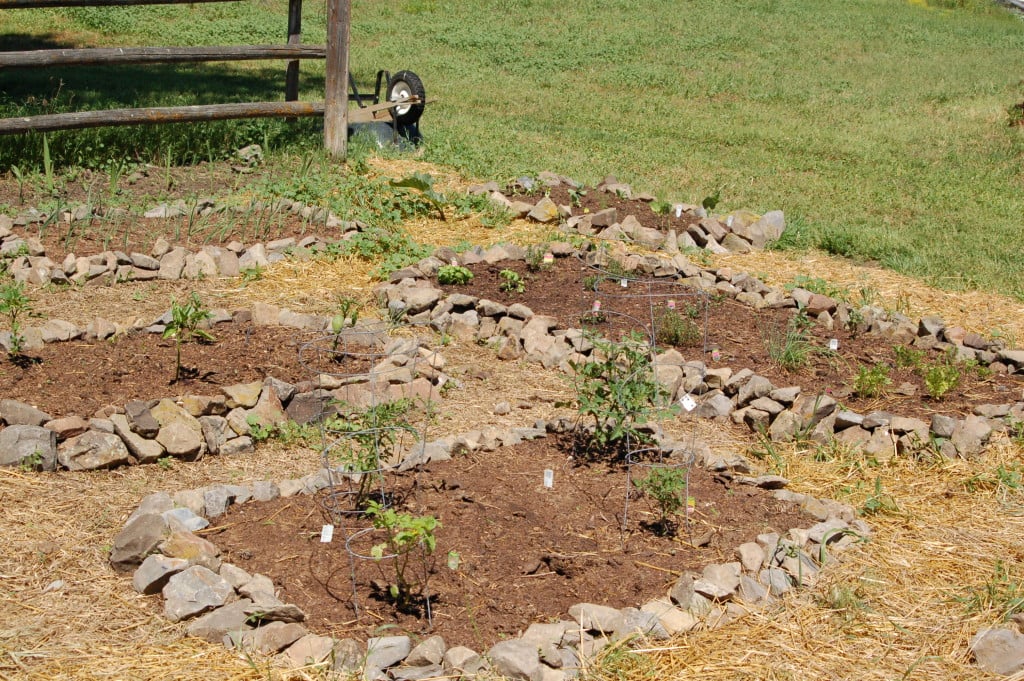
I would open the bags and dump the soil basically in the same area the bag took up. Then I spread it evenly with a rake. After I spread the soil, I created the rock border. I learned that there is an art to making the rocks stay where you want them too and look good. It was harder than I thought!
When building the DIY garden boxes, I would try and use larger rocks for a base all the way around and then stack smaller ones in the cracks and crevices. I built them a couple inches above the soil so that water wouldn't run out and the soil would stay put. Other than the herbs, I planted perennials, like rhubarb, in the ground wherever it was ascetically pleasing between the boxes. One day, I'll empty the trash in my planting shed.

Having the right tools for the job definitely made it easier. If you are going to be hauling any number of rocks repeatedly, I highly recommend getting an ATV wagon. Overall, I like it. The dump feature is great but the tailgate is a little flimsy. I can't complain though because it wasn't very expensive. I also popped the tires within about two seconds but Andy came to the rescue and mounted some heavy duty tubeless tires on it for me.

So far, there are a few weeds coming up through the straw but they aren't too bad to manage. Next year I will get some pretty ground cover to lay down, the look of the straw just really isn't doin' it for me. Or maybe this year - we will see. I also think I will add two or three more boxes next year. Since my past two attempts at gardening have been fairly unsuccessful, I'm not sure how much I need to grow. All I know is I want as much fresh produce as possible! I also just developed a {slight} obsession with pickling all sorts of things so I wouldn't mind having a bunch of extra. If you haven't tried pickling, you're missing out on a whole new world of salads and side dishes. Enter at your own risk. It's addictive.

Poppy loves to watch me work in the garden. And run through my freshly planted boxes. What a little peach. We are still working on boundaries in the garden. I don't think my beets and carrots will forgive her anytime soon. They just don't understand the importance of covering the ground between dog and imaginary-thing-worth-chasing as rapidly as possible.

Pin this farm tip on your Hobby Farming board to SAVE it for later! Follow Longbourn Farm on Pinterest for more great tips, ideas, and tutorials!
[et_bloom_inline optin_id="optin_4"]


Leave a Reply