

Installing package bees isn't hard! There are a few simple steps and tips to get it done correctly and safely. Check out step by step videos and instruction in this post!
WANT TO SAVE THIS RECIPE?
Enter your email below and we'll send it straight to your inbox. Plus you’ll get great new recipes from us every week!
In the last bee post, we reviewed everything you'll need to get set up and ready for your bees to come {Click here for the downloadable tutorial version!}. When you get close to picking up your bees, be sure you will be able to buy food for them that day or have it beforehand. Something we learned when we picked up our bees was how important feeding them is. Andy chatted with the man who provided {bred? Is that the right term?} all of the bees for this particular pick-up and it was a great learning experience! Their apiary and orchard is actually just in the little town next to ours, so that was a fun connection. He really emphasized how and why we feed the bees.
We purchased two different kinds of bee feed - basically, they are just various sugars and nutrients the bees need and you mix them ½ and ½. There are many varieties of bee feed - the important thing to check is that it's the right nutrients they need for the springtime. We also included a liquid probiotic in the food mix to give them an additional healthy boost. Another thing we feed them is what's called a protein patty. We were told this helps prevent skinny bees - I don't totally understand this so I'm doing some bee nutrition research and it's all pretty interesting. I'll, of course, report back with my findings.
Andy picked up the bees by himself so I wasn't there to be obnoxious and ask 100 million questions :). I've been told on multiple occasions by multiple teachers, bosses, and professors that I ask a lot of questions. I blame my father! Basically, you need to remember that when you install your bees, they have NO food. Making food will take energy, so you need to provide them with the adequate energy and nutrients they need to start making their own food. We will feed our bees until about the middle of June.
Another thing to remember is that your bees are working all summer long so they can survive through the winter. If they are struggling to survive during the spring and summer because you don't give them enough feed, there is no way they will make it through the winter.
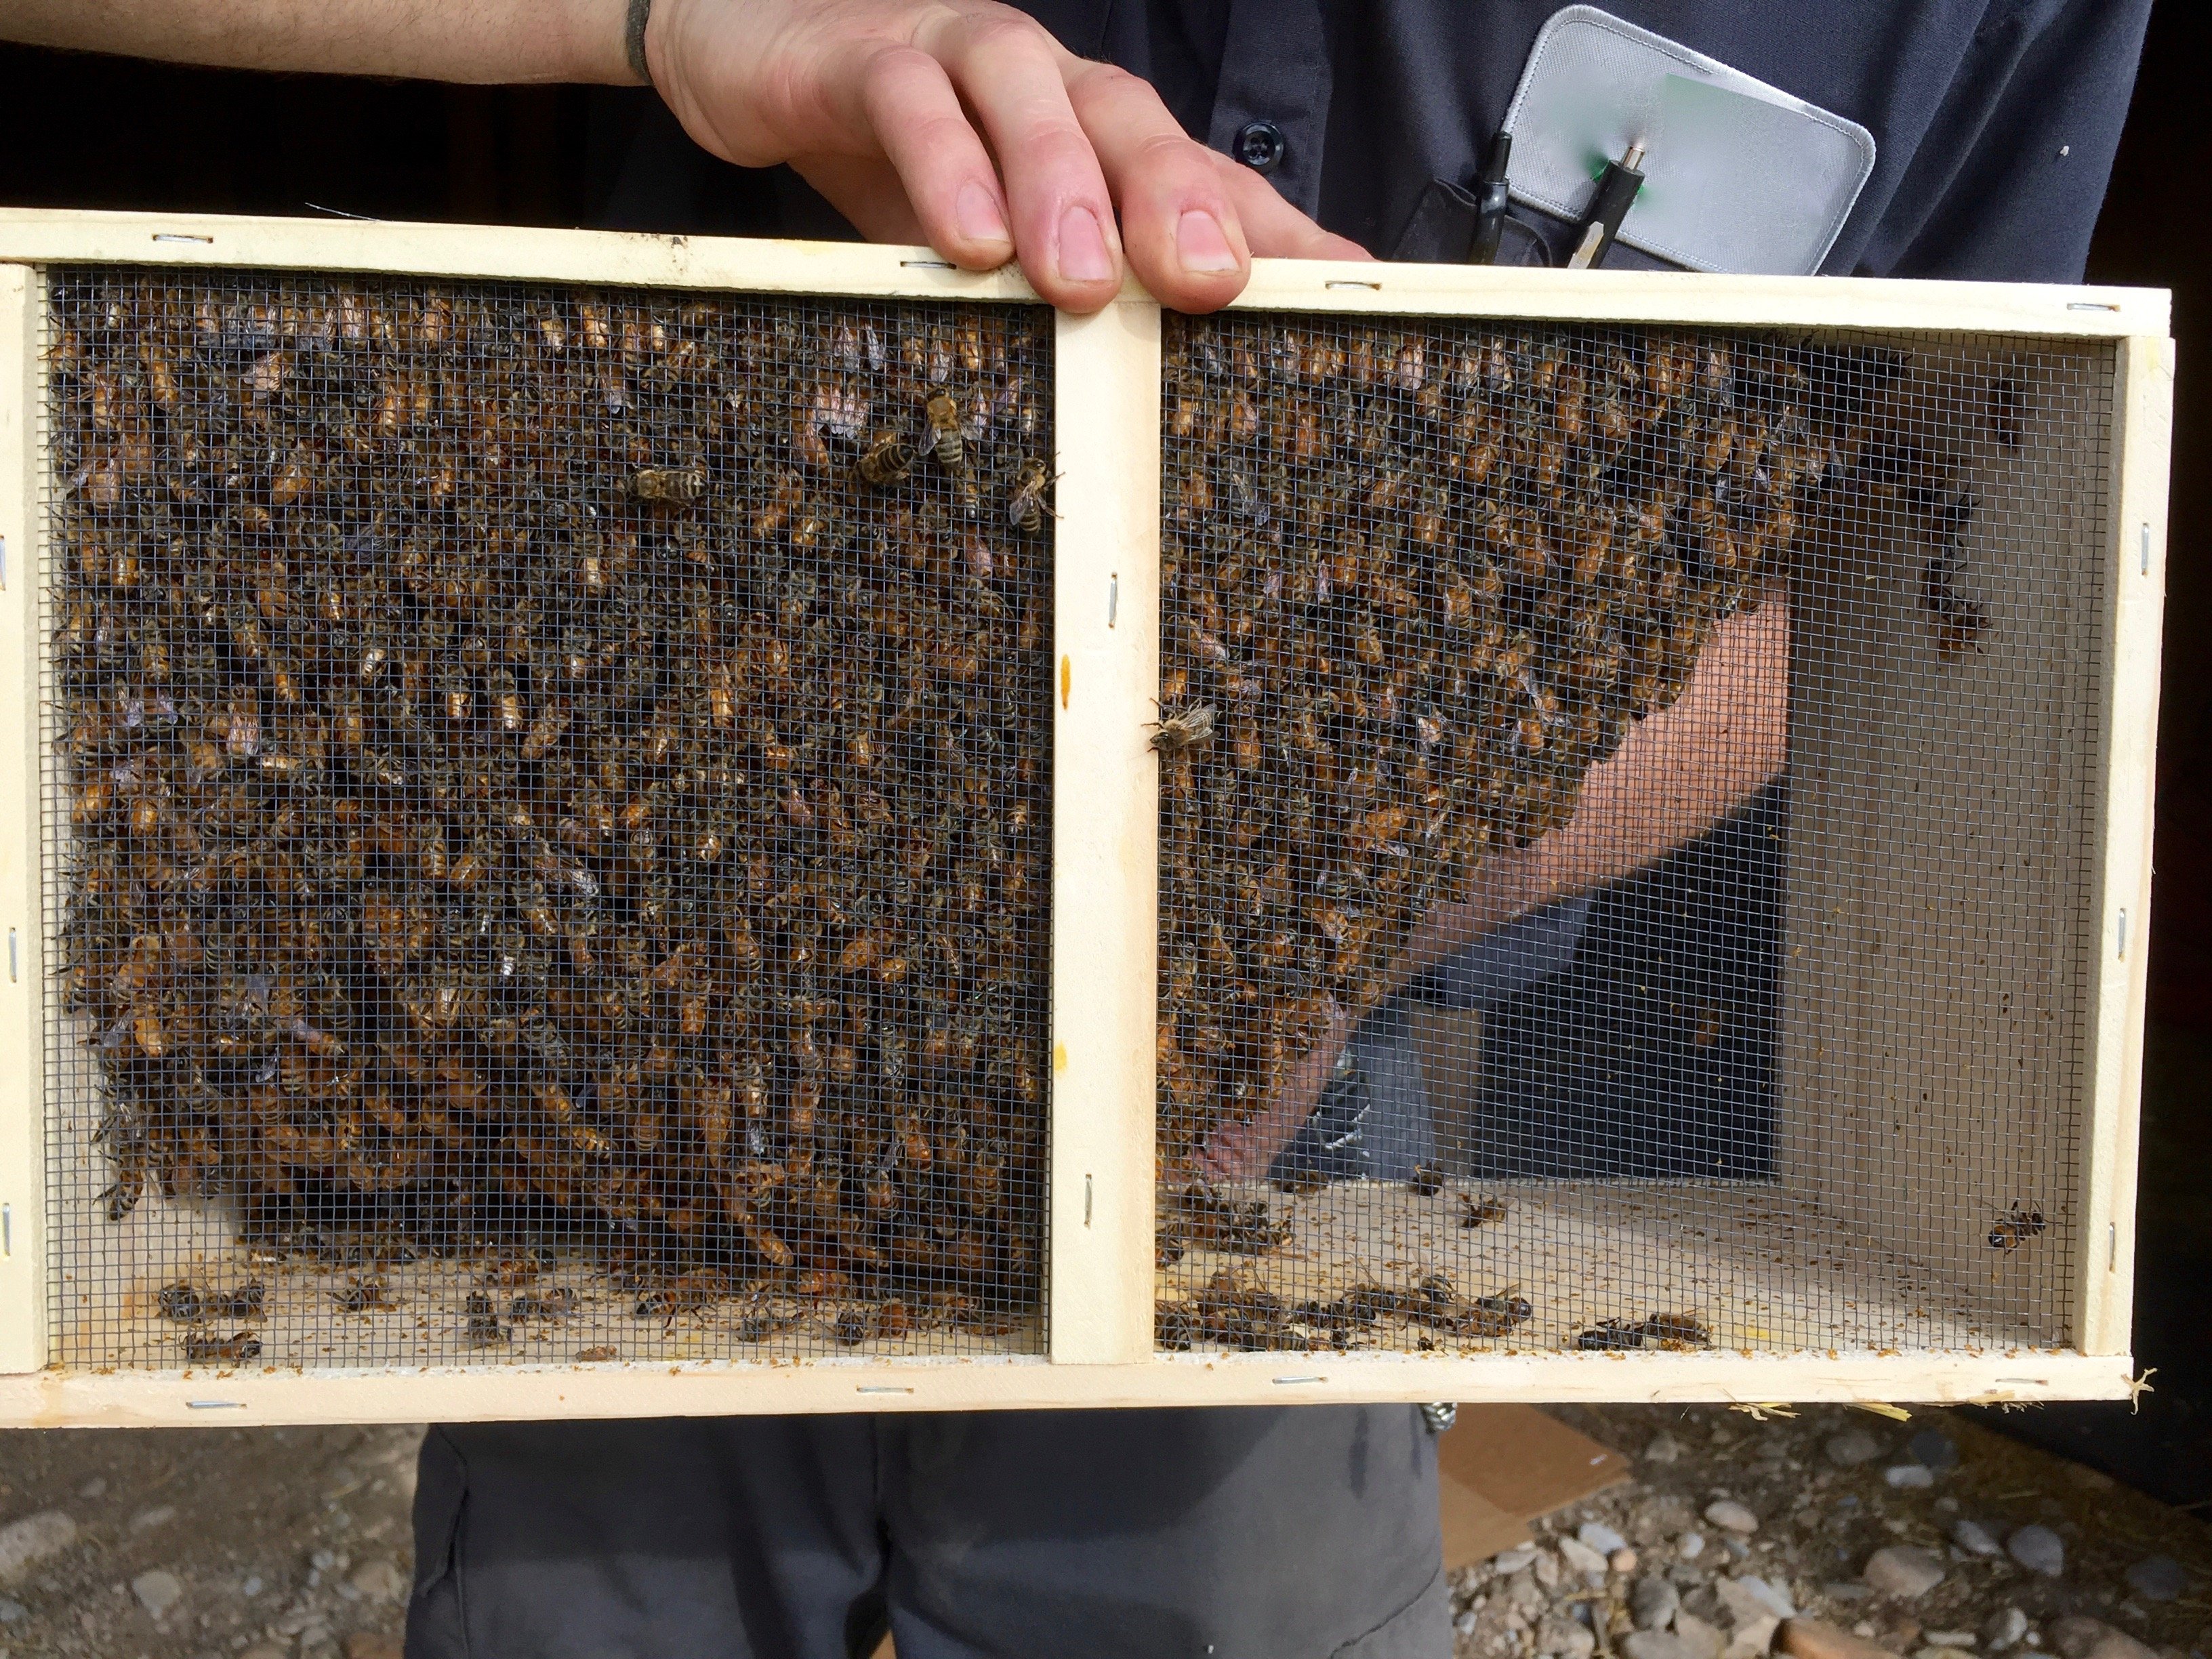
Ok, now on to the action. The bees come in a package that is similar to this {above}. This is 3 pounds of bees all in this little container. There is enough food in there for about 1 week. It was really windy the day we picked up our bees, so we opted to wait until the next day. If you wait until evening, they won't be flying around so much and will settle down for the night shortly after you install them. This could be useful if you have close neighbors or don't want bees flying everywhere.
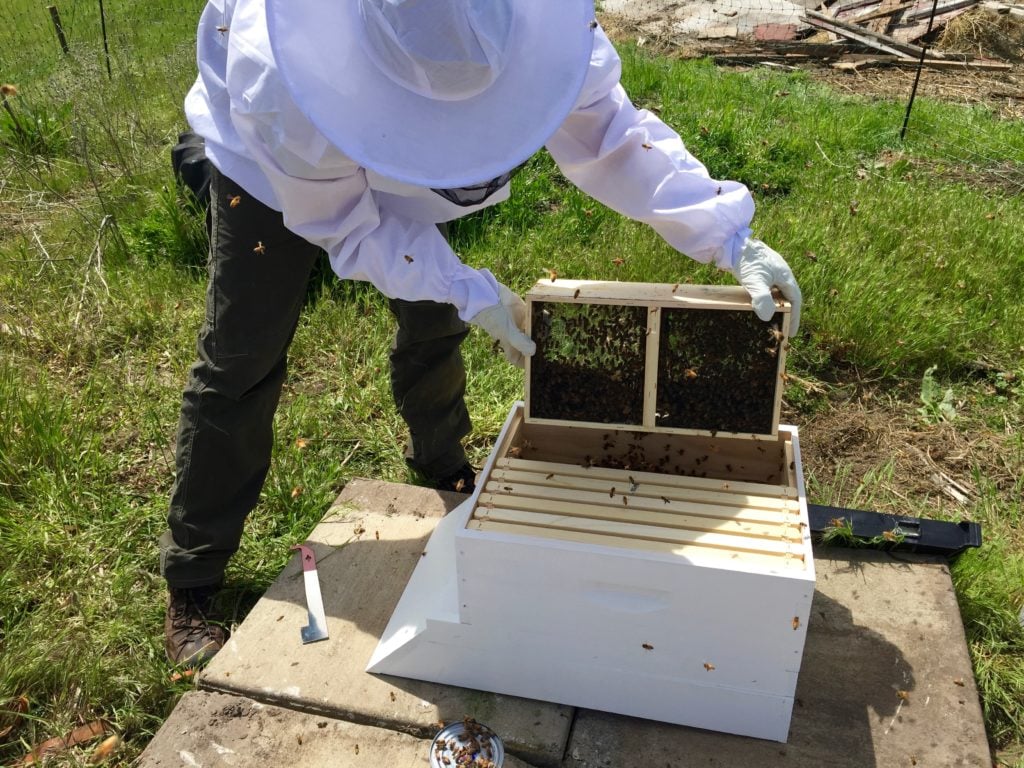
We installed them in the middle of the day because they were getting a little agitated in the cage. When they are calm, they will all be in a group around the queen, like in the picture above. When they start to get agitated {like on the drive home} they will be buzzing and moving around more. If they get too hot, they will start to push up against the outside of the package. Better to install in less than ideal conditions than to wait too long. Basically just use common sense. If you open the hive and the bees start blowing away, it's too windy. Avoid rain and extreme cold, but other than that it's alright.
After you get the queen cage out, installing it is pretty easy. This is actually all pretty easy. Just don't be freaked out by all the bees, when they are in a swarm like that when you first get them, they are really docile because they don't have anything to protect. {You can read about what happens when you try to get in there the wrong way when they are protecting something here}. Just slowly set your fingers on the queen cage and they will move out of the way or brush them off with your bee brush.
Replace the cork in the queen cage with a marshmallow or hard candy, anything that is sweet that will take the bees a little while to eat. The idea is to have the queen stay in the hive a while so the bees establish it as "home." They will eat the marshmallow out after a while, long enough for everyone to know that the hive is their new home. You'll check after a day or two to make sure she got out.

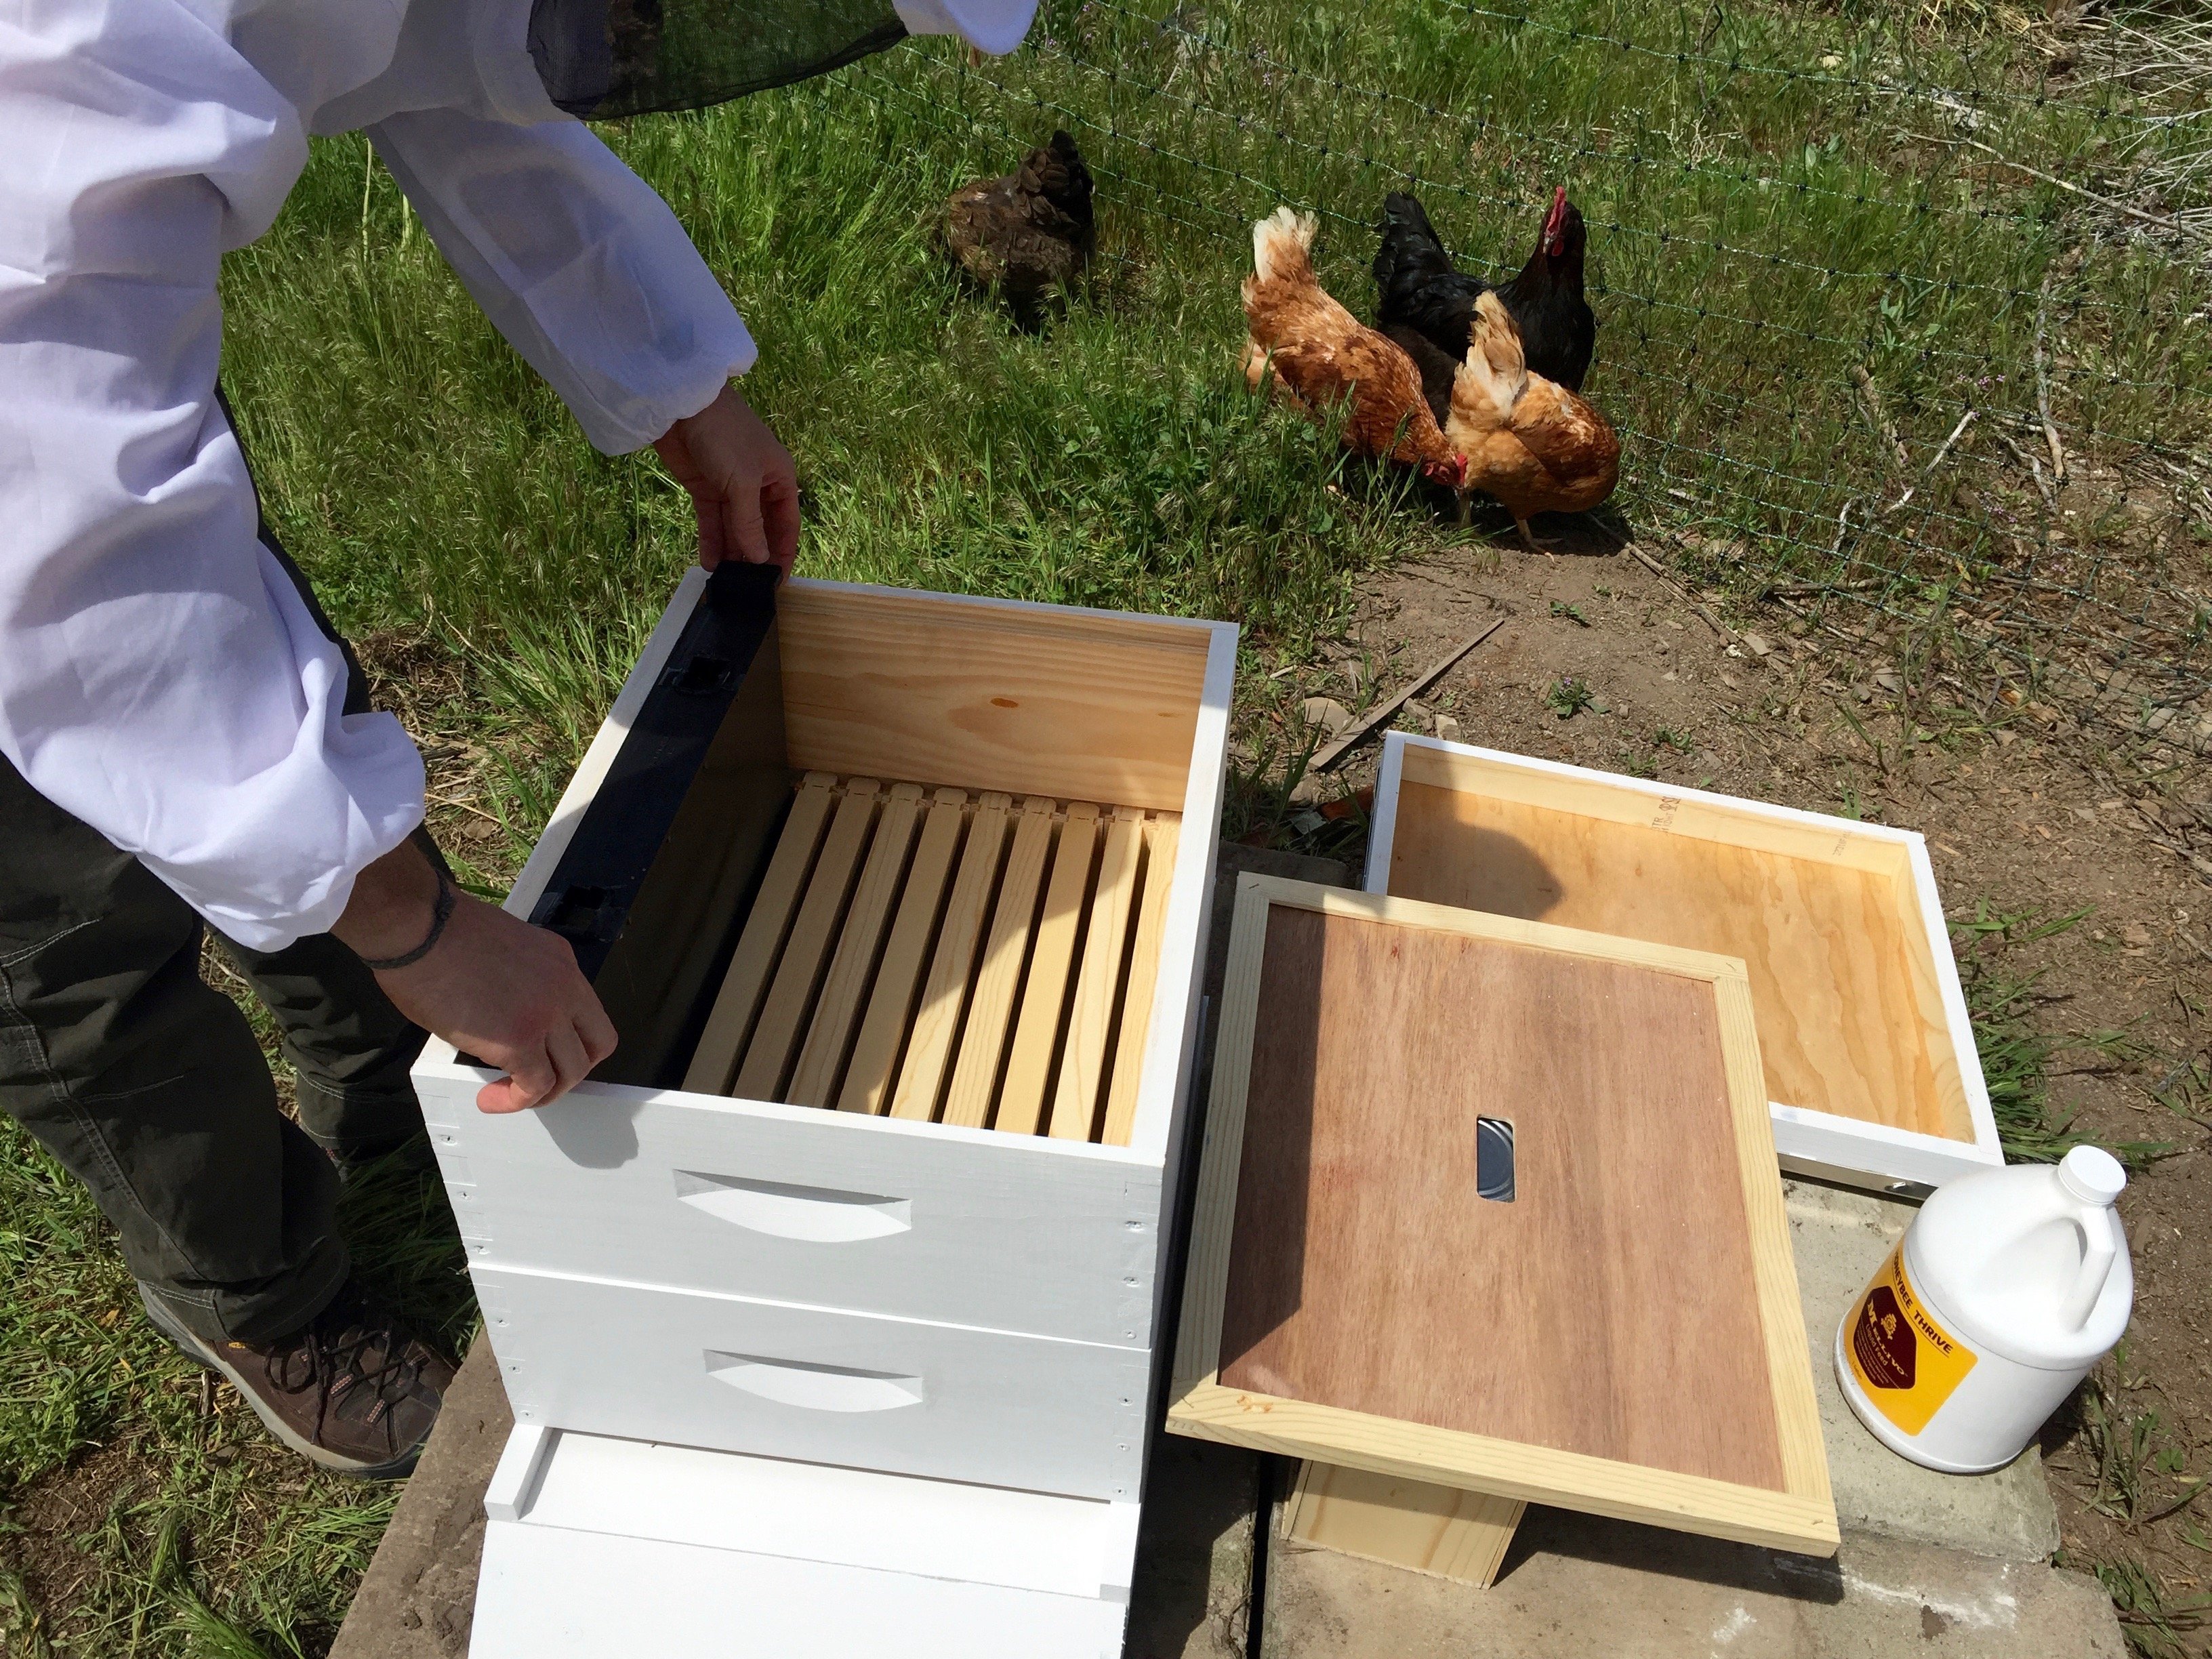
Once you have the cork replaced with something bee-edible, you'll hang the queen cage in between a couple of the frames with the queen facing parallel to the frames {Andy explains this in the video} so that the other bees can feed her and keep her alive while she is in the cage.
Once you have the queen in place, you literally just dump the other bees in there. They will fly around and you'll miss some that get left in the package but because the queen is in the hive, they will all eventually go there {they can smell her}. They will also clean up any dead bees and extra food you spill so don't worry about grabbing the packaging straight away. Leave it out there for a while until they all settle into the hive.
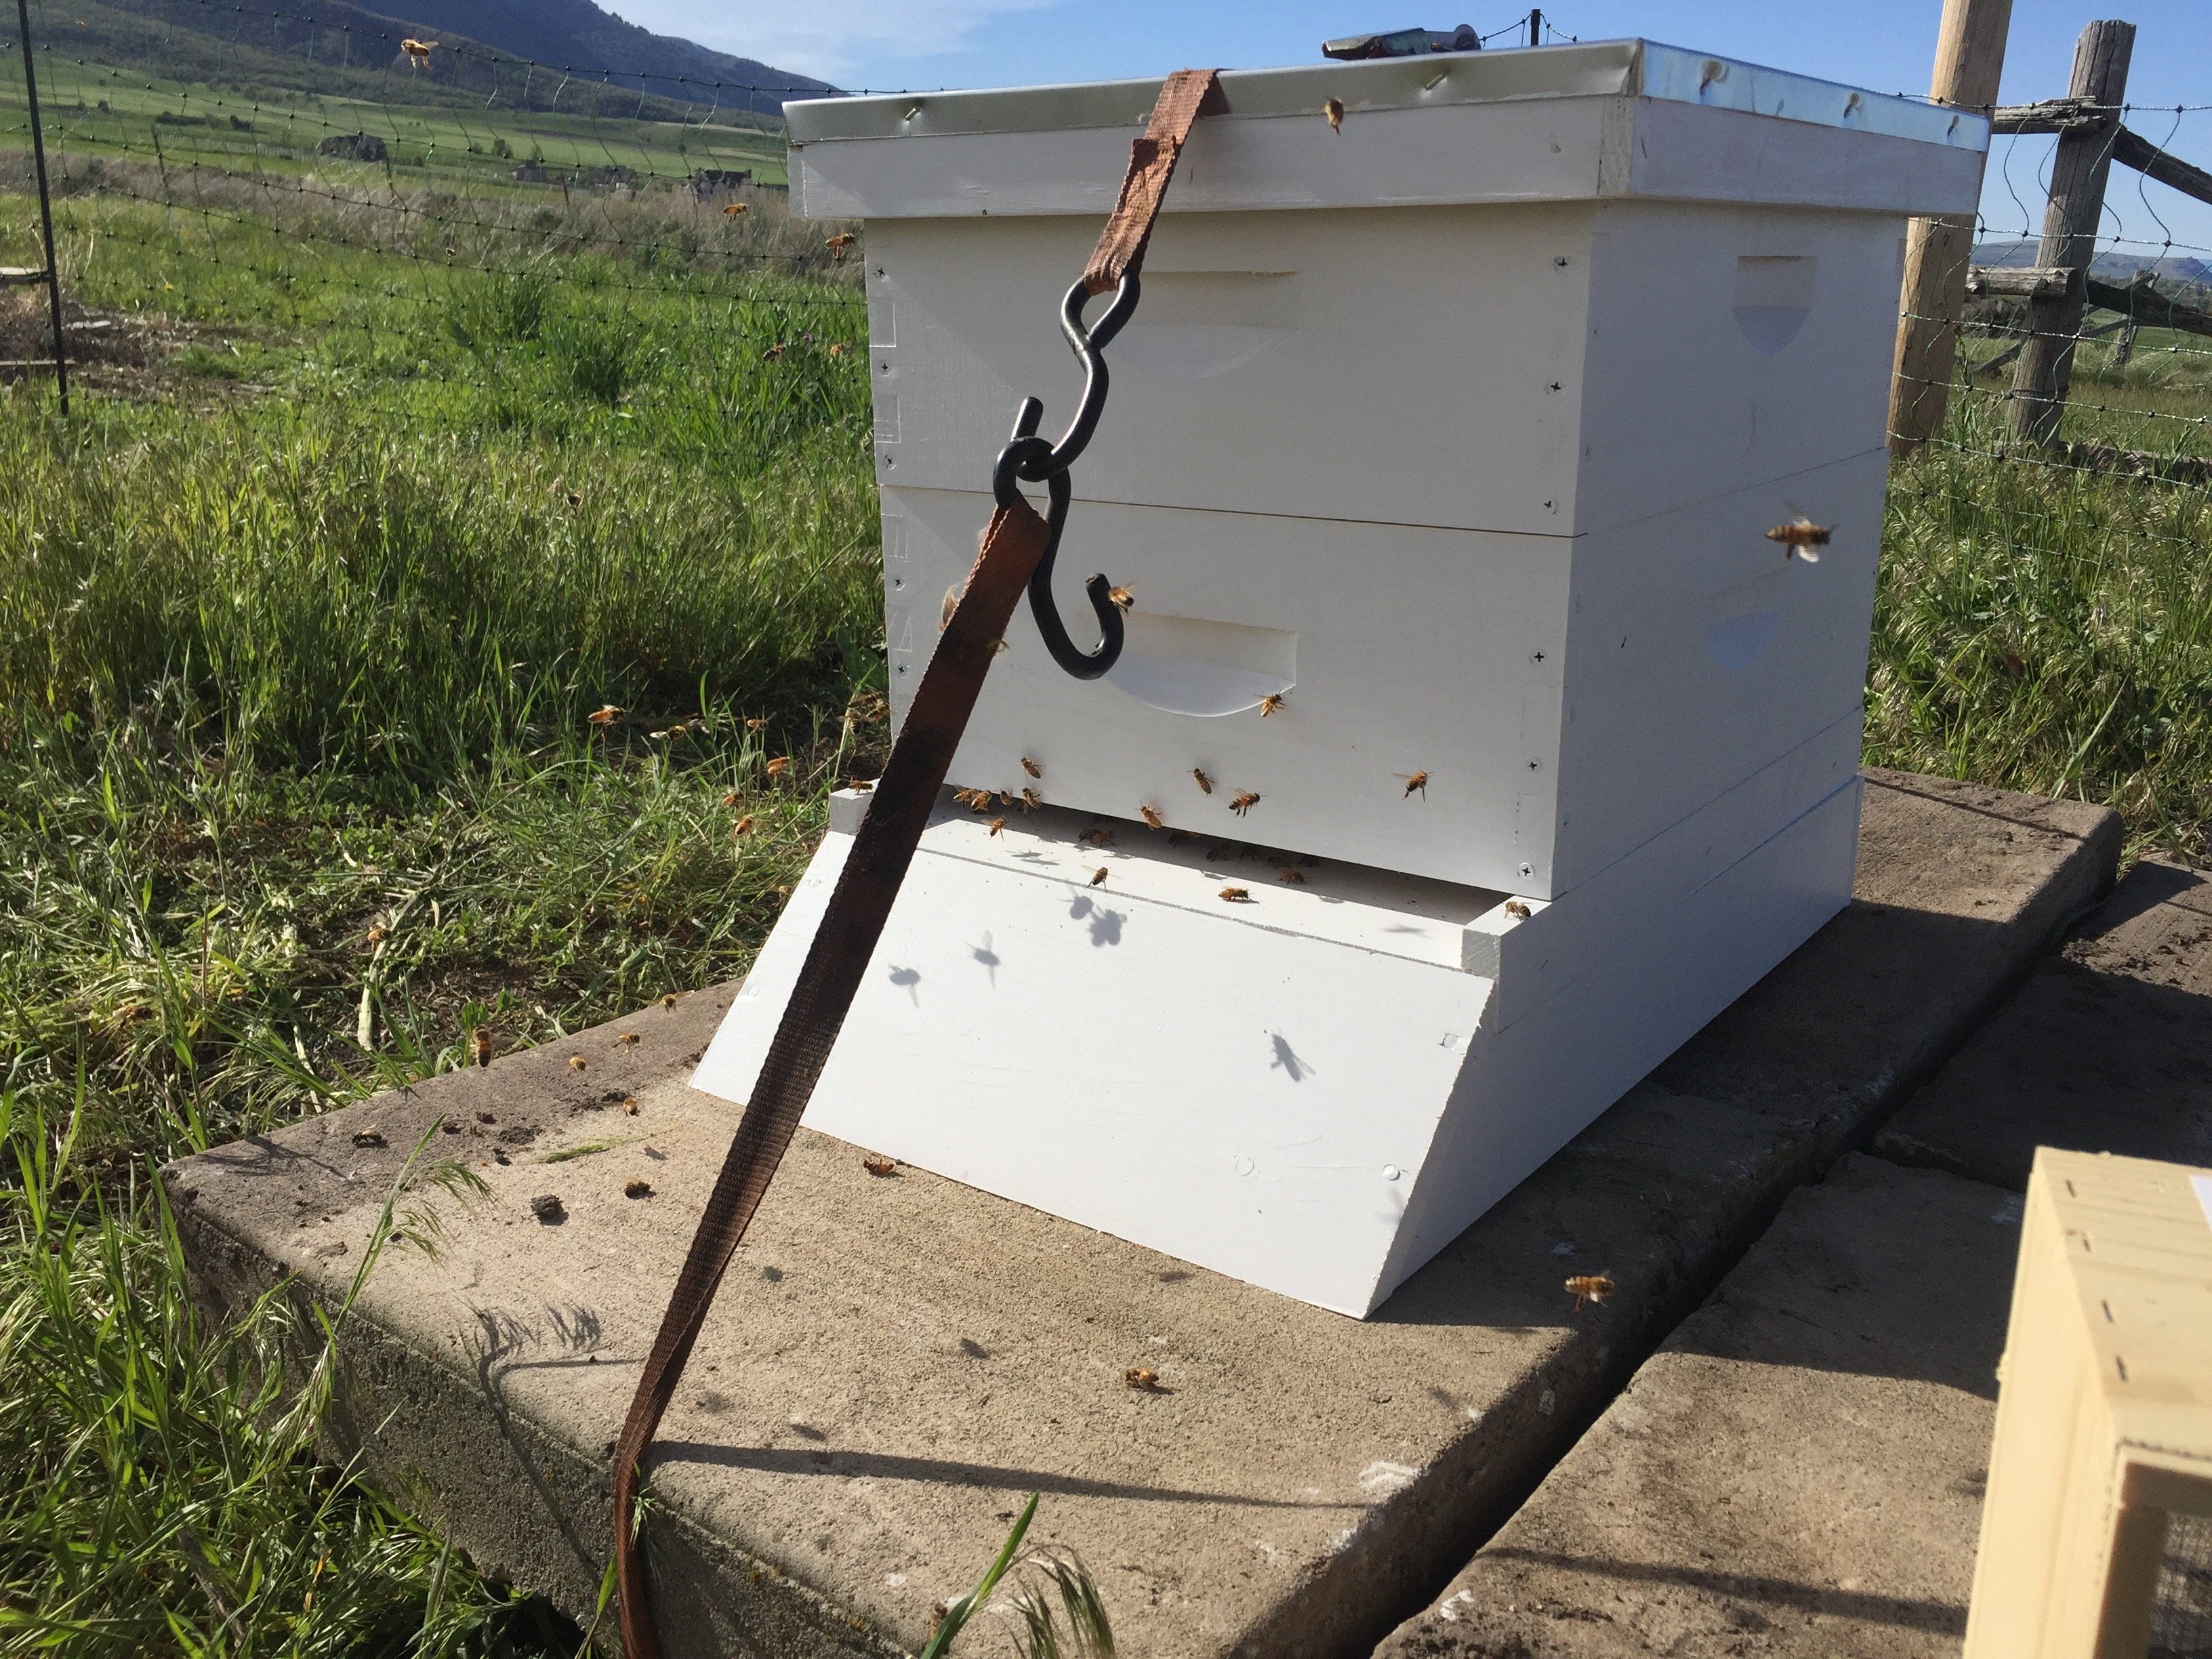
After you have the feed, queen, and bees in the hive, just put it back together. Again, use your bee brush and move slowly to avoid casualties. We secured ours to our cement stand using a tie down. This will keep skunks and raccoons from getting in there and eating any bees. And we are also paranoid about how windy it is so it gives us peace of mind. So there it is, installing your bees. Easy as pie!
Ask any questions or leave suggestions below!
Pin this farm tip on your Bee Keeping board to SAVE it for later! Follow Longbourn Farm on Pinterest for more great tips, ideas, and tutorials!
[et_bloom_inline optin_id="optin_4"]


Leave a Reply